Build an astrolabe
Build a simple cardboard astrolabe to measure star and sun positions, learn angles, read directions, and track time with safe, guided steps.


Step-by-step guide to build an astrolabe
Astrolabe Explanation by Eddie Goldstein
Step 1
Gather all materials on a clear table so everything is ready and easy to reach.
Step 2
Put a bowl or use the ruler and draw a circle about 18–22 cm across in the center of the cardboard.
Step 3
Cut out the circle carefully along the line to make your astrolabe disk.
Step 4
Use the protractor to mark degree ticks around the rim every 10 degrees and label 0 90 180 and 270 with the marker.
Step 5
Measure and cut a straight pointer about 12 cm long from spare cardboard to make the alidade (sighting arm).
Step 6
Make two small holes near each end of the pointer so you can sight through them like little windows.
Step 7
Attach the pointer to the center of the disk with the brad fastener so the pointer can rotate freely.
Step 8
Make a small hole at the top edge of the disk and tie the string through it with the washer so the plumb line hangs freely across the face.
Step 9
Use the magnetic compass to find North and write a small N at the 0-degree mark on the outer rim so your astrolabe can show directions.
Step 10
Hold the astrolabe by the top edge hole so the string hangs straight down and the disk hangs vertical.
Step 11
With an adult and never looking directly at the sun sight a bright star or the Moon by rotating the pointer until the star is visible through the pointer holes.
Step 12
Read the angle where the plumb string crosses the degree marks and write down that altitude; check the compass N mark to record the direction as well.
Step 13
Take photos or notes of your measurements over time to see how the sun or stars move and then share your finished astrolabe and what you learned on DIY.org
Final steps
You're almost there! Complete all the steps, bring your creation to life, post it, and conquer the challenge!


Help!?
What can we use if we don't have a protractor, brad fastener, washer, or magnetic compass from the materials list?
If you don't have a protractor print one from the internet or use a paper-folding method to mark 10° ticks, substitute the brad fastener with a pushpin or split pin and the washer with a button or coin, and use a smartphone compass app instead of the magnetic compass.
My pointer won't rotate freely or the plumb line doesn't hang straight — what should we check or fix?
If the alidade sticks, enlarge the center hole slightly and add a small cardboard spacer or bead under the brad so it turns, and if the string leans check that the top hole is centered, tighten the knot, or add a heavier washer so the plumb line hangs vertical when you hold the astrolabe by the top edge as instructed.
How can we adapt the steps for different ages like preschoolers, elementary kids, and teens?
For preschoolers have an adult pre-cut the disk and pointer and use stickers for 0/90/180/270, for elementary kids let them mark every 10° with a protractor and practice sighting the Moon under supervision, and for teens challenge them to add 1° ticks, record measurements over weeks and use them to compute latitude or compare photos as suggested in the final step.
What are some easy ways to extend, improve, or personalize our finished astrolabe?
You can personalize and improve it by decorating the disk, upgrading cardboard parts to thin wood or plastic for durability, painting the pointer holes with glow-in-the-dark paint for night use, mounting the disk on a small stand or tripod to steady readings, and using your photos and notes to create a time-lapse or star chart to share on DIY.org.
Watch videos on how to build an astrolabe
How Did The Astrolabe Work For Ancient Astronomers? - Astronomy Made Simple
3 Videos

How Did The Astrolabe Work For Ancient Astronomers? - Astronomy Made Simple
How to use an astrolabe I Curator's Corner S3 Ep1 #CuratorsCorner
Introduction to astrolabes: history, design and how they work.
Facts about astronomy and navigation for kids
🪐 Astrolabes were used for over 1,000 years across Europe, the Middle East, and Asia to locate stars and tell time.
🧭 Mariners and explorers used simple celestial tools like astrolabes to find latitude by measuring the angle to a star or the sun.
⏳ A cardboard astrolabe can help you estimate local time: align the sun with the date on the face and read the hour.
📐 Making and using an astrolabe teaches real angle-measuring—angles are measured in degrees from 0° to 360°.
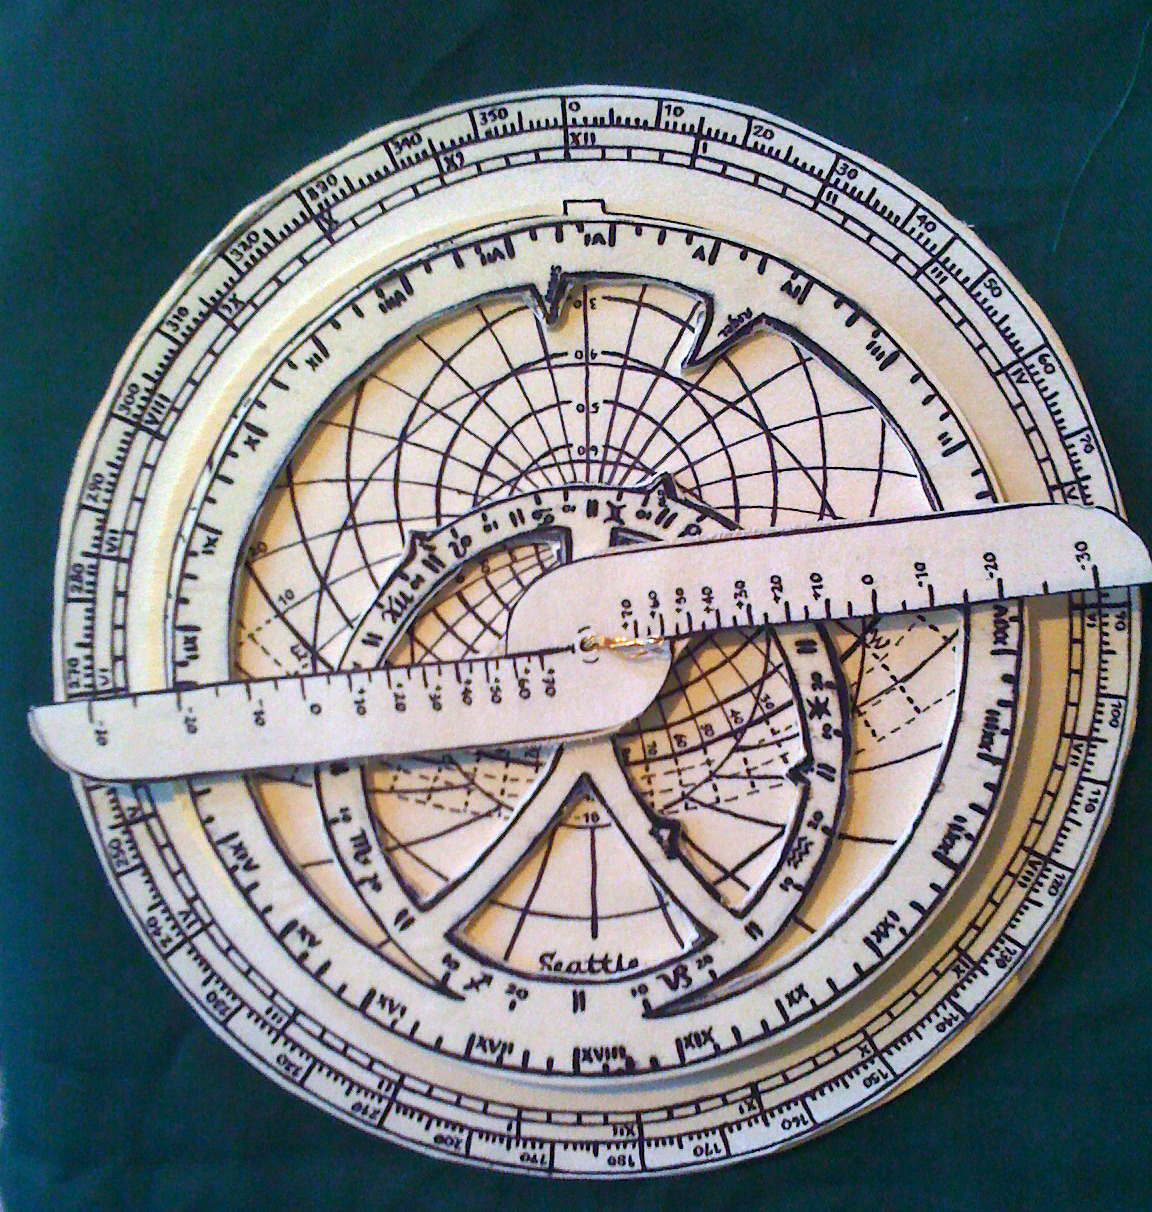
🏺 Many historical astrolabes are finely engraved brass objects and are now prized museum pieces for their science and art.