Design your own mosaic with LEGO®
Design and build a colorful LEGO® mosaic using baseplates and bricks, plan a pattern, practice symmetry and color mixing while creating your own artwork.
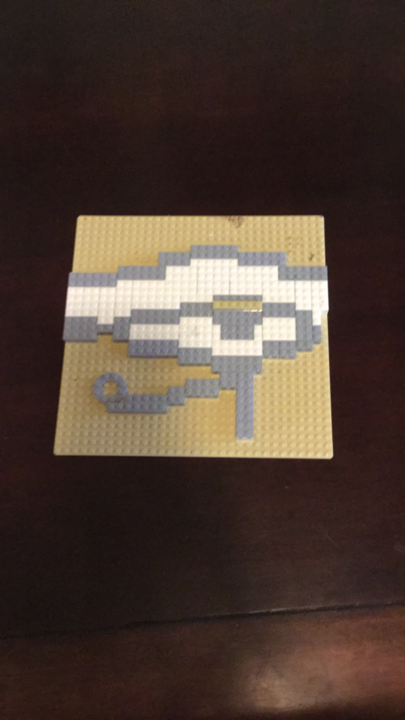
About this activity
Design and build a colorful LEGO® mosaic using baseplates and bricks, plan a pattern, practice symmetry and color mixing while creating your own artwork.
What you need
Step by step
- 1
Step 1
Gather all materials at your workspace.
- 2
Step 2
Choose which baseplate to use.
- 3
Step 3
Decide how many studs wide and tall your mosaic will be.
- 4
Step 4
Draw a rectangle on the graph paper that matches your stud count.
- 5
Step 5
Draw a symmetry line on the paper to guide mirroring.
- 6
Step 6
Choose 4 to 6 main colors for your design.
- 7
Step 7
Sketch half of your design on the paper.
- 8
Step 8
Copy the sketch across the symmetry line to make the mirrored side.
- 9
Step 9
Mark the areas on the paper where you want to blend colors.
- 10
Step 10
Choose a simple mixing pattern for blended areas like alternating studs or checkerboard.
- 11
Step 11
Sort your LEGO bricks by color into small piles.
- 12
Step 12
Decide whether to begin building from the center or a corner of the baseplate.
- 13
Step 13
Place bricks onto the baseplate following your paper and build row by row.
- 14
Step 14
Add blended sections by alternating colors exactly as your mixing pattern shows.
- 15
Step 15
Share your finished creation on DIY.org
Fun facts
How do you design and build a colorful LEGO® mosaic?
Start by choosing a baseplate size and sketching your design on graph paper or a digital grid. Pick a color palette and sort bricks by hue and size. Build from one corner or the center, laying tiles or 1x1 plates to follow your sketch. Use symmetry and mirror sections to practice balance, and swap colors to test mixing or gradient effects. Finish with a border and press pieces firmly for a stable mosaic.
What materials do I need for a LEGO® mosaic?
You’ll need one or more flat LEGO® baseplates, lots of 1x1 tiles or plates, and a variety of colored bricks. Add small plates, tiles, or slope pieces for texture. Use graph paper or a pixel-art app for planning, and sorting trays or bowls to organize colors. Optional items: tweezers for tiny pieces, a brick separator, and transparent tape to hold a paper pattern in place on the baseplate.
What ages is a LEGO® mosaic suitable for?
LEGO® mosaics work well for ages about 4 and up with supervision. Younger children (4–6) enjoy simple patterns and large color blocks; 7–9-year-olds can plan symmetry and try gradients; 10+ can design detailed pixel art or complex patterns independently. Watch children under 3 due to small parts. Adjust complexity, provide templates, and offer hands-on help for younger builders to boost confidence and fine motor skills.
What are the benefits and safety tips for making LEGO® mosaics?
Mosaic building boosts creativity, color recognition, fine motor skills, spatial reasoning, and patience. It’s a calm, screen-free activity that encourages planning and symmetry practice. For safety, keep small pieces away from children under 3, use bins to store bricks, pick up loose pieces to avoid stepping hazards, and supervise younger kids. Variations include team mosaics, seasonal themes, or turning the mosaic into framed wall art.
Watch & Learn
Need help?
What can we use if we don't have a LEGO baseplate or graph paper?
If you don't have a LEGO baseplate or graph paper, use a cardboard square or shoebox lid as a base with a hand-drawn stud grid matching your chosen stud count and draw the rectangle and symmetry line on plain paper with a ruler.
My mirrored design doesn't line up when I build—how do I fix it?
If the mirrored halves don't line up, re-count studs on your drawn rectangle and symmetry line, adjust the sketch so each row matches, and build row by row from the center or a marked corner to keep alignment on the baseplate.
How can I adapt this activity for different ages or skill levels?
For preschoolers use a small baseplate, 2–3 bold colors, and build from a simple 4×4 half-sketch; for school-age kids use larger baseplates, 4–6 colors, and add blended checkerboard sections, while teens can plan complex patterns and photograph work to share on DIY.org.
How can we make the mosaic more creative or challenging?
To enhance the project, create a color key on your graph paper, try different blending patterns (alternating studs or checkerboard), add minifigures or 3D studs at the edges, or turn the design into a framed wall mosaic and share step-by-step photos on DIY.org.