Practice the Last Five Calligraphy Strokes
Practice the last five calligraphy strokes using brush or pen, create a practice sheet, and learn consistent pressure, spacing, and rhythm.
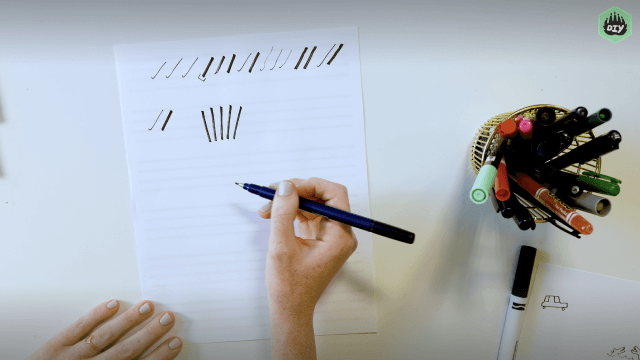
About this activity
Practice the last five calligraphy strokes using brush or pen, create a practice sheet, and learn consistent pressure, spacing, and rhythm.
What you need
Step by step
- 1
Step 1
Gather all your materials and set them on a flat table so everything is easy to reach.
- 2
Step 2
Tape one sheet of smooth paper to the table with masking tape so it does not move while you write.
- 3
Step 3
Use your pencil and ruler to draw five evenly spaced horizontal guide lines across the paper for practice rows.
- 4
Step 4
Use your pencil to draw four or five vertical columns about a finger width apart to separate each stroke practice.
- 5
Step 5
Warm up your hand on scrap paper by making light up-and-down strokes for one minute to loosen your wrist.
- 6
Step 6
In the first column practice the first of the five strokes you learned by repeating it slowly while controlling light upstrokes and heavier downstrokes.
- 7
Step 7
In the second column repeat the second stroke focusing on keeping equal spacing between each repeat.
- 8
Step 8
In the third column practice the third stroke while keeping a steady rhythm by counting evenly as you draw each stroke.
- 9
Step 9
In the fourth column practice the fourth stroke while watching that each shape looks the same size as the others.
- 10
Step 10
In the fifth column practice the fifth stroke ten times slowly checking pressure and spacing for each copy.
- 11
Step 11
Look along each row and lightly mark any strokes with your pencil that need size or spacing fixes.
- 12
Step 12
Repeat one clean row of each stroke at a comfortable steady speed to build consistency and muscle memory.
- 13
Step 13
Add labels or a splash of color to each column so you can remember which stroke is which.
- 14
Step 14
Sign your name and date on the practice sheet to show your progress.
- 15
Step 15
Share your finished practice sheet and what you learned on DIY.org
Fun facts
How do you practice the last five calligraphy strokes?
Begin with warm-up lines: light upstrokes and heavier downstrokes to feel pressure. Demonstrate each of the last five strokes slowly, showing entry, pressure change, and exit. Create a practice sheet with rows for tracing, guided dots, then free repetition. Focus on consistent pressure, even spacing, and steady rhythm—slow and deliberate at first, then gradually increase speed while keeping shape consistent. Take short breaks to avoid hand fatigue.
What materials do I need for practicing the last five calligraphy strokes?
You’ll need a brush pen or pointed pen (or a small round brush with ink), smooth practice paper or marker paper, a pencil and ruler for guidelines, and an eraser. Optional: a preprinted practice sheet or printable templates, spare ink or cartridges, a scrap paper for warm-ups, and a cloth to wipe brushes. Choose beginner-friendly tools like a soft brush pen to help children feel pressure differences.
What ages is this activity suitable for?
This activity is generally suitable for children aged 7 and up, when fine motor control and patience improve. Younger children (4–6) can try simplified strokes using broad markers or felt-tip pens for basic motor practice, with close supervision. Teens and older kids can handle pointed pens and ink. Always match tool complexity to the child’s dexterity and provide adult help when using liquid ink or sharp nibs.
What are the benefits of practicing the last five calligraphy strokes?
Practicing these strokes builds fine motor control, hand-eye coordination, and consistent pressure awareness. It improves spacing, rhythm, and patience while boosting confidence in handwriting and artistic skills. Repetition trains muscle memory, making letterforms more consistent. For children, it also encourages focus and a calm, mindful activity that can reduce stress and foster pride in visible progress.
Watch & Learn
Need help?
What can we use if we don't have masking tape or smooth practice paper?
If you don't have masking tape use painter's tape or removable sticky putty to hold the paper, and a sheet of regular printer paper or a magazine page taped flat can substitute for smooth paper when you draw your guide lines.
My paper keeps moving and my strokes are uneven—what should I do?
Press the tape firmly at all four corners and along the edges, redo the warm-up step on scrap paper to loosen your wrist, then repeat the column where you struggle (for example the first or fifth column) focusing on lighter upstrokes and controlled downstrokes.
How can this activity be adapted for younger or older kids?
For younger children make wider columns about two finger-widths apart and use a chubby marker to trace the strokes in the practice rows, while older kids can use a finer pencil, draw more precise guide lines with the ruler, and increase repetitions or add timed rounds for the fifth stroke.
How can we extend or personalize the practice sheet once we're done?
Add colored labels or a splash of color to each column (step 14), sign and date the sheet (step 15), photograph it and save multiple dated sheets to compare progress or create a collage to share on DIY.org.