Design Cute Candy Button Earrings
Design and make cute candy button style earrings using colorful polymer clay or beads, practice shaping, decorating, and attaching earring hooks with adult supervision.


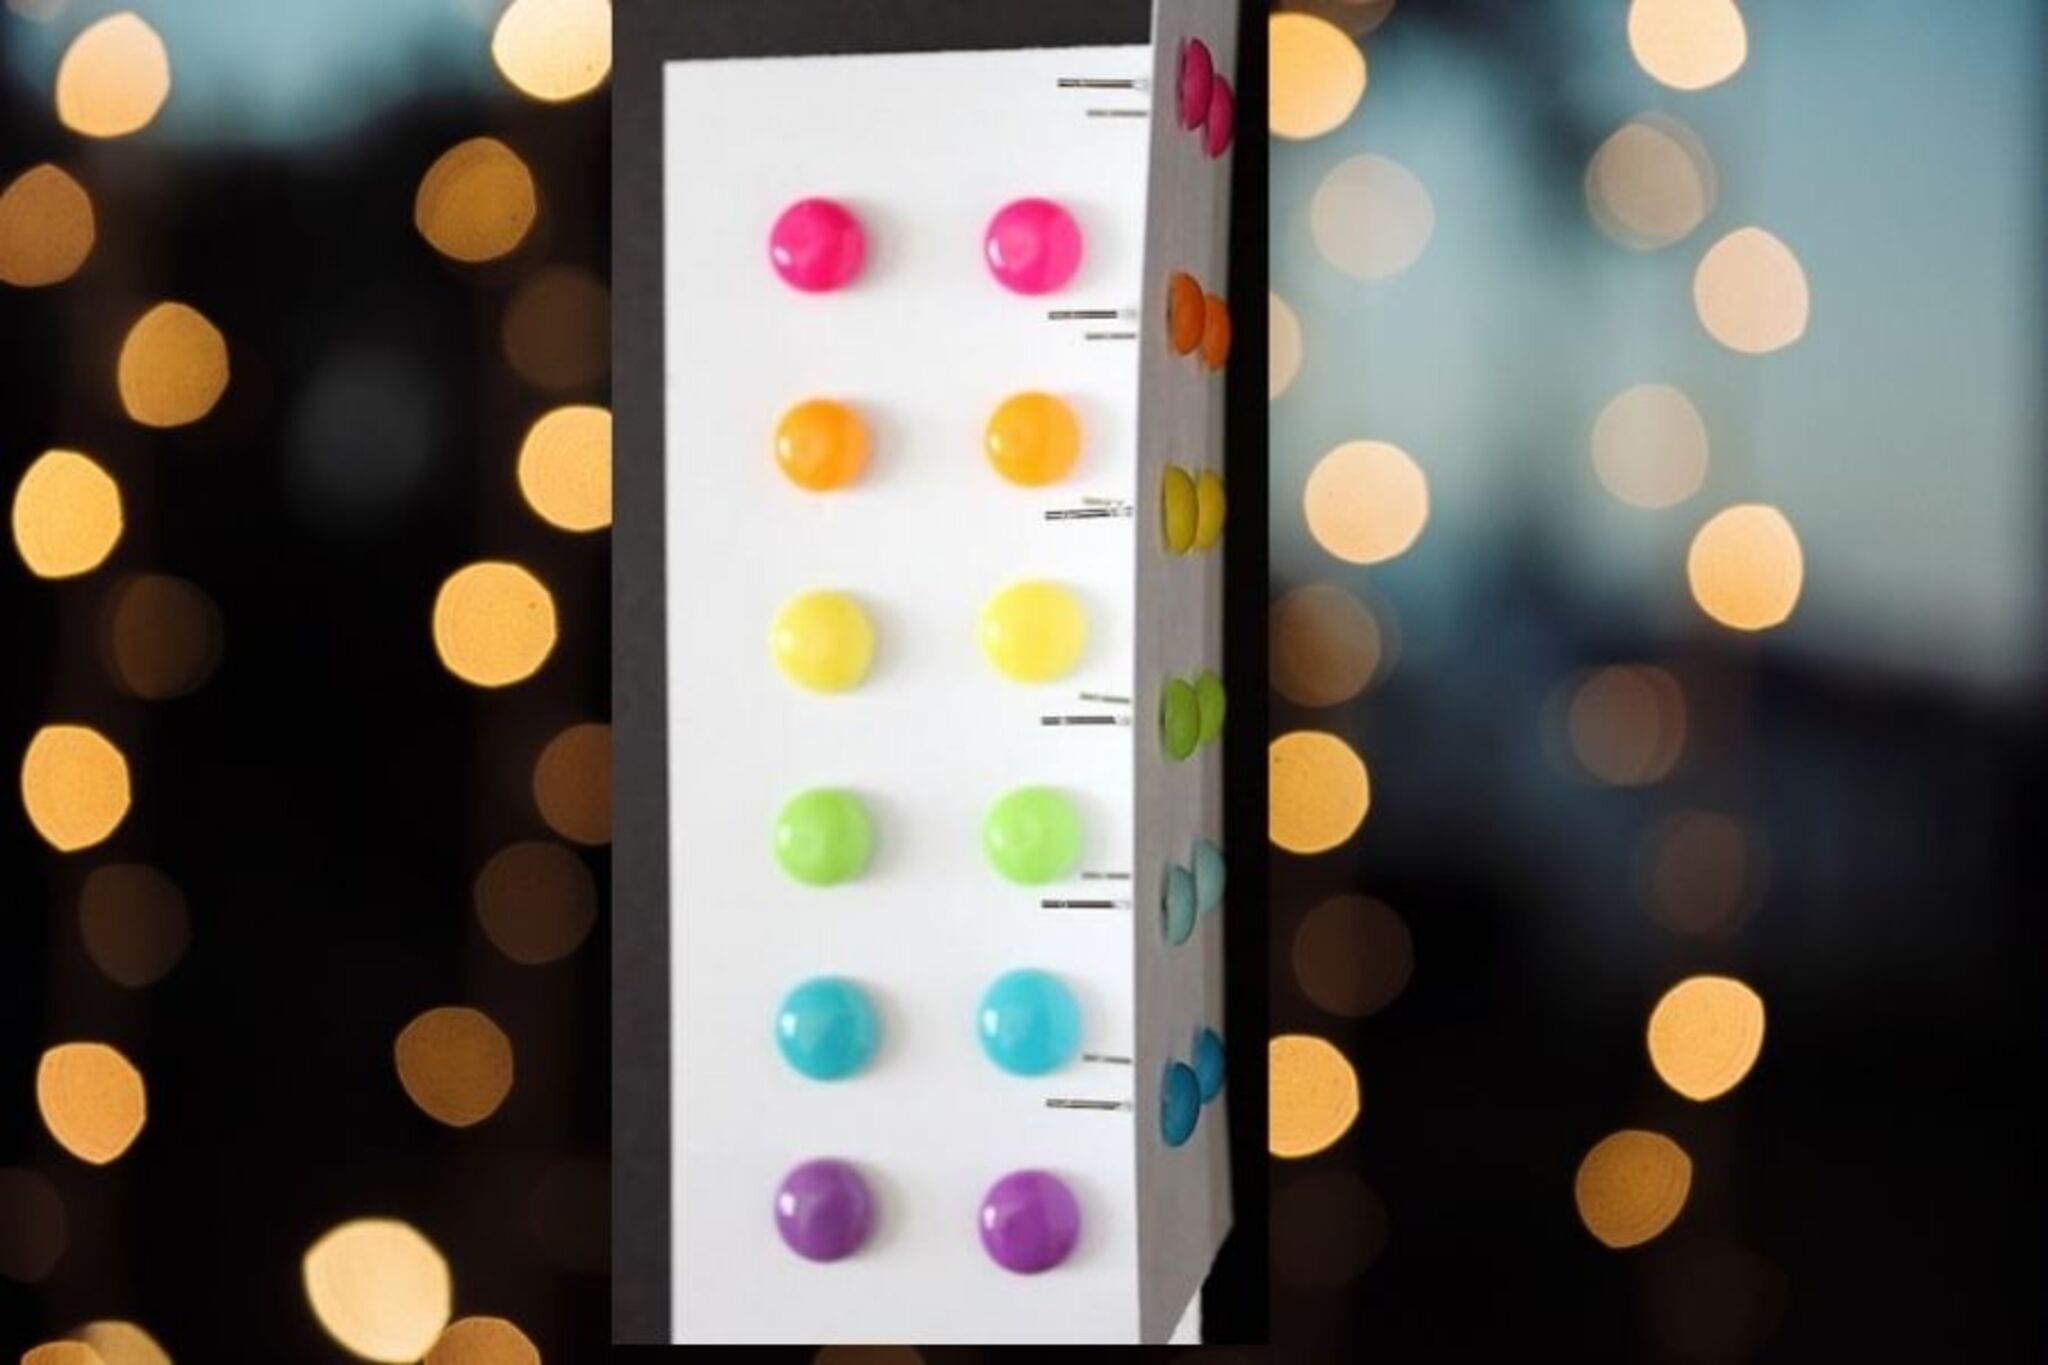

Step-by-step guide to Design Cute Candy Button Earrings
How To Tutorial: Button Earrings
Step 1
Clear a small workspace and lay a sheet of parchment paper on the table.
Step 2
Pick two or three bright clay colors you want for your candy button earrings.
Step 3
Knead each chosen clay color until it feels soft and flexible.
Step 4
Roll one color into a flat disc about 3 to 4 millimeters thick with the rolling pin.
Step 5
Press the round cutter into the disc to cut out two matching circles and place them on the parchment.
Step 6
Pinch tiny pea-size balls from a contrasting clay color for your candy dots.
Step 7
Press the tiny balls onto each circle to make cute candy button dots.
Step 8
Use a toothpick to make a small hole near the top edge of each circle for the jump ring.
Step 9
With an adult, preheat the oven and bake the clay pieces on the baking sheet at the temperature and time recommended on the clay package.
Step 10
Let the baked candy buttons cool completely on the baking sheet before touching them.
Step 11
Use pliers to open two jump rings slightly.
Step 12
Slide each open jump ring through the hole of one candy button so you have a ring on each button.
Step 13
Thread an earring hook onto each jump ring.
Step 14
Use pliers to close both jump rings securely so the hooks are locked in place.
Step 15
Share your finished candy button earrings on DIY.org.
Help!?
What can I use instead of parchment paper, polymer clay, or jump rings if I can't find them?
Use a silicone baking mat or lightly oiled aluminum foil instead of parchment, use air-dry clay so you can skip the instruction that says 'With an adult, preheat the oven and bake the clay pieces,' and substitute small beads-plus-jewelry-thread or earring blanks if you can't find jump rings and hooks.
My candy dots keep falling off or the hole closes when I bake them — how do I fix that?
Press each pea-size ball firmly onto the circle during the 'Press the tiny balls onto each circle' step, make the toothpick hole a little larger before baking, and if the hole narrows after cooling reopen it gently with the toothpick before sliding on the jump ring.
How can I adapt the steps for different ages?
For preschoolers have an adult pre-roll or cut the discs and handle the oven and pliers while the child presses dots, for school-age kids let them knead, roll to 3–4 millimeters, cut circles and make the toothpick holes with supervision, and for tweens/teens let them work more independently and use pliers to open/close jump rings themselves.
What are some fun ways to personalize or enhance the earrings?
After the 'Let the baked candy buttons cool completely' step add a clear gloss glaze or tiny painted details with acrylic paint, marble two clay colors during kneading before rolling for mixed-color buttons, or attach matching charms or a beaded chain to the jump ring to make a set to share on DIY.org.
Watch videos on how to Design Cute Candy Button Earrings
DIY - Learn how to make a cute pair of button earrings.
4 Videos
DIY - Learn how to make a cute pair of button earrings.
How to make button earring | Watch Me Create | Olivia Heyward

DIY | Easy Button Earrings in 2 Minutes!
How to Make Earrings with Buttons
Facts about jewelry making for kids
🎨 Polymer clay is actually a plastic-based modelling material that bakes hard in a home oven—great for tiny earring charms!
🍬 The "candy button" look means small, colorful round dots—many handmade earring buttons are around 6–12 mm across.
🔥 Most polymer clays cure at about 130°C (265°F); baking times depend on thickness, so always follow the brand directions and have an adult handle the oven.
🧩 Seed beads can be super tiny (2–3 mm) and are perfect for adding sparkle or texture to button-style earrings.
🛠️ Earring hooks are often made from surgical steel, sterling silver, or gold-filled metal to reduce irritation—ask an adult to pick hypoallergenic options.
How do you make candy button style earrings with polymer clay?
What materials do I need to make candy button earrings?
What ages are candy button earrings suitable for?
What safety tips should I follow when making polymer clay earrings?
