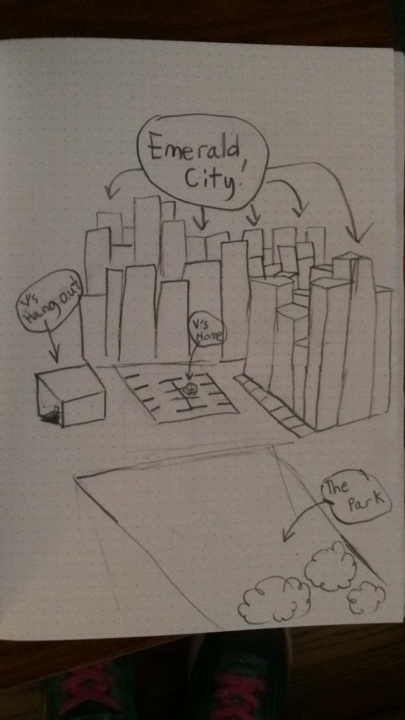
Draw a map of a world you want to animate
Draw and color a map of your imaginary world, label locations and characters, add landmarks, then plan simple movements to animate scenes.


Step-by-step guide to draw a map of a world you want to animate
Continents | Geography For Kids Year 2 | Stem Home Learning
Step 1
Choose a name for your imaginary world and write it big at the top of your paper.
Step 2
Use your pencil to sketch the big outline of your world like one island many islands or a floating map.
Step 3
Draw the main regions such as mountains forests rivers cities or deserts inside your outline.
Step 4
Label each region by writing its name clearly next to it with your pen.
Step 5
Draw 3 to 6 characters and at least 3 special landmarks like castles waterfalls or weird trees on the map.
Step 6
Write a name and one short trait (brave funny sleepy etc.) next to each character.
Step 7
Color your map and characters so each place and person looks bright and different.
Step 8
Use your pencil or pen and ruler to draw arrows showing where each character will travel on the map.
Step 9
On a separate sheet draw three small boxes and sketch or write what happens in the start middle and end of one animated scene.
Step 10
Draw each character on a sticky note so you can move them later.
Step 11
Put each sticky-note character on its starting spot and move them along the arrows to practice the animation steps.
Step 12
Share your finished map world and animation plan on DIY.org.
Help!?
What can we use if we don't have sticky notes, colored pens, or a ruler?
Cut small squares from scrap paper and tape one corner to the map to act like the 'Draw each character on a sticky note' pieces, use crayons or markers in place of colored pens to 'Color your map and characters', and use a book edge or a strip of cardboard as a straight edge instead of a ruler for 'Use your pencil or pen and ruler to draw arrows'.
My arrows look messy and the sticky-note characters tear or fall off when we move them—what should we try?
Lightly pencil the paths first using a straight edge from the 'Use your pencil or pen and ruler to draw arrows' step, then go over them in pen, and reinforce each sticky-note character from 'Draw each character on a sticky note' by attaching the top edge with a small piece of clear tape so they slide without tearing.
How can I adapt the activity for younger or older kids?
For younger kids, pre-sketch the main regions and provide stickers for the 'Draw 3 to 6 characters' and let them color, while older kids can add more characters and traits, create detailed travel arrows and timing, and expand the three boxes into a longer storyboard as in 'On a separate sheet draw three small boxes'.
How can we improve or personalize the animation beyond the paper practice?
Make the movement step 'Put each sticky-note character on its starting spot and move them along the arrows' into a stop-motion by photographing each incremental move with a phone, name and decorate special landmarks like the castle from 'Draw 3 to 6 characters and at least 3 special landmarks', and write short dialogue for the three storyboard boxes to add personality.
Watch videos on how to draw a map of a world you want to animate
World Map for Kids: Learn the Continents! Play-Doh Puzzle of The Earth
3 Videos
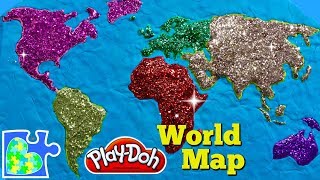
World Map for Kids: Learn the Continents! Play-Doh Puzzle of The Earth

COUNTRIES of the World for Kids - Learn Continents, Countries Map, Names and Flags
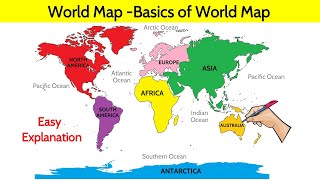
World Map - Basics of World Map
Facts about mapmaking and simple animation
🗺️ The oldest known map fragments are over 4,000 years old—people have been drawing worlds for millennia!
✍️ J. R. R. Tolkien hand-drew maps of Middle-earth to help plan his stories and sometimes changed them as the tale grew.
🎬 Traditional hand-drawn animation typically uses 24 frames per second, so one second of motion can need about 24 drawings.
🧭 Some mapmakers add fake streets or landmarks called 'copyright traps' to spot when others copy their maps.
🎨 Warm colors (reds/oranges) appear closer and cool colors (blues/greens) recede—use this to make map features pop or fade.
How do I create and animate a map of an imaginary world?
What materials do I need to draw and animate an imaginary world map?
What ages is this activity suitable for?
What are the benefits, safety tips, and variations for this map animation activity?
