Make land art
Create a temporary outdoor artwork using leaves, stones, sticks, and flowers; arrange patterns, explore symmetry, and photograph your land art before nature reclaims it.
About this activity
Create a temporary outdoor artwork using leaves, stones, sticks, and flowers; arrange patterns, explore symmetry, and photograph your land art before nature reclaims it.
What you need
Step by step
- 1
Step 1
Ask an adult to help and stay nearby.
- 2
Step 2
Choose a safe flat outdoor spot with enough space for your design.
- 3
Step 3
Gather leaves; stones; sticks; and flowers or petals in your bag or basket.
- 4
Step 4
Clear small debris from the chosen area to create a clean canvas.
- 5
Step 5
Decide on a simple design idea such as a circle spiral or mirrored pattern.
- 6
Step 6
Choose and place a focal center piece like a big stone or bright flower in the middle.
- 7
Step 7
Arrange a first ring or row of stones or sticks around the center.
- 8
Step 8
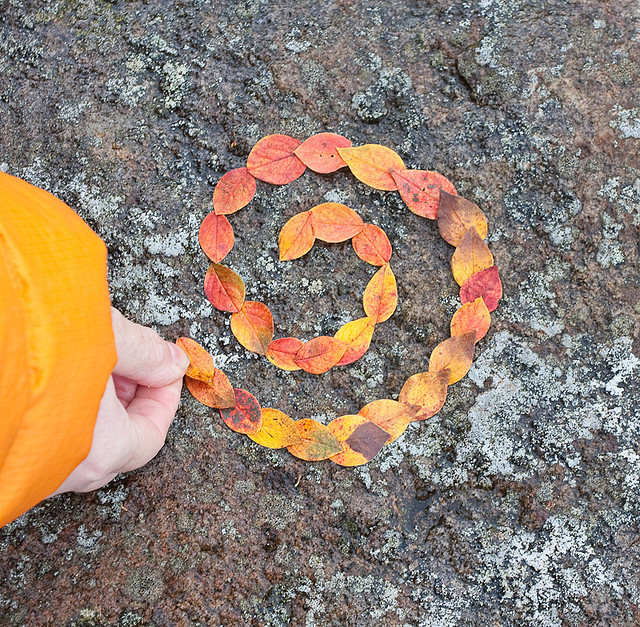
Add a second ring or row of leaves or petals around the first ring.
- 9
Step 9
Mirror one side of your artwork onto the other side to create symmetry.
- 10
Step 10
Continue adding rings or patterns using different materials to build texture and color.
- 11
Step 11
Step back a few paces to view your artwork and check its balance.
- 12
Step 12
Make small adjustments to improve spacing and symmetry.
- 13
Step 13
Have an adult help you photograph your land art from above to capture the whole design.
- 14
Step 14
Gently return any living flowers or delicate plants to nearby soil so nature can heal.
- 15
Step 15
Share your finished creation on DIY.org.
Fun facts
How do I make land art with my child?
Start by choosing a flat, public or backyard spot with permission. Walk with your child to collect fallen leaves, stones, sticks, and flowers—avoid picking live plants. Sketch a simple plan or mark symmetry lines in the soil. Arrange elements from the center outward, experimenting with repeating shapes and mirror symmetry. Encourage creativity and conversation, photograph the finished piece, then gently return materials or leave them to return to nature. Keep sessions short and playful.
What materials do I need to make land art?
Bring baskets or paper bags for collecting, plus natural items like leaves, stones, sticks, seedpods, and flowers. Optional tools: a small rake or stick for smoothing, scissors for adult trimming, gloves for sensitive hands, and a camera or smartphone for photos. Use only fallen materials—don’t uproot live plants—and pack water, sun protection, and a small first-aid kit. Simple aids like string or a tray help teach symmetry and pattern planning.
What ages is land art suitable for?
Land art fits many ages: toddlers (2–4) can gather and place large items with supervision; preschoolers (3–5) enjoy sorting colors and making simple patterns; school-age kids (6–11) can design symmetrical pieces, count repeats, and photograph results; tweens and teens (12+) can plan complex mandalas and document work. Adjust tasks to fine motor skills and attention span, and always supervise younger children around small stones or sharp sticks.
What are the benefits of making land art with children?
Land art boosts creativity, observation, and a connection to nature. It teaches pattern recognition, symmetry, counting, and color sorting while developing fine and gross motor skills. The temporary aspect encourages respect for the environment and mindfulness about impermanence. Photographing creations builds storytelling and basic digital skills. It’s free, inclusive, and adaptable—try themed challenges, timed builds, or collaborative mandalas for variety and teamwork.
Watch & Learn
Need help?
What can we use if we can’t find flowers or big stones for the focal center?
If you can’t find a big stone or bright flower for the focal center, use a pinecone, acorn cluster, brightly colored ribbon, or a small toy from your bag as the focal center piece.
My design keeps losing its symmetry or pieces blow away—what should we try?
If pieces shift or symmetry looks off, anchor lightweight leaves and petals under heavier stones or sticks, make small adjustments while you step back to check balance, and have an adult hold the camera overhead when photographing to capture the whole design.
How can we change the activity for younger or older kids?
For younger children, simplify to one ring or a single spiral using just leaves and stones with close adult supervision, while older kids can build multiple rings, mirror complex patterns, and photograph the finished work for DIY.org.
How can we extend or personalize our land art once the basic rings are done?
To extend and personalize the project, make color-coded rings with petals and leaves, add textured layers of sticks and stones for contrast, write a short nature story about your design, and ask an adult to photograph it from above before gently returning any living plants to the soil.