Create a scissor lift launcher
Build a small scissor lift launcher using cardboard, craft sticks, paper fasteners, and a rubber band. Test lifting and launching lightweight objects with adult supervision.


Step-by-step guide to build a scissor lift launcher
Step 1
Gather all the materials and clear a workspace so you have room to build.
Step 2
Cut a cardboard base about 20 cm by 12 cm using scissors.
Step 3
Cut a small cardboard platform about 6 cm by 6 cm using scissors.
Step 4
Cross two craft sticks in an X shape and fasten them together in the middle with a paper fastener to make one scissor pair.
Step 5
Make a second scissor pair by crossing two more craft sticks and fastening them in the middle with a paper fastener.
Step 6
Line the two scissor pairs side by side and join the outer ends on one side together with a paper fastener.
Step 7
Join the outer ends on the other side of the two scissor pairs together with a paper fastener so the Xs are linked into a scissor stack.
Step 8
Place the scissor stack on the cardboard base and push a paper fastener through each bottom end into the base then fold the fastener prongs flat underneath to make pivot feet.
Step 9
Tape the cardboard platform to the top ends of the scissor stack so it can move up and down.
Step 10
Secure the middle of the rubber band under the base with tape and stretch the ends up and over the platform so the band can pull the platform upward.
Step 11
With an adult watching, put a lightweight item on the platform press the platform down to stretch the rubber band and then release to lift or launch the item.
Step 12
Move the rubber band or add a bit more tape to change how high or far things go until you like the lift or launch.
Step 13
Share a photo or video of your finished scissor lift launcher on DIY.org
Help!?
What can we use instead of craft sticks, paper fasteners, or a rubber band if we can't find them?
If you can't find craft sticks, paper fasteners, or rubber bands, use sturdy strips of cardboard or wooden skewers in place of craft sticks, small brads or split pins where the instructions fasten the Xs and pivot feet, and substitute an elastic hair tie or a short piece of surgical tubing taped under the base for the rubber band.
My scissor stack won't lift the platform or the platform sticks—what should I check or fix?
If the scissor stack won't pivot or the platform sticks after you join the Xs and push fasteners through the base, check that the paper fasteners aren't tightened too much—loosen them slightly, add a tiny washer or a bit of tape under fastener heads for smoother pivots, and reinforce or retape the cardboard platform where it's taped to the top ends so it can move up and down freely.
How should we change the activity for younger kids or make it harder for older kids?
For younger children, have an adult pre-cut the 20×12 cm base and 6×6 cm platform and pre-make the two scissor pairs so kids only assemble and test the rubber-band launch under supervision, while older kids can add more scissor pairs, change rubber-band tension by moving the taped anchor, or measure and calculate how launch height changes.
How can we improve or personalize the scissor lift launcher once it's built?
To enhance the launcher, decorate the 6 cm platform, add a removable paper-clip hook or small cup for different payloads, create an adjustable rubber-band anchor with extra tape to fine-tune height, or glue a cardboard stop on the 20×12 cm base to control maximum lift.
Watch videos on how to build a scissor lift launcher
How to Build a Scissor Lift Using LEGO Spike Prime
4 Videos
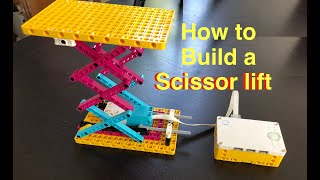
How to Build a Scissor Lift Using LEGO Spike Prime
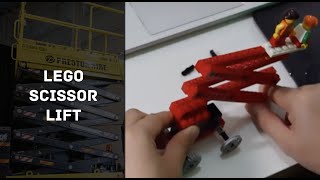
Building a Scissor Lift with LEGO Simple Machines (Highlights)
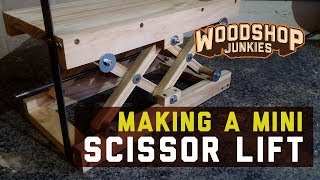
How to make your own small scissor lift jack STEP BY STEP with plans
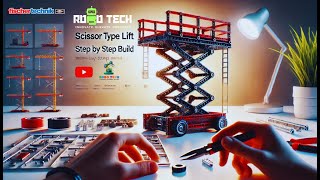
How to Build a Scissor Lift with Fischertechnik | Step-by-Step DIY Tutorial (Easy & Fun!) 🚀
Facts about simple machines and basic engineering for kids
🏗️ Scissor lifts use X-shaped crossing arms so a small push or pull can produce a big vertical move — great for tiny toy lifters!
🪢 Rubber bands store elastic potential energy — stretch one and let it snap back to launch lightweight objects safely with supervision.
⚙️ A four-bar linkage is a basic mechanical system that turns one motion into another; scissor mechanisms are a type of linkage family.
📦 Corrugated cardboard (first patented in 1856) is lightweight, strong, and perfect for quick engineering prototypes and craft projects.
🎯 Simple launchers are modern cousins of ancient catapults — they teach kids about energy transfer, angles, and safety when launching small items.
How do I build a scissor lift launcher?
What materials do I need to make a scissor lift launcher?
What ages is this scissor lift launcher activity suitable for?
What are the benefits, safety tips, and easy variations for this activity?
