Build a wheel and axle
Build a simple wheel and axle using cardboard, wooden dowels, and tape. Test and measure how different wheel sizes change movement and friction.


Step-by-step guide to build a simple wheel and axle
Step 1
Gather all your materials on a clear table so you can see everything.
Step 2
Choose three different wheel sizes and draw two matching circles of each size on the cardboard using the cup or lid and marker.
Step 3
Cut out all six cardboard wheels carefully with scissors.
Step 4
Use the ruler and marker to mark the exact center of each cardboard wheel.
Step 5
Make a hole in the center of each wheel that is just big enough for the wooden dowel to pass through so the wheel can spin.
Step 6
Cut the wooden dowel to about 25 centimeters to make a test axle.
Step 7
Cut two small cardboard rings or short strips to act as spacers on the axle.
Step 8
Assemble one pair of matching wheels on the axle with a spacer between each wheel and tape the dowel ends so the wheels cannot slide off but can still spin.
Step 9
Lay a long flat piece of cardboard as a straight test track and use the ruler to mark a start line and a finish line one meter apart.
Step 10
Place your assembled wheel-and-axle at the start line and give it a gentle push while starting the timer.
Step 11
Stop the timer when the wheel-and-axle stops moving.
Step 12
Write down the time and which wheel size you tested on a piece of paper.
Step 13
Replace the wheels on the axle with the next size and repeat Steps 8 to 12 for each remaining wheel size to collect more times.
Step 14
Compare the times you wrote down to see which wheel size rolled fastest and think about how wheel size changed movement and friction.
Step 15
Share your finished wheel-and-axle creation and your test results on DIY.org.
Help!?
What can we use if we can't find a wooden dowel?
If you don't have a wooden dowel, use a sturdy pencil or bamboo skewer as the axle and make the center holes in Step 5 the same diameter so the substitute fits snugly.
The wheels won't spin after I tape them on—what should I check?
If wheels don't spin freely after assembly in Step 8, gently widen the center holes from Step 5 and make sure the cardboard spacers you cut in Step 7 hold the wheels away from the tape-wrapped dowel ends so the tape doesn't rub.
How can I change the activity for different ages?
For younger children (3–5) have an adult complete Steps 2–6 and let them assemble, push, and time in Steps 8–12, while older kids (10+) can precisely cut the dowel in Step 6, run multiple timed trials in Steps 11–12, and analyze results.
How can we make the experiment more advanced or personal?
To extend the experiment, tape small coins inside different cardboard wheels before Step 8 to compare how added weight affects the times recorded in Steps 11–12, or tilt the cardboard track from Step 9 and then share your findings on DIY.org as in Step 13.
Watch videos on how to build a simple wheel and axle
Simple Machines - Wheel and Axle
4 Videos
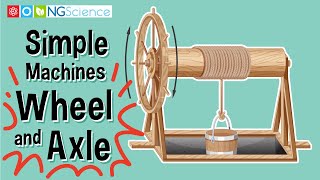
Simple Machines - Wheel and Axle

Simple Machines - Wheel and Axle | Science for Kids

Simple Machines: The Wheel & Axle
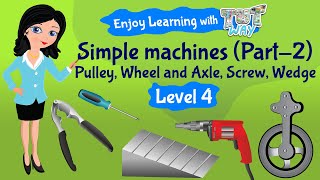
Simple Machines - The Wheel & Axle | Science | Grade 3 & 4 | TutWay
Facts about simple machines and friction
🔩 The wheel and axle is one of the six classical simple machines — people have used it for thousands of years to make work easier!
🛞 Bigger wheels travel farther per turn: a wheel twice as wide goes twice the distance in one rotation.
📏 Use the formula circumference = π × diameter to predict how far your wheel will roll in one spin.
📦 Rolled cardboard can be very strong — a tight tube of cardboard can make a sturdy DIY wheel or hub.
🧪 Friction isn’t just about roughness — weight, wheel material, and the floor surface all change how fast things move.
How do I build a simple wheel and axle with cardboard and wooden dowels?
What materials do I need to make a cardboard wheel and axle for testing different wheel sizes?
What ages is this wheel-and-axle building activity suitable for?
What are the benefits of building a wheel and axle, and what safety tips or variations should I try?
