Make and test a thermometer
Build a simple liquid thermometer using a straw, small bottle, and colored water; test temperature changes and record results to learn about thermal expansion.

Step-by-step guide to make and test a thermometer
Step 1
Gather all the materials from the list and bring them to your work table.
Step 2
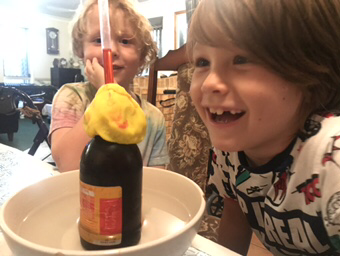
Use the funnel or pipette to fill the bottle about one quarter full with water.
Step 3
Add four drops of food coloring to the bottle and gently swirl the bottle to mix the color.
Step 4
Push the straw into the bottle so the bottom of the straw reaches the colored water and the top sticks out above the bottle neck.
Step 5
Press modeling clay firmly around the straw and bottle neck to make an airtight seal while leaving the top of the straw open.
Step 6
Use the permanent marker to draw a clear baseline where the colored liquid sits now.
Step 7
Use the ruler to add small tick marks at 1 centimeter intervals above and below the baseline and label the baseline as 0 with the marker.
Step 8
Place your bottle thermometer into the bowl of warm water keeping the top of the straw dry.
Step 9
Leave the bottle in the warm water for two minutes.
Step 10
Check the straw and write down on your paper which tick mark the liquid reaches after warming.
Step 11
Move the bottle into the bowl of ice water and leave it there for two minutes.
Step 12
Write down the new tick mark level from the straw for the cold test and then share your finished creation on DIY.org.
Help!?
I don't have a funnel or pipette—how can I fill the bottle one quarter full?
Carefully pour water from a small cup or use a folded piece of paper as a makeshift funnel, or use a medicine dropper from a first-aid kit to add water until the bottle is one quarter full.
When I warm the bottle the colored liquid doesn't move up the straw—what should I check?
Make sure the straw bottom sits in the colored water, press the modeling clay tightly around the bottle neck to make an airtight seal, and keep the top of the straw dry and open so expanding air can push the liquid up.
How can I adapt the activity for different age groups?
For toddlers have an adult fill the bottle and seal the straw while the child adds food coloring and watches, for elementary kids let them mark 1-cm ticks with the ruler and record warm and cold levels, and for teens have them calibrate the scale against a real thermometer and analyze the results.
How can we improve or personalize our bottle thermometer?
Calibrate the tick marks by measuring the same warm and ice water with a real thermometer and write temperatures next to the tick marks with the permanent marker, then decorate the bottle with stickers or colored tape.
Watch videos on how to make and test a thermometer
Make a Thermometer - STEM Activity
4 Videos

Make a Thermometer - STEM Activity
Build a Thermometer Experiment | Energy | The Good and the Beautiful
How to Make an Amazing DIY Thermometer at Home - School Project for kids
How To Make Your Own Thermometer | Homemade Bottle Thermometer For Kids | Weather Experiments
Facts about thermal expansion and temperature
🌡️ Early thermometers used wine and trapped air; mercury and alcohol thermometers became common in the 1700s.
🔬 Liquid-in-glass thermometers work because most liquids expand when warmed and rise in a narrow tube.
💧 Dyed alcohol or colored water is great for homemade thermometers — it’s easy to see and safer than mercury.
🧪 Charles’s law (and the trapped air in the bottle) helps explain why the liquid level moves with temperature changes.
📈 Recording liquid height versus temperature lets kids plot a graph and watch thermal expansion in action.
How do you make and test a simple liquid thermometer?
What materials do I need to build a straw bottle thermometer?
What ages is this activity suitable for?
What safety tips and learning benefits come from making a liquid thermometer?
