Enchanting Fairy Potion Creation Contest w/ DIY Star XxItzAFairyxX
Create a glittery, scented fairy potion using water, food coloring, biodegradable glitter, flower petals, and safe scents; measure, mix, and present your magical bottle.


Step-by-step guide to make a glittery, scented fairy potion
DIY Fairy Dust: Magic Glitter Potions | Quick and Easy Kid Friendly Craft | The Magic Crafter
Step 1
Gather all the materials listed and bring them to your work table.
Step 2
Wash the bottle and lid with soap and water to make them clean.
Step 3
Dry the bottle and lid completely with a clean towel.
Step 4
Pick fresh flower petals and place them on a clean plate.
Step 5
Use the funnel to pour water into the bottle until it is three quarters full.
Step 6
Add 2 drops of food coloring into the water in the bottle.
Step 7
Add one half teaspoon of biodegradable glitter into the bottle.
Step 8
Drop 4 to 6 flower petals into the bottle one at a time.
Step 9
Add 2 drops of your safe scent into the bottle.
Step 10
Tightly screw the lid onto the bottle.
Step 11
Shake the bottle gently 10 times to mix your fairy potion.
Step 12
Decorate the outside of the bottle with a ribbon or make a name label and stick it on.
Step 13
Share a photo and story of your finished fairy potion on DIY.org.
Help!?
Can I substitute any hard-to-find materials like biodegradable glitter, a funnel, or the 'safe scent'?
If biodegradable glitter (step 7) is unavailable, use 1/2 teaspoon of large craft sequins or colored sugar, make a paper funnel for step 5 or pour from the plate edge, and replace the 2 drops of 'safe scent' (step 9) with 2 drops of vanilla extract or a child-safe flavored extract.
What should I do if the glitter sinks, the water looks cloudy, or the lid leaks?
If the glitter sinks or clumps when you shake (step 11) or the water is cloudy, be sure the bottle and lid were fully rinsed and dried (steps 2–3) and add one small drop of clear glycerin to the water before adding the 1/2 teaspoon of biodegradable glitter (step 7), and if the lid leaks tighten it firmly and add a small strip of tape around the thread before screwing on (step 10).
How can I adapt this potion activity for different ages?
For toddlers (2–4), an adult should do the pouring and the 2 drops of food coloring (steps 5–6) and skip small glitter using large petals or big sequins; for ages 5–8 let them add petals one at a time (step 8) with supervision; and for ages 9+ let them measure the 1/2 teaspoon glitter, mix scents (step 9), decorate the bottle (step 12), and write the story to share (step 13).
How can we enhance or personalize our fairy potion beyond the basic instructions?
To extend the activity, put a tiny waterproof LED tealight inside before screwing the lid (step 10), try glow-in-the-dark paint or layered colored water before adding petals (steps 5–8), craft a unique ribbon and name label (step 12), and create a short fairy story to post the photo with on DIY.org (step 13).
Watch videos on how to make a glittery, scented fairy potion
HOW TO MAKE YOUR OWN FAIRY POTION!!! **REAL MAGIC**
3 Videos

HOW TO MAKE YOUR OWN FAIRY POTION!!! **REAL MAGIC**
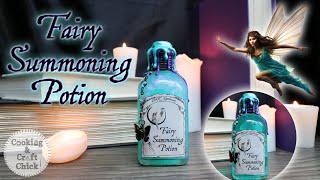
Fairy Summoning Potion : Fairy Potion : Color Changing Potion : DIY Prop Bottle : Potion Prop

Fizzy Fairy Potions
Facts about sensory play and DIY kids' crafts
🧚 Fairies: Stories about fairies appear in folklore from many countries — sometimes they're helpful, sometimes they love mischief!
✨ Glitter: People used shiny minerals for sparkle for centuries, and modern craft glitter became popular in the 20th century.
♻️ Biodegradable glitter: Many eco-friendly glitters are made from plant-based cellulose so they break down faster than plastic glitter.
🌸 Flower petals: Dried petals from roses, lavender, and marigolds add gentle color and tiny natural scent bursts to bottles — remember to ask before picking!
👃 Smell power: Our noses can distinguish thousands of different scents, so just a drop of scent oil can really change a potion's magic.
How do you run the Enchanting Fairy Potion Creation Contest with DIY Star XxItzAFairyxX?
What materials do I need for a glittery scented fairy potion?
What ages is the Enchanting Fairy Potion activity suitable for?
What are safety tips and fun variations for the fairy potion contest?
