Draw a Fox in Luluber's Style
Draw a playful fox in Luluber's colorful, simple style using pencil, markers, and bold shapes; learn proportions, patterning, and shading techniques step by step.


Drawing Apps
Step-by-step guide to Draw a Fox in Luluber's Style
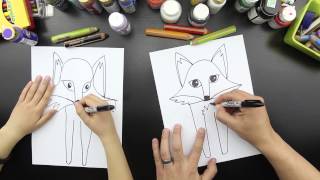
How To Draw A Cartoon Fox
Step 1
Look at two or three pictures of Luluber style fox drawings to notice simple shapes bright color blocks and playful details.
Step 2
Lightly sketch a circle for the head and an oval for the body to set the fox proportions.
Step 3
Draw two triangles on top of the head for ears and a long teardrop shape for the tail to add basic shapes.
Step 4
Add a faint vertical center line and a horizontal eye line on the head to mark face placement.
Step 5
Draw simple bold eyes a triangle nose and a small smiling mouth using geometric shapes for a playful face.
Step 6
Sketch short rounded legs as simple rectangles or ovals and connect them to the body for sturdy stance.
Step 7
Add large color blocks and patterns like a white chest patch cheek spots or stripes on the tail using simple geometric patches.
Step 8
Erase extra pencil guidelines so only the clear shapes and patterns remain.
Step 9
Trace the final outline and patterns with a black marker and let the ink dry completely.
Step 10
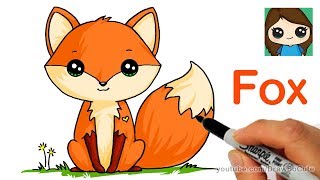
Fill the color blocks with markers using bold bright colors and staying inside the black outlines.
Step 11
Add light shading with coloured pencil by applying soft strokes along edges and blending gently to create depth.
Step 12
Share your finished Luluber-style fox creation on DIY.org
Help!?
What can I use instead of a black marker or markers if I don't have them?
If you don't have a black marker to 'trace the final outline and patterns' or markers to 'fill the color blocks,' substitute a black gel pen or fineliner for outlines and colored pencils, crayons, or washable paint for the bold color blocks.
My ink smudged or the marker bled—what should I do?
If ink smudges or markers bleed while you 'trace the final outline' or 'fill the color blocks,' switch to heavier paper, let each inked area dry completely, and place a scrap sheet under your hand to avoid smears.
How can I adapt this fox drawing activity for different ages?
For toddlers give pre-drawn circles, triangles and a teardrop to color, elementary kids can follow all steps and focus on bold color blocks, and older kids can add finer marker details, more complex patterns, and the coloured-pencil shading in step 11.
How can we extend or personalize our Luluber-style fox once it's finished?
To personalize or extend the activity add a background scene, collage textured fur on the tail, experiment with patterned color blocks, or create a series to share on DIY.org as suggested in the instructions.
Watch videos on how to Draw a Fox in Luluber's Style
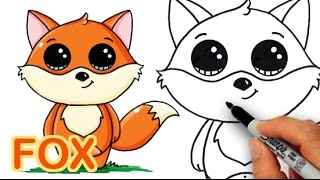
How To Draw A Cute Fox
4 Videos

How To Draw A Cute Fox
How To Draw A Fox
How to Draw a Cartoon Fox Cute and Easy
How to Draw a Cute Fox Easy
Facts about stylized animal drawing for kids
🦊 Fox tails are super expressive—artists use big, bold tail shapes to show motion and personality!
🎨 Bright flat colors and simple outlines (like Luluber's style) make your fox easy to read and extra playful.
✏️ Start with a circle for the head and an oval for the body—simple shapes make proportion fixes fast and fun.
🖍️ Markers give bold, even color that really pops—let layers dry between colors to avoid smudges.
✨ Use light pencil strokes and cross-hatching for soft shading or add simple stripe patterns to give your fox character.
How do I draw a fox in Luluber's style step by step?
What materials do I need to draw a Luluber-style fox?
What ages is drawing a Luluber-style fox suitable for?
What are the benefits of drawing a fox in Luluber's style?
