Find an image and trace its shapes
Choose a simple image, print or display it, then trace and label its basic shapes to practice observation, drawing, and shape recognition skills.

Drawing Apps
Step-by-step guide to find an image and trace its shapes
Step 1
Pick a simple image you like such as a cat a house or an apple.
Step 2
Print the image or open it full screen on a tablet or computer.
Step 3
Place a sheet of tracing paper or plain paper gently over the image so it covers the picture.
Step 4
Tape the corners of the paper down so it does not slide while you trace.
Step 5
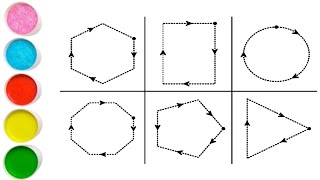
Use a pencil to trace the big outer shapes first with light lines.
Step 6
Trace the smaller inner shapes and details with light lines.
Step 7
Carefully peel the tracing paper off the image and set it aside.
Step 8
Put a clean blank sheet of paper on the table in front of you.
Step 9
Look at your traced lines and copy the shapes freehand onto the clean sheet.
Step 10
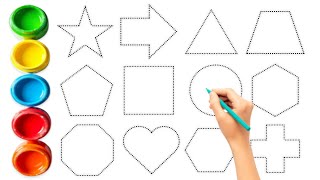
Label each basic shape on your drawing with its name like circle triangle rectangle or oval.
Step 11
Colour each shape a different colour and add any fun decorations you want.
Step 12
Share a photo of your finished traced and labeled picture on DIY.org
Help!?
What can we use instead of tracing paper or tape if we don't have them?
If you don't have tracing paper or tape (steps 3–4), use baking/parchment paper or wax paper over the image and hold corners with paperclips or a heavy book, or tape both papers to a window and trace using the tablet or printed image as backlight.
The paper keeps sliding and my lines smudge—how do we fix that?
To stop sliding and smudging while tracing (steps 4–6), firmly tape the corners or weigh them down, use light pencil strokes (HB or lighter), and let the graphite settle before carefully peeling the tracing paper off.
How can we adapt this activity for different ages?
For younger kids, pick very simple large images like a big apple or house, have an adult hold the paper and use chunky crayons for tracing, while older kids can choose more detailed pictures, attempt the freehand copy step (step 8) without tracing, and add labeled shapes as in step 9.
How can we extend or personalize the traced and labeled picture?
After labeling and colouring each shape different colours (steps 9–11), cut out traced shapes to make a collage, add stickers or textured materials for decorations, and then photograph the finished piece to share on DIY.org as instructed.
Watch videos on how to find an image and trace its shapes
Tracing Lines and Shapes for Kids
4 Videos
Tracing Lines and Shapes for Kids
Learn Shapes Drawing, Painting & Coloring For Kids and Toddlers_ Kids Art

5 Kindergarten SHAPES Lessons for Art Teachers; activities, projects, videos, lessons: How to Teach
Learn 12 Shapes for Kids | Shapes Name, Tracing & Color For Toddlers | Preschool Learning Activity
Facts about shape recognition and drawing for kids
🟠 Young children can usually identify basic shapes like circles and squares by age 2–3 — shape play starts very early!
✏️ Tracing is a simple way to boost fine motor skills and hand-eye coordination because the eye guides the hand along a line.
🔍 Tracing trains observation: artists often trace or copy to learn how complex images are built from simple shapes.
🖼️ Teachers use tracing as a confidence-builder — kids can focus on labeling and recognizing shapes before freehand drawing.
📐 Many letters, logos, and objects are just combinations of basic geometric shapes, so tracing helps early geometry thinking.
How do I guide my child to trace and label shapes from a picture?
What materials do I need to trace shapes from an image?
What ages is this tracing and shape-labeling activity suitable for?
What are the benefits of tracing and labeling shapes from images?
