Click a Medium Shot on Stop Motion Studio
Create a medium shot scene using Stop Motion Studio: arrange characters, set framing, capture consistent frames, and play back your short animation.


Step-by-step guide to create a medium shot scene in Stop Motion Studio
Step 1
Pick a flat table or desk as your filming workspace.
Step 2
Set up a background by standing a sheet of paper or using a shoebox behind where your characters will stand.
Step 3
Put your characters or toys on the set where you want the story to happen.
Step 4
Use a little sticky putty or tape to keep each character standing up.
Step 5
Open the Stop Motion Studio app on your device.
Step 6
Start a new project inside the app.
Step 7
Mount your device on the tripod or stable stand.
Step 8
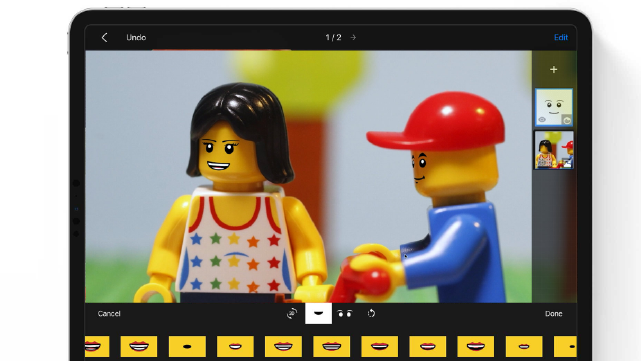
Point the camera so your characters are in the middle of the screen.
Step 9
Zoom or move the camera so the shot is a medium shot showing roughly waist to head.
Step 10
Lock the frame or hold the device very still so the camera does not move.
Step 11
Turn on the lamp or desk light so the set is evenly lit.
Step 12
Capture frames by moving your characters a tiny bit between each photo and keep taking frames until the animation is about 5 to 10 seconds long.
Step 13
Share your finished creation on DIY.org.
Help!?
What can we use if we don't have a tripod, sticky putty, or a desk lamp?
Mount your device on a stack of books or a steady cup instead of a tripod, use double-sided tape or rolled tape in place of sticky putty, and light the set with sunlight from a window or a clamp lamp instead of a desk lamp.
My camera is shaking and the animation looks jumpy—what should I check or fix?
Make sure you mount your device on the tripod or stable stand and lock the frame in Stop Motion Studio (or hold it very still), secure each character with sticky putty or tape so they don't fall, and move characters only a tiny bit between each photo to avoid jumpy frames.
How can I adapt this activity for younger kids or older kids?
For younger children use bigger toys, a single sheet-of-paper background, fewer frames per movement and adult help to mount the device, while older kids can build a detailed shoebox diorama, make finer character movements to extend the animation beyond 5–10 seconds, and experiment with more camera framing.
How can we enhance or personalize the stop-motion after capturing the medium shot?
Edit the project in Stop Motion Studio to add titles, music, or a voice-over, adjust frame timing for smoother motion, decorate the shoebox or paper background with props and colored paper, and then share the finished video on DIY.org.
Watch videos on how to create a medium shot scene in Stop Motion Studio
Stop Motion Studio Pro Tutorial/Overview | All Features Explained! 2021
4 Videos
Stop Motion Studio Pro Tutorial/Overview | All Features Explained! 2021

01 First Steps - Stop Motion Studio Tutorial

How to make Stop Motions for Beginners Part 1 (Stop Motion Tutorial)
05 Editing - Stop Motion Studio Tutorial
Facts about stop motion animation
🎬 A medium shot usually frames a person from the waist up — great for showing both action and facial expression in stop-motion scenes.
📸 Stop-motion is captured one frame at a time; using about 12 frames per second gives a pleasantly smooth look for kid-friendly projects.
🧩 Claymation (clay stop-motion) was popularized by studios like Aardman — characters can bend, squash, and stretch between frames for fun effects.
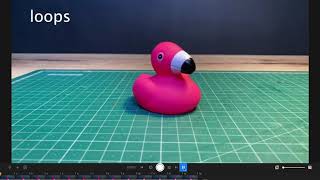
⏱️ Consistent tiny movements (use a ruler or grid) make animation look smoother — even a 1–2 mm shift per frame adds up to fluid motion.
🎞️ Playback is the magic: a sequence of still photos shown quickly becomes motion — our eyes merge the images into action.
How do I create a medium shot stop-motion scene in Stop Motion Studio?
What materials do I need to click a medium shot in Stop Motion Studio?
What ages is this stop-motion medium shot activity suitable for?
What are the benefits of making a medium shot stop-motion animation?
