Mega Upcycling Challenge
Design and build a large upcycled project using household recyclables, planning, assembling, and decorating to create a useful or artistic item while reducing waste.
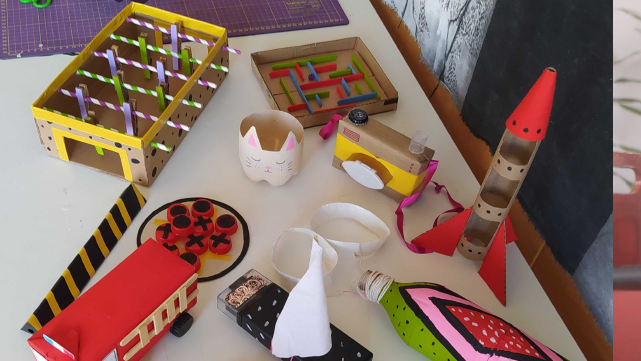
About this activity
Design and build a large upcycled project using household recyclables, planning, assembling, and decorating to create a useful or artistic item while reducing waste.
What you need
Step by step
- 1
Step 1
Pick one big upcycling project idea like a play fort a storage crate a bird feeder or a planter.
- 2
Step 2
Clear a flat workspace and protect it with newspaper or an old cloth.
- 3
Step 3
Gather the recyclables and tools you think you will need.
- 4
Step 4
Sketch your design on paper showing the size and which pieces will join.
- 5
Step 5
Measure the parts on your recyclables using the ruler and pencil.
- 6
Step 6
Mark cut lines clearly on the recyclables where you will cut or fold.
- 7
Step 7
Cut out the marked pieces using child safe scissors with adult supervision.
- 8
Step 8
Assemble the main structure by joining pieces with tape or glue following your sketch.
- 9
Step 9
Reinforce any weak spots with extra tape folded cardboard or more glue.
- 10
Step 10
Add functional parts like handles hinges or openings using tape string or small pieces.
- 11
Step 11
Decorate your project using markers paints stickers or fabric pieces.
- 12
Step 12
Let the glue and paint fully dry until it is safe to touch.
- 13
Step 13
Take clear photos of your finished project from different angles.
- 14
Step 14
Share your finished creation on DIY.org
Fun facts
How do I do the Mega Upcycling Challenge step-by-step?
Start by choosing a useful or artistic goal (playhouse, storage, sculpture). Sketch a plan, measure, and list needed recyclables. Collect and sort materials, then prepare a safe workspace with newspaper and tools. Build in stages: create a strong frame, attach panels, reinforce joints, and add functional parts. Finish by painting and decorating. Test stability, make adjustments, and display your project. Supervise cutting or heavy tasks for safety.
What materials do I need for the Mega Upcycling Challenge?
Use common household recyclables: cardboard boxes, plastic bottles, milk cartons, tin cans, egg cartons, fabric scraps, bottle caps, paper rolls, and old toys. Have basic tools and supplies: scissors, craft knife (adult use), hot glue or PVA glue, strong tape, string, markers, paints, brushes, and safety gear like gloves and goggles. Add screws, zip ties, or clamps for sturdier builds. Choose cleaned and dry materials to reduce odors and pests.
What ages is the Mega Upcycling Challenge suitable for?
This activity suits a wide range: preschoolers (4–6) can help sort materials and decorate simple parts with close adult help. Elementary kids (7–10) can plan, measure, and assemble with guidance for cutting or gluing. Tweens and teens (11+) can lead complex designs, use more advanced tools, and manage project planning. Always match tasks to a child’s skills and supervise any sharp tools, heat glue, or heavy lifting.
What are the benefits and safety tips for the Mega Upcycling Challenge?
Benefits include creativity, problem-solving, planning skills, and learning about recycling and sustainability. It boosts fine and gross motor skills and teamwork if done together. For safety, use age-appropriate tools, supervise hot glue or knives, wear protective gear, and check that structures are stable. Variations: set themes (garden, space), make it a timed family challenge, or focus on purely wearable or functional items to change difficulty and outcomes.
Watch & Learn
Need help?
What can we use if we don't have tape, glue, or child-safe scissors listed in the materials?
If you don't have child-safe scissors, have an adult cut or pre-cut pieces from recyclables, and if you lack tape use strong craft glue or slot-and-tab folds in folded cardboard to join pieces following the 'Assemble the main structure' step.
My pieces won't fit together when assembling—what should I check and how can I fix it?
Check your measurements and marked cut lines from the 'Measure the parts' and 'Mark cut lines' steps, trim or re-cut where needed, and reinforce joins with extra tape or folded cardboard as suggested in 'Reinforce any weak spots'.
How can I change the project to suit different ages?
For preschoolers have an adult complete cutting and measuring beforehand so they can focus on assembling and decorating (steps 'Cut out the marked pieces' and 'Decorate your project'), while older kids should do full sketches, measure, cut, add functional handles or hinges, and photograph the final build for DIY.org.
How can we make the finished fort/planter/bird feeder more durable or unique?
Make it more durable by reinforcing seams with folded cardboard and extra glue from the 'Reinforce any weak spots' step, waterproof or seal paint on a planter, add string handles or hinges from 'Add functional parts', and personalize with painted patterns or fabric before photographing to share on DIY.org.