Make a cool kaleidoscope from scratch
Build a kaleidoscope from a cardboard tube, reflective plastic or foil, and colorful beads; explore reflections, symmetry, and changing patterns safely.


Step-by-step guide to make a cool kaleidoscope from scratch
Step 1
Lay all your materials out on a clean flat table so everything is easy to reach.
Step 2
Measure the length of the cardboard tube and mark that length on the reflective sheet with your ruler and pencil.
Step 3
Cut three identical rectangular strips from the reflective sheet each the same length as the tube and about one third of the tube's circumference.
Step 4
Fold each reflective strip lengthwise so the shiny side faces inward and the strip has a straight long edge.
Step 5
Line up the three folded strips with their shiny sides facing the inside so the long edges touch each other.
Step 6
Tape along the long edges where the strips touch to join them into a neat triangular prism that reflects inside.
Step 7
Slide the reflective triangular prism gently into the cardboard tube so it fits snugly inside lengthwise.
Step 8
Trace and cut two circles from the clear plastic that are slightly bigger than the tube's open end.
Step 9
Put a small pile of colorful beads on one clear plastic circle and then place the second circle on top to sandwich the beads.
Step 10
Tape all around the edges of the two clear circles to seal the beads inside a wobbleable pocket.
Step 11
Tape the sealed bead pocket to one end of the tube so the beads sit over the reflective prism and can move.
Step 12
Cut a small peephole in the opposite end of the tube and cover any sharp edges with a small piece of tape.
Step 13
Wrap or draw on the outside of the tube with construction paper or markers to decorate your kaleidoscope.
Step 14
Hold the peephole to your eye and slowly rotate the bead end to watch colorful symmetrical patterns change and sparkle.
Step 15
Take a picture or video of your finished kaleidoscope and share your creation on DIY.org
Help!?
What can I use instead of the reflective sheet if I can't find one?
If a reflective sheet is unavailable, use the shiny side of an emergency blanket, mirror-effect plastic strips, or aluminum foil glued to thin cardboard cut to the length in step 2 and folded in step 3.
Why won't the triangular prism fit neatly into the tube or produce clear reflections, and how do I fix it?
If the three folded strips don't form a neat triangular prism or slide into the tube (steps 4–6), trim each strip to exactly the tube length from step 2, ensure the shiny sides face inward when folding in step 3, and add extra tape along the seams in step 5 for a tighter, cleaner fit.
How can I adapt this kaleidoscope activity for younger kids or make it more challenging for older kids?
For younger children, have an adult pre-measure and cut the tube and reflective strips (steps 2–3) and use large, pre-sealed beads in step 10, while older kids can do all measuring/cutting themselves, try different reflective materials in step 5, and experiment with varied bead sizes and tinted plastics for more complex patterns.
What are some simple ways to enhance or personalize the finished kaleidoscope?
Enhance the kaleidoscope by adding colored cellophane or tinted plastic over the bead pocket before taping in step 11, placing a small magnifying lens over the peephole in step 12 to sharpen patterns, and decorating the outside as in step 13 before taking photos in step 15.
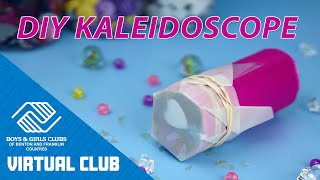
Watch videos on how to make a cool kaleidoscope from scratch
How to Make DIY Kaleidoscope | Easy Science Project for Class 5 to 8
4 Videos
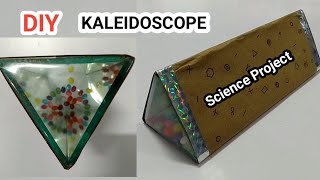
How to Make DIY Kaleidoscope | Easy Science Project for Class 5 to 8

How to make a Kaleidoscope at home without mirror | DIY Kaleidoscope | Fun designs | Science project
DIY STEM Project For Kids: How To Make A Kaleidoscope

DIY Kaleidoscope | Mirror Science | dArtofScience
Facts about light, reflection, and symmetry
🌀 The kaleidoscope was invented in 1816 by Sir David Brewster while he studied light and optical reflections.
🔺 A three-mirror kaleidoscope with mirrors set at 60° makes repeating hexagonal patterns from a few objects.
🎨 Tiny rearrangements of beads or bits of colored plastic can create millions of different-looking patterns.
📚 The word "kaleidoscope" comes from three Greek words meaning "beautiful form to behold" (kalos + eidos + skopeo).
♻️ Kid-safe kaleidoscopes often use reflective plastic or aluminum foil instead of glass mirrors to avoid sharp edges.
How do I make a kaleidoscope from a cardboard tube?
What materials do I need to build a homemade kaleidoscope?
What ages is building a cardboard kaleidoscope suitable for?
What are the benefits and safety tips for making a kid-friendly kaleidoscope?
