POV: You're the Head of DIY. What Would You Do?
As Head of DIY, design and build a simple bird feeder from recycled materials, write step-by-step instructions, and lead a mini assembly workshop.


Step-by-step guide to design and build a bird feeder from recycled materials
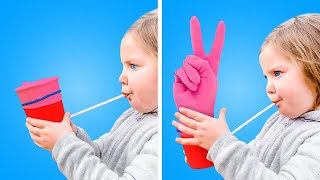
23 EASY CRAFTING IDEAS FOR KIDS AND ADULTS
Step 1
Gather all your materials and lay them out on a clean flat workspace.
Step 2
Decide on a simple feeder shape and draw a quick sketch showing where a seed opening and a perch will go.
Step 3
Use the marker to mark the spots for the seed opening perch hole and hanging holes on your recycled container.
Step 4
With an adult, use scissors or the hole punch to carefully cut the seed opening and the holes you marked.
Step 5
Push the wooden spoon or stick through the perch hole so it sticks out as a place for birds to sit.
Step 6
Secure the perch with tape or glue so it stays steady when birds land.
Step 7
Thread string through the top holes and tie a strong knot to make a hanger for your feeder.
Step 8
Hang the feeder briefly to check that the perch and hanger are steady and make any fixes with tape.
Step 9
Fill the feeder with birdseed through the opening until it is ready to share with birds.
Step 10
Decorate the outside of your feeder with markers and colouring materials to make it bright and friendly.
Step 11
Write a short numbered set of assembly instructions on one page that others can follow during your mini workshop.
Step 12
Lead your mini assembly workshop by showing your steps and helping friends follow your written instructions.
Step 13
Share a photo and your workshop instructions for your finished bird feeder on DIY.org.
Help!?
What can we use instead of a wooden spoon, hole punch, or specific recycled container if we can't find them?
If you don't have a wooden spoon for the perch, substitute a pencil, chopstick, or 6–8 cm wooden dowel, and if you lack a hole punch or a sturdy recycled container, carefully cut the hanging holes and seed opening with scissors in the 'cut the seed opening and the holes you marked' step and choose a thicker plastic bottle or small milk carton as your recycled container.
What should we do if the perch wobbles or the holes tear when we cut them?
If the seed opening or hanging holes tear or the wooden spoon wobbles when birds land, reinforce the hole edges and the perch anchor with strong tape or a dab of glue as instructed in 'secure the perch with tape or glue' and add extra tape under the perch before hanging to stabilize it.
How can we adapt the project for different ages so it's safe and engaging?
For ages 3–5 have an adult pre-cut the seed opening and hanging holes and supervise placing the blunt stick and decorating, for ages 6–9 allow supervised cutting and taping during 'push the wooden spoon' and 'secure the perch', and for 10+ let them design the sketch, write the numbered assembly instructions, and lead the mini workshop.
How can we extend or personalize the bird feeder after finishing the basic steps?
To enhance your feeder after you 'fill the feeder with birdseed' and 'decorate the outside', add a small clear window taped over part of the seed opening to watch seed levels, attach a second perch for extra perching space, seal seams with waterproof glue, and note the seed type on your written assembly instructions to attract specific birds.
Watch videos on how to design and build a bird feeder from recycled materials
Fun Arts and Crafts to DO AT HOME
4 Videos

Fun Arts and Crafts to DO AT HOME

20 DIY IDEAS FOR LITTLE KIDS
Fun Activities And Cool Crafts To Try With Your Kids || Toy DIYs, Parenting Hack
Easy and Fun Crafts for Kids | Handmade Picture Frame | Simple Handmade Gifts
Facts about recycled crafts and DIY for kids
🐦 Many backyard birds like chickadees, finches, and sparrows visit feeders regularly—some species return to the same feeder every day.
♻️ Common recyclables such as plastic bottles, milk cartons, and cardboard can become cozy, low-cost bird feeders with a little creativity.
🛠️ You can build a safe, working bird feeder with basic kid-friendly tools: scissors, string, glue, and a marker for decorating.
📏 Placing a feeder 5–10 feet from dense shrubs helps keep birds safe from predators while staying easy for human watchers to see.
🌱 Designing and running a mini assembly workshop teaches leadership, step-by-step thinking, and caring for local wildlife.
How do I guide my child to design and build a simple bird feeder from recycled materials and run a mini assembly workshop?
What materials and tools do we need to make a recycled bird feeder for a kids' DIY workshop?
What ages is this 'Head of DIY' bird feeder activity suitable for and how much adult help is needed?
What are the benefits of having my child design a bird feeder and lead a mini workshop?
