Make a Water Body with Aluminium Foil
Make a small model water body using aluminium foil, water, pebbles, and plants; observe reflections, buoyancy, and simple ecosystem interactions.


Step-by-step guide to make a water body with aluminium foil
Step 1
Wash your hands with soap and dry them so your pond stays clean.
Step 2
Put the shallow tray or plate on a flat table to catch any spills.
Step 3
Tear off a square of aluminium foil about the size of your palm.
Step 4
Shape the foil into a shallow bowl by pressing the center and lifting the edges to make a pond shape.
Step 5
Smooth the bottom of the foil bowl so it sits flat in the tray.
Step 6
Place small pebbles inside the foil to make shores and underwater rocks.
Step 7
Add small pieces of plants or moss around the edge and a little inside the pond for habitat.
Step 8
Slowly pour water from the cup into the foil bowl until a shallow puddle forms covering the pebble bases.
Step 9
Hold the tray still and look at the water surface to notice reflections of the room and plants.
Step 10
Gently place a small leaf on the water surface to see if it floats and watch how it moves.
Step 11
Drop one pebble into the pond and watch it sink and make ripples.
Step 12
Blow gently on the water or tap the tray to make ripples and watch how plants and pebbles react.
Step 13
Share your finished foil pond and what you observed on DIY.org
Help!?
What can I use if I don't have aluminium foil or a shallow tray?
If you don't have aluminium foil, use a clean shallow plastic container or disposable pie tin as the pond and if you lack a tray, place the foil or container on a cookie sheet or large plate to catch spills.
My foil pond keeps collapsing or leaking when I add water—how do I fix it?
Remake the pond with a larger square or a double layer of aluminium foil and press and smooth the bottom firmly (step 5) so it sits flat in the tray before adding pebbles and water.
How can I adapt this pond activity for different ages?
For toddlers, pre-shape the foil bowl and let them place big pebbles and plants with supervision, while older kids can measure ripple sizes, test different leaves for floating, and record observations to share on DIY.org.
How can we extend or personalize the foil pond after finishing the basic steps?
Personalize it by adding small toy animals, using colored water drops to change reflections, building several ponds to compare how different pebbles and plants affect ripples, or arranging moss and shore pebbles into patterns.
Watch videos on how to make a water body with aluminium foil
Aluminum Foil Sculpture for Kids!
4 Videos
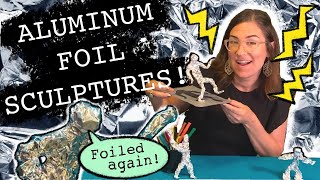
Aluminum Foil Sculpture for Kids!
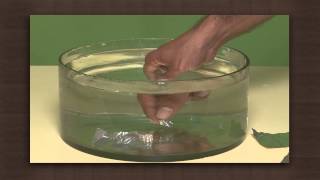
Buoyancy lab: fun with aluminium foil | Force | Physics
STEM: Foil Boats
Marker & Foil Prints | Art Lessons for Kids
Facts about pond ecosystems and water properties
🧪 Household aluminium foil is about 16 micrometres (0.016 mm) thick — thin enough to fold into tiny pond shapes!
🪞 Still water acts like a mirror because light reflects off its surface at the same angle it arrives (the law of reflection).
⚖️ Things float when they displace more water weight than they weigh — that's buoyancy (Archimedes' principle).
🌱 A single teaspoon of pond water can contain thousands of microorganisms and bits of plant life — a whole mini-ecosystem!
🪨 Smooth pebbles are polished by tumbling in water for years and make great hiding spots and anchors for pond plants.
How do I make a small model water body using aluminium foil?
What materials do I need to make a foil water body for kids?
What ages is the aluminium foil water body activity suitable for?
What are some easy variations to try with the aluminium foil water body?
