Add Details to Your Paper Architecture
Decorate and enhance a paper building model by adding windows, doors, textures, and miniature landscaping using paper, scissors, glue, markers, and recycled materials.

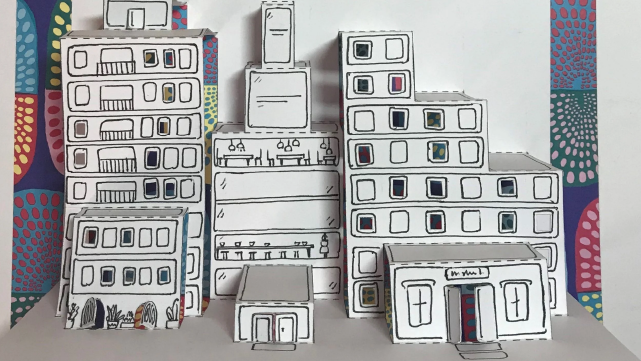
Step-by-step guide to add details to your paper architecture
Step 1
Gather all Materials Needed and set them on a clear workspace.
Step 2
Look at your paper building model and choose which face or side to decorate first.
Step 3
Draw window and door shapes on extra paper using your pencil and ruler sized to fit the chosen side.
Step 4
Cut out the window and door shapes carefully with scissors.
Step 5
Color and decorate each cut-out window and door using your coloring materials.
Step 6
Glue each decorated window and door onto the building model in the spots you planned.
Step 7
Cut small paper strips or shapes to make textures like bricks roof tiles or awnings.
Step 8
Attach the texture pieces to the walls or roof using glue to create patterns.
Step 9
Build tiny trees benches or flower beds from recycled bits by cutting shaping and folding them.
Step 10
Glue your miniature landscaping pieces around the base of the building to create a scene.
Step 11
Add tiny finishing details like shadows curtains or pathway lines with markers for extra realism.
Step 12
Let the glue dry completely for at least 15 minutes before moving your model.
Step 13
Share your finished paper architecture creation on DIY.org
Help!?
What can we use if we don't have glue, scissors, or a ruler for attaching and measuring the windows, doors, and textures?
If you don't have scissors, glue, or a ruler, use pre-cut shapes or stickers for windows and doors, double-sided tape or a glue stick to attach pieces, and a book spine or cereal-box edge as a straightedge for drawing with your pencil.
My cut-out windows and texture pieces keep slipping or don't fit—how can I fix that?
If cut-outs are too big, re-measure with the ruler and pencil and trim before gluing, and if textures or landscaping bits slip, use smaller glue dots, press firmly, and let the glue dry undisturbed for the 15 minutes called for in the instructions.
How can I adapt this paper architecture activity for different ages and skill levels?
For younger children offer pre-cut windows, sticker doors, and crayons for coloring, while older kids can use the ruler to draw precise window and door shapes, cut thin paper strips for brick textures, and craft detailed recycled benches as in the landscaping step.
What are some ways to extend or personalize the finished paper building beyond the basic steps?
To enhance the model, make a row of buildings by repeating the steps, place a battery tea-light behind the cut-out windows for a glow, and add extra realism by drawing pathway lines, shadows, or curtains with markers before letting everything dry.
Watch videos on how to add details to your paper architecture
How to Make a Simple 3D Paper House - Paper Skills | Zart Art
4 Videos
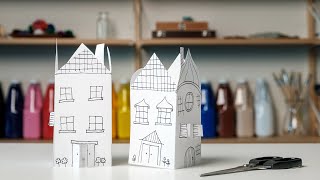
How to Make a Simple 3D Paper House - Paper Skills | Zart Art
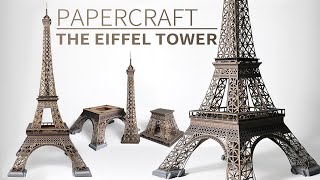
How to make this papercraft of The Eiffel Tower | DIY | Paper model | Architecture
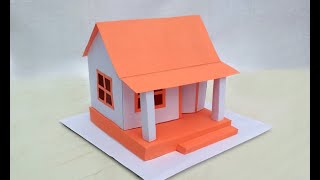
How to make paper house | Easy paper house making
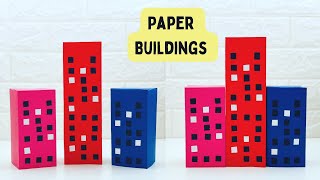
How To Make Easy Paper Building For Kids / Paper Skyscraper / Paper Craft Easy / KIDS crafts
Facts about paper model-making
🏛️ Architects often build scale models (common scales: 1:50 or 1:100) to study proportions and layouts.
✂️ Papercraft can produce highly detailed structures—some artists make life-sized installations using only paper and glue.
📐 Model-makers use everyday items (sponge bits, painted salt, torn paper) to create realistic miniature landscaping.
♻️ Recycling one ton of paper can save roughly 17 mature trees, plus significant water and energy.
🌱 The word "origami" means "folding paper" in Japanese and inspires many paper-modeling techniques.
How do I decorate and enhance a paper building model with added details?
What materials do I need to add details to a paper architecture project?
What ages is this paper architecture decorating activity suitable for?
What are the benefits of adding details to paper architecture?
