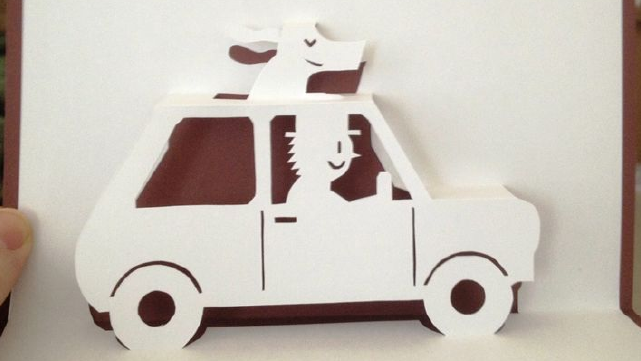
Show Us Your Pop Up Vehicles
Build pop-up vehicles using paper, card, straws, and tape; design moving parts, decorate them, and demonstrate how your vehicle’s pop-up mechanism works.


Step-by-step guide to Show Us Your Pop Up Vehicles
Step 1
Gather all your materials on a clear table so you can reach everything easily.
Step 2
Draw a car body shape and a rectangle for the base on the card using your pencil so you have shapes to cut.
Step 3
Cut out the car body and the rectangular base with scissors to make your vehicle pieces.
Step 4
Fold the rectangular base lengthwise to make a sturdy chassis for the wheels and pop-up parts.
Step 5
Cut two small slits near the front and back edges of the folded base to make slots for the axles.
Step 6
Cut two straws to match the width of the base and cut four wheel circles from card to prepare axles and wheels.
Step 7
Tape one wheel to each end of the two straws so each straw becomes an axle with two wheels.
Step 8
Push the straw axles through the slits so the wheels sit outside the folded base.
Step 9
Tape the straw ends under the base so the axles do not slide out and the wheels can roll.
Step 10
Cut a long strip of paper and fold it into a V or accordion fold to make a pop-up arm that will move.
Step 11
Tape the bottom of the pop-up arm inside the car base so it is anchored and can spring up.
Step 12
Attach a small paper driver or decoration to the top of the pop-up arm so it becomes the part that pops up.
Step 13
Decorate the car body and the pop-up figure with colouring materials to make your vehicle look awesome.
Step 14
Test the wheels and the pop-up by rolling the car and gently pressing the pop-up arm, then tweak any tape or folds so it works smoothly.
Step 15
Share a photo or video of your finished pop-up vehicle and explain how its pop-up mechanism works on DIY.org
Help!?
I can't find plastic straws or thick card—what can I use instead?
Use wooden skewers or thin dowels as axles instead of straws and repurpose a cereal box or shoe-box cardboard for the car body, rectangular base, and wheel circles so you can still cut and fold the pieces.
My wheels won't roll or the straw axles keep sliding out—how do I fix that?
Make the slits in the folded base snug, trim the straw or skewer ends so tape holds flush, and secure the taped straw ends under the base with extra tape or a dab of glue so the wheels can spin freely.
How can I change the activity for different age groups?
For younger children, pre-cut the car body, rectangular base, and wheel circles and let them fold, tape, and decorate, while older kids can try more complex pop-up arms (V vs accordion), sturdier dowel axles, larger wheels, or multiple moving parts after cutting the base.
What's a fun way to enhance or personalize our pop-up vehicle?
Add a second pop-up arm for a passenger, swap the paper wheels for bottle caps or reinforced cardboard discs, paint the car body, or attach a rubber-band wind-up to the axle taped under the folded base so the car can roll on its own.
Watch videos on how to Show Us Your Pop Up Vehicles
Pop-Up Tutorial 1 - Introduction - Materials and Basic Theory
4 Videos
Pop-Up Tutorial 1 - Introduction - Materials and Basic Theory

【Pop-Up Tutorial 11】Car /車・ ポップアップカード/card/作り方
How To Make Pop up Cars | DIY Flower Pop up Card

5 EASY POP UP CARDS THAT ANYONE CAN MAKE | Tutorial On How To DIY An Interactive Card
Facts about paper engineering and pop-up mechanisms
📚 The idea of movable paper parts goes back to medieval "volvelles" — rotating paper discs used in manuscripts as early as the 13th century.
✂️ Modern pop-up artists like Robert Sabuda and Matthew Reinhart helped revive and popularize intricate paper-engineered books for kids.
♻️ Cardboard is one of the easiest materials to recycle and repurpose, which makes it a favorite for building sturdy DIY vehicles.
🧠 Simple mechanisms — tabs, hinges, cams and levers — can turn a single push into a surprising pop-up motion in your vehicle.
🥤 Everyday straws can act as low-friction axles for lightweight wheels, perfect for homemade moving toy vehicles.
How do I build a pop-up vehicle for the "Show Us Your Pop Up Vehicles" activity?
What materials do I need to make pop-up vehicles?
What ages is the pop-up vehicle activity suitable for?
What are the benefits and safety tips for making pop-up vehicles?
