Add Details to Your Pop Up Buildings
Decorate and add details to paper pop-up buildings using colored paper, markers, stickers, and craft materials to create textured facades and miniature scenes.
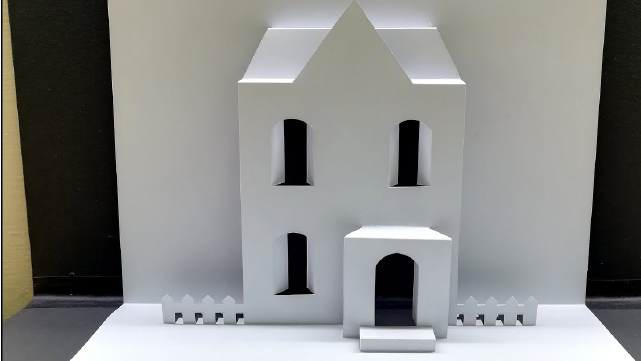
About this activity
Decorate and add details to paper pop-up buildings using colored paper, markers, stickers, and craft materials to create textured facades and miniature scenes.
What you need
Step by step
- 1
Step 1
Gather all the materials from the list and place them on a flat table.
- 2
Step 2
Clear a clean workspace and lay down a protective scrap paper or placemat.
- 3
Step 3
Look closely at your pop-up building and choose a style or theme for it.
- 4
Step 4
Use a pencil to lightly mark where you want windows doors awnings and other features.
- 5
Step 5
Cut colored paper into shapes for windows doors trim and signs.
- 6
Step 6
Glue the colored paper shapes onto the building where you penciled them.
- 7
Step 7
Tear small pieces of tissue paper or fabric and glue them to create textured walls or roof patches.
- 8
Step 8
Use markers or coloring materials to draw bricks roof tiles shutters and fine details.
- 9
Step 9
Fold a strip of colored paper to make a 3D awning or balcony edge.
- 10
Step 10
Attach the folded awning or balcony to the building with glue or double-sided tape.
- 11
Step 11
Make tiny street items like planters trees or signs from scrap paper yarn or stickers.
- 12
Step 12
Stick stickers onto the building to add fun decorations and characters.
- 13
Step 13
Smooth all glued edges press things firmly and trim any extra paper for a neat finish.
- 14
Step 14
Share your finished pop-up building on DIY.org
Fun facts
How do I add details to my pop-up buildings?
Start by planning each facade—sketch windows, doors, and rooflines on the building template. Layer colored paper cut into bricks, shingles, or siding, gluing edges to create depth. Use markers for trim, shadows, and tiny signs. Add stickers or die-cut windows, and glue on textured scraps like felt, foam, or yarn for vines and awnings. Finish inside with miniature scenes (trees, benches) and let glue dry fully. Supervise cutting and small parts.
What materials do I need for decorating pop-up buildings?
Gather cardstock or pre-made pop-up templates, colored paper, scissors and an adult craft knife, glue stick and liquid craft glue, double-sided tape, markers and colored pencils, stickers, textured scraps (felt, foam), washi tape, yarn, sequins or beads for accents, and a ruler and cutting mat. Household substitutes (magazine clippings, fabric scraps) work fine. Keep small parts away from very young children.
What ages is this pop-up building activity suitable for?
This activity suits many ages: preschoolers (3–5) can decorate with paper stickers and markers with close adult help. Ages 6–8 can cut simple shapes and layer paper with supervision for scissors. Ages 9–12 work independently on finer details and 3D textures. Teens can design complex miniature scenes and use a craft knife. Adjust tool access and complexity to the child’s motor skills and attention span, and always supervise sharp tools.
What are the benefits of decorating pop-up buildings?
Decorating pop-up buildings boosts fine motor skills, spatial reasoning, and planning as kids layer textures and compose facades. It encourages storytelling, color sense, and creativity while practicing patience and following steps. Working with varied materials also offers sensory play and early engineering thinking (tabs, supports). It’s great for collaborative family projects and can be adapted for lessons about architecture, history, or community.
Watch & Learn
Need help?
What can I use if I don't have double-sided tape or tissue paper?
Use a glue stick or white craft glue (or small folded paper tabs) instead of double-sided tape, and replace tissue paper with thin napkins, crepe paper, or lightweight fabric scraps when making textured walls or roof patches.
My 3D awning keeps folding flat or glued edges wrinkle—how do I fix that?
Score the strip lightly with the blunt side of a knife before folding, use thicker cardstock for the awning, apply a thin line of glue and hold with a clothespin until dry, and follow 'Smooth all glued edges' to press and trim any excess for a neater finish.
How can I adapt the activity for younger or older children?
For younger kids, pre-cut the colored paper shapes, use glue sticks and larger stickers and let them tear big tissue pieces, while older children can use rulers and X‑Acto knives for precise 'Cut colored paper into shapes', add stitched fabric patches, and draw more detailed bricks and roof tiles with fine markers.
How can we enhance or personalize our pop-up building once the basic details are added?
Add battery tea-lights behind cut-out windows, glue yarn for clotheslines, create movable doors with folded paper hinges, build a street base and 'Make tiny street items' like planters and trees, and finish by photographing your work to share on DIY.org.