Show Your Paper Architecture Material
Build a small paper building model using different paper types, glue, and simple tools. Test strength, decorate surfaces, and display your design.


Step-by-step guide to Show Your Paper Architecture Material
Step 1
Gather all materials and clear a flat workspace so you have room to build.
Step 2
Draw a simple floor plan on scrap paper showing where the walls doors and windows will go.
Step 3
Cut a rectangle from cardstock to make the building base.
Step 4
Measure and draw wall panels on your chosen paper using the ruler and pencil.
Step 5
Cut out each wall panel carefully along the lines.
Step 6
Fold small tabs along the edges of each wall panel so they can be glued.
Step 7
Glue the wall panels together at their tabs to form the building's walls.
Step 8
Glue the bottom tabs of the walls to the base to secure the walls in place.
Step 9
Cut a roof shape from cardstock sized to sit on top of your walls.
Step 10
Glue the roof onto the top of the walls so it stays in place.
Step 11
Place small coins or tiny toys on the roof to test how much weight your building holds.
Step 12
Reinforce any bending or weak spots by gluing thin strips of paper across joints or under the roof.
Step 13
Decorate the outside and inside of your building with coloring materials and extra paper details.
Step 14
Put your finished paper building on a spot where everyone can see your design.
Step 15
Share a photo or description of your finished paper building on DIY.org
Help!?
What can we use instead of cardstock or white glue if we don't have them?
Use cereal boxes or thin cardboard for the base and roof and replace white glue with double-sided tape, a glue stick, or clear tape when joining tabs and attaching the roof.
My walls keep coming apart or wobbling — how can I fix that?
Carefully re-crease and press the tabs, add more glue and hold joints with clothespins or heavy books until dry, and reinforce weak seams by gluing thin strips of paper across the inside joints as in the reinforce step.
How can I adapt this paper building activity for younger kids or older kids?
For younger children, pre-draw and pre-cut the wall panels and use tape to join tabs, while older kids can do full measuring and cutting, design detailed floor plans, and perform the coin weight test for structural testing.
What are some ways to make the building more interesting or stronger?
Add cut-out doors and furniture from scrap paper, glue extra strips under the roof and across joints for strength, decorate inside and out with paint or collage, and display or photograph the final design to share on DIY.org.
Watch videos on how to Show Your Paper Architecture Material
How to Make a Simple 3D Paper House - Paper Skills | Zart Art
4 Videos
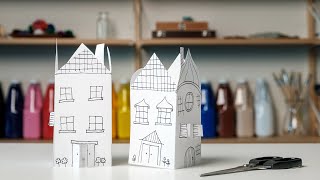
How to Make a Simple 3D Paper House - Paper Skills | Zart Art
How to make Paper Building -- school project work
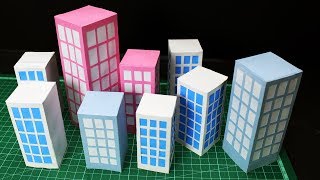
How To Make Easy Paper Building For Kids / Paper Skyscraper / Paper Craft Easy / KIDS crafts
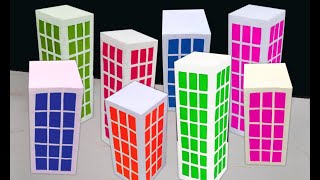
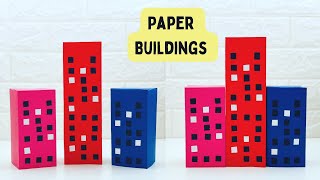
how to make building out of paper - paper building - paper house making
Facts about paper engineering and model making
📄 Paper as we know it was developed in China around the 2nd century CE and changed how people recorded ideas.
🏛️ Architects have used scale models for centuries to test proportions and present ideas—some ancient models are museum pieces today.
📦 Corrugated cardboard is strong because of its wavy middle layer, so layering paper or using corrugated pieces makes tougher models.
🧪 Simple strength tests—like pressing, hanging small weights, or gently shaking—quickly show which joints and glues are strongest.
🎨 Using light washes of paint, patterned paper, or tiny decals can make a small paper building look much more detailed and realistic.
How do you build a small paper building model for the Show Your Paper Architecture activity?
What materials do I need for the Show Your Paper Architecture activity?
What ages is the Show Your Paper Architecture activity suitable for?
What are the benefits and safety tips for the Show Your Paper Architecture activity?
