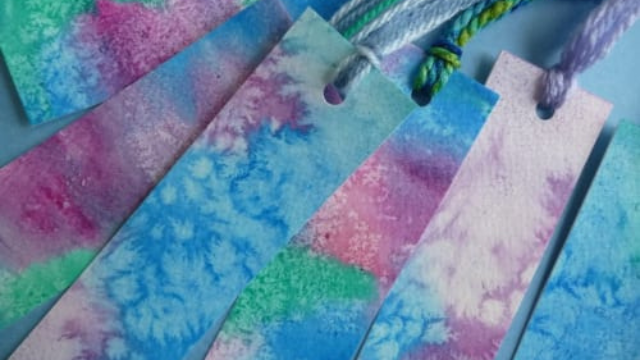
Make tie-dye bookmarks with CookieKoo
Make colorful tie-dye bookmarks with CookieKoo using washable markers, twisting and spraying water, then drying to create unique designs for your books.


Step-by-step guide to make tie-dye bookmarks with CookieKoo
Step 1
Spread the tray or a layer of paper towels on your table to protect it.
Step 2
Use the CookieKoo to cut out a bookmark shape from the cardstock.
Step 3
Pick 3 to 5 washable marker colors you want to use for your tie-dye.
Step 4
Press the first marker tip onto the bookmark and twist the marker in a small circle to make a swirly color spot.
Step 5
Repeat the twisting motion with each other color, placing spots across the bookmark and leaving tiny white spaces between colors.
Step 6
Hold the spray bottle about 6 to 8 inches away and lightly mist the bookmark until the colors look wet but not dripping.
Step 7
Gently dab the wet areas with a paper towel to help the inks spread and soften into a tie-dye look.
Step 8
Lay the bookmark flat on the tray and let it dry completely.
Step 9
Write your name or a fun message on the back of the bookmark with a marker.
Step 10
Share your finished colorful tie-dye bookmark on DIY.org.
Help!?
What can I use if I don't have a CookieKoo to cut the bookmark from cardstock?
If you don't have a CookieKoo, use scissors or a craft punch to cut the bookmark shape from cardstock before you pick your washable marker colors.
My colors aren't spreading or they're soaking through—what should I try?
If the inks puddle or soak through the cardstock, hold the spray bottle farther than 6-8 inches, mist more lightly, and gently dab excess moisture with a paper towel to help the inks spread without dripping.
How can I adapt this bookmark tie-dye activity for different ages?
For younger kids have an adult pre-cut the cardstock with the CookieKoo, limit to 2 washable marker colors, and let the grown-up mist and dab with the spray bottle and paper towel, while older kids can use 4-5 colors, tighter swirls, and experiment with placement of spots.
How can we make the finished bookmark last longer or add a personal touch?
After the bookmark dries, write your name on the back with a marker, punch a hole and add a yarn tassel, or laminate the cardstock to make the tie-dye bookmark more durable before sharing it on DIY.org.
Watch videos on how to make tie-dye bookmarks with CookieKoo
DIY Tie-Dye Fun 🌈 Easy Tutorial + Donation Inspiration!
4 Videos
DIY Tie-Dye Fun 🌈 Easy Tutorial + Donation Inspiration!
Amazing tie dye tutorial / quick & easy
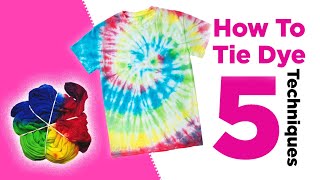
How to Tie-Dye at Home Like a Pro - Try These 5 Easy Techniques!
Ice Dyeing 101 | How to Ice Dye Tie-Dye for Beginners Featuring 3 Techniques
Facts about paper crafts for kids
🎨 Tie-dye isn't new — ancient techniques like Japanese shibori and Indian bandhani have been used for centuries.
📚 The earliest bookmarks were simple strips of leather or parchment used to mark places in medieval manuscripts.
💧 Spraying water on washable markers makes the ink spread because capillary action pulls the color through the paper.
🧪 Watching marker colors separate on paper is a basic form of chromatography — scientists use the same idea to separate pigments.
☕ Lightweight papers like coffee filters make great tie-dye bookmarks because they soak up and blend marker colors beautifully.
How do I make tie-dye bookmarks with CookieKoo?
What materials do I need for tie-dye bookmarks with CookieKoo?
What ages is this activity suitable for?
What are some fun variations and finishing tips for tie-dye bookmarks?
