Draw Customers and Buttons on Scratch
Design and code cartoon customers and interactive buttons in Scratch, learning sprite drawing, costumes, and simple click events to control actions.


Step-by-step guide to Draw Customers and Buttons on Scratch
Step 1
Open Scratch and start a new project.
Step 2
Delete the cat sprite by right-clicking it and choosing Delete.
Step 3
Click the Paint new sprite button and name this sprite "Customer".
Step 4
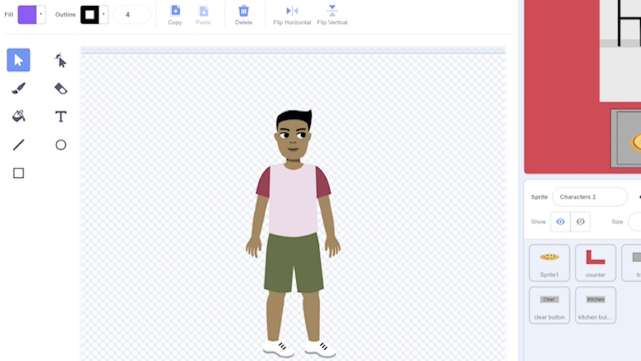
In the Costumes tab draw a colorful happy cartoon customer using the paint tools.
Step 5
Duplicate that costume and edit it to make a second costume with a different expression.
Step 6
Add a script to the Customer: use the "when green flag clicked" block and set the costume to the happy costume.
Step 7
Add another script to the Customer: use the "when this sprite clicked" block and add "next costume" and "start sound [pop]" blocks.
Step 8
Click the Paint new sprite button again and name this sprite "Serve Button".
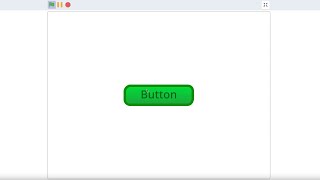
Step 9
Draw a bright button costume then duplicate it and edit the copy to make a pressed-button costume.
Step 10
Add this script to the Serve Button: "when this sprite clicked" then "broadcast [serve]" then switch to the pressed costume wait 0.2 seconds switch back to the normal costume.
Step 11
Add this script to the Customer: "when I receive [serve]" then "say [Yum!] for 2 seconds" then "change y by -20" wait 0.5 seconds "change y by 20" to show a little hop.
Step 12
Click the green flag and test by clicking the Serve Button and the Customer to check the costumes sounds and reactions.
Step 13
Save your Scratch project to your Scratch account.
Step 14
Share your finished creation on DIY.org.
Help!?
What can we use if we can't access Scratch online or don't have the 'pop' sound?
Use the free Scratch Desktop/offline editor and still click the Paint new sprite button to make the 'Customer' and import or record a replacement 'pop' sound in the Sounds tab.
The Customer doesn't react when I click the Serve Button—what should I check?
Make sure the Serve Button broadcasts the message exactly named 'serve' (matching the Customer's 'when I receive [serve]' block) and that the Customer has the hop script with 'say [Yum!] for 2 seconds' then 'change y by -20' and 'change y by 20'.
How can I change the activity for different ages?
For younger kids skip duplicating costumes and use the Serve Button's 'when this sprite clicked' to directly make the Customer say and hop, while older kids can add a 'score' variable, a timer, multiple Customer sprites, and randomized costumes.
How can we extend or personalize our Scratch project after finishing the basic steps?
Add extra Customer costumes and sprites with different expressions, use the Sounds tab to add varied eating noises, create a score that increases when the Serve Button broadcasts 'serve', then save to your Scratch account and share on DIY.org.
Watch videos on how to Draw Customers and Buttons on Scratch
How to make a Simple Button in Scratch | Scratch Tutorial!
4 Videos
How to make a Simple Button in Scratch | Scratch Tutorial!

Scratch Button Tutorial | How to make the BEST Buttons!
How to Program Buttons in Scratch
Scratch Basics - A Beginners Guide to Scratch
Facts about Scratch programming
🐱 Scratch's default sprite is a smiling cat — it's been the friendly face of Scratch since it was launched by the MIT Media Lab in 2007.
🎨 In Scratch, each sprite can have multiple costumes so you can animate characters by switching costumes like flipbook frames.
🖱️ Click events in Scratch are examples of event-driven programming — sprites run scripts when clicked or when keys are pressed.
🧩 Buttons in Scratch are often just sprites with scripts attached — one click can change scenes, trigger sounds, or control games.
🕹️ Designing cartoon customers teaches both art and logic: drawing costumes builds visuals while scripts create interactive behavior.
How do I create cartoon customers and clickable buttons in Scratch?
What materials do I need for the Draw Customers and Buttons project?
What ages is this Scratch activity suitable for?
What are the benefits of designing customers and buttons in Scratch?
