It's Mini Hovercraft Time!
Build a small, safe hovercraft using a CD, balloon, and bottle cap. Test movement over smooth surfaces and learn about air cushion physics.


Step-by-step guide to build a mini hovercraft
Step 1
Gather all the materials and put them on a clean table so everything is ready.
Step 2
Ask an adult to make a small centered hole in the bottle cap using a pin or pushpin.
Step 3
Wipe the center of the CD to remove dust so the seal will stick better.
Step 4
Place the bottle cap over the CD center hole with the cap hole facing downward toward the CD.
Step 5
Press tape around the cap edge and across the seam to make a tight airtight seal between the cap and the CD.
Step 6
Stretch the balloon neck a few times to make it stretchy and easier to inflate.
Step 7
Inflate the balloon until it is firm but not overfilled and pinch the neck closed so air does not escape.
Step 8
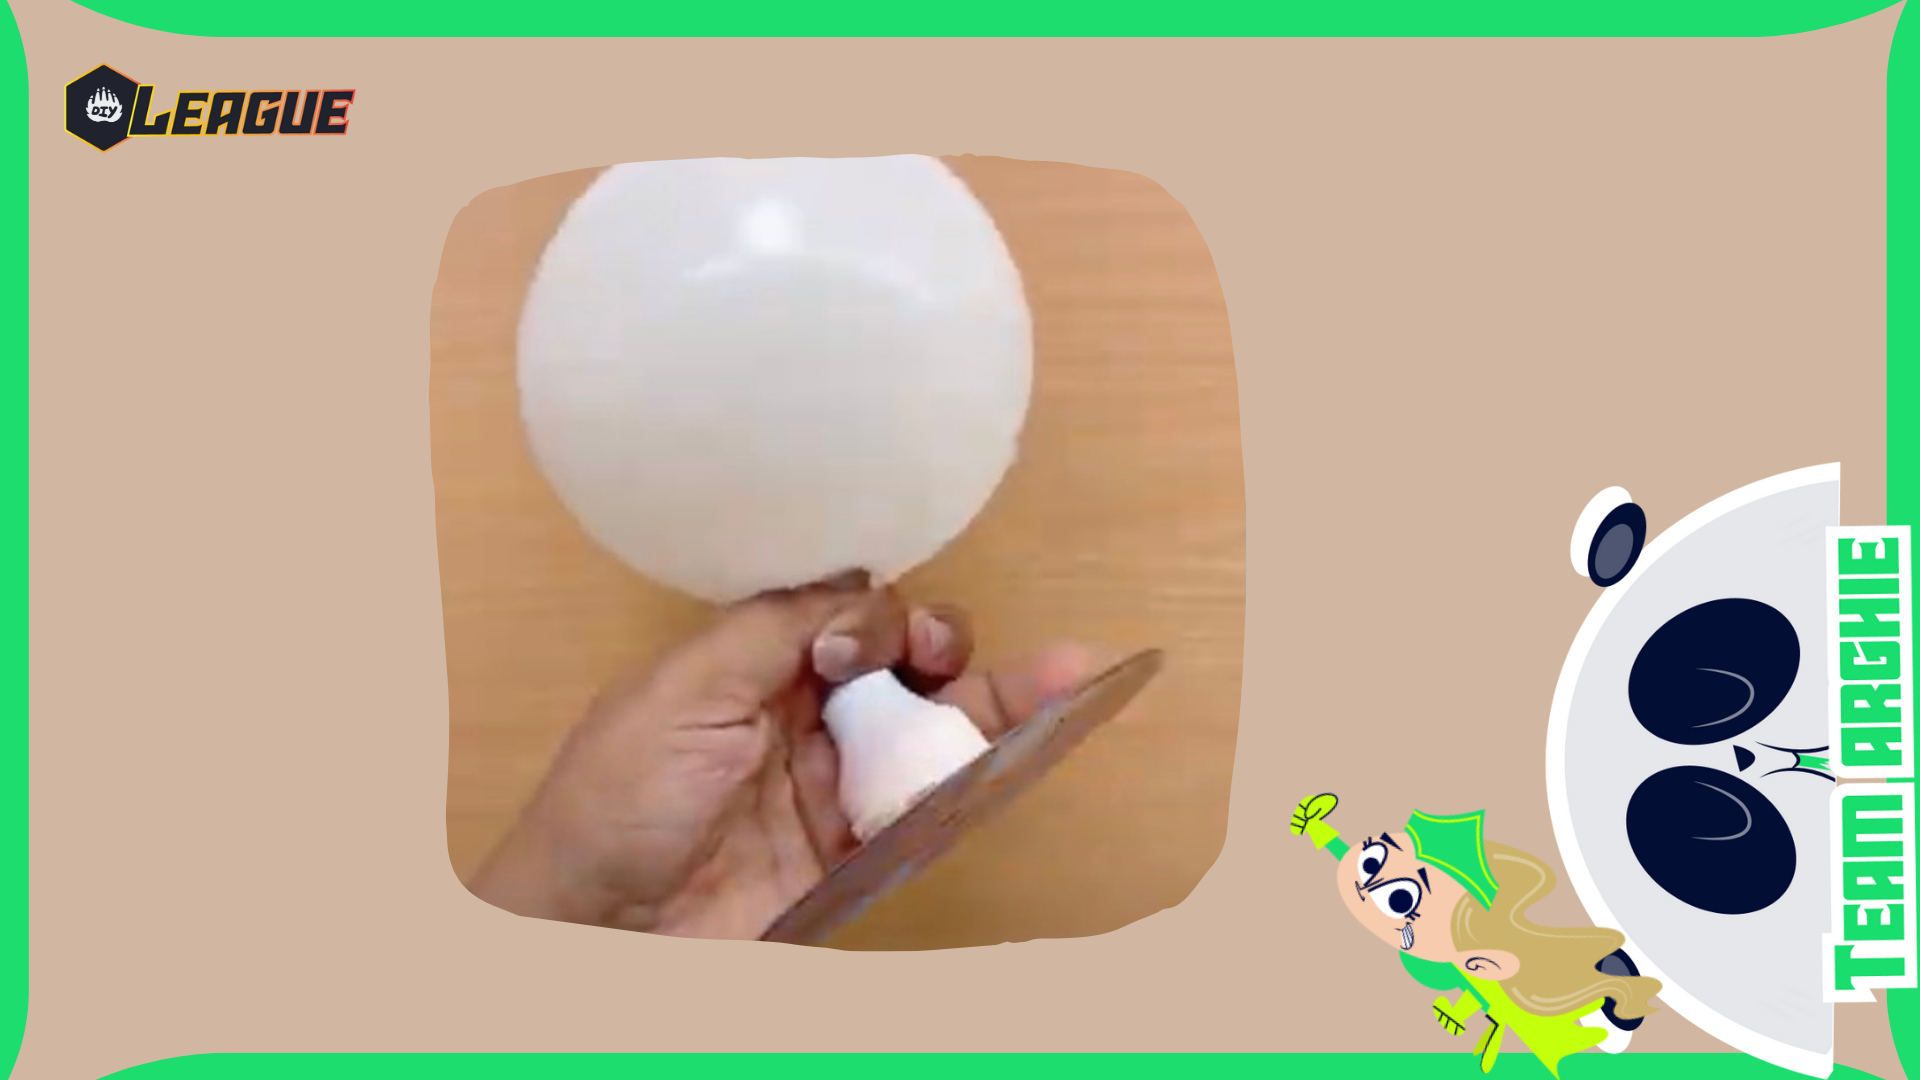
While still pinching the neck, stretch the balloon opening down over the bottle cap so the balloon sits snugly on the cap.
Step 9
Put the CD hovercraft on a smooth flat surface while you keep the balloon neck pinched.
Step 10
Release the balloon neck so air flows through the cap hole and watch the CD hover on an air cushion.
Step 11
Gently push the hovercraft to test how it glides and try it on other smooth surfaces to see what changes.
Step 12
Share a photo or description of your finished hovercraft and what you observed on DIY.org.
Help!?
What can we use if we don't have a CD, bottle cap, or pushpin?
If you don't have a CD use a smooth rigid plastic lid of similar size, if you lack a bottle cap try a small plastic jar lid, and an adult can use a small nail instead of a pushpin to make the centered hole before following the wipe-and-tape sealing step.
My hovercraft won't lift or keeps leaking air—what should I check?
Make sure an adult made a small centered hole in the bottle cap (not too big), you wiped the CD center and pressed tape tightly around the cap edge and across the seam for an airtight seal, and that the balloon neck is stretched and sitting snugly over the cap before release.
How can we adapt this activity for younger children or make it more challenging for older kids?
For younger children have an adult pre-poke and tape the cap to the CD and help fit the balloon, while older kids can inflate the balloon themselves and experiment with different balloon sizes, hole sizes, and smooth surfaces to study glide differences.
How can we extend or personalize the hovercraft once it's working?
Decorate the CD with markers or stickers, tape a lightweight toy on top, and (with adult help) try slightly changing the cap hole size to observe how hover height and glide change.
Watch videos on how to build a mini hovercraft
HOW TO MAKE A HOVERCRAFT Easy Kids Science Experiments
4 Videos
HOW TO MAKE A HOVERCRAFT Easy Kids Science Experiments
Let's Make Your Own Hovercraft | Smart Science | Da Vinci Kids
We Built Our Own DIY Hovercraft | KiwiCo
How to make a EASY Hovercraft
Facts about air cushion physics
🚀 The first practical hovercraft was built in 1955 by Christopher Cockerell.
💨 Hovercraft ride on a very thin layer of air—just millimeters thick—to glide with almost no friction.
🎈 A blown-up balloon stores the air pressure that powers many simple DIY hovercrafts.
💿 A compact disc works great as a hovercraft base because it's flat, lightweight, and has a center hole for a nozzle.
🧪 Mini hovercrafts are a fun way to see Newton's third law in action: pushing air backward makes the craft move forward.
How do you build a mini hovercraft from a CD, balloon, and bottle cap?
What materials are needed for a mini CD hovercraft?
What ages is the mini hovercraft activity suitable for?
Is building a mini hovercraft safe and what precautions should I take?
