Craft a Bunny!
Make a cute paper bunny using colored paper, scissors, glue, and markers. Practice cutting, folding, and decorating simple shapes to create ears, face, and tail.


Step-by-step guide to craft a paper bunny
Step 1
Gather all the Materials Needed and put them on a clear workspace.
Step 2
Pick one sheet of colored paper to be the bunny's body.
Step 3
Use your pencil to draw a large oval on the chosen sheet for the body.
Step 4
Cut out the oval carefully with scissors.
Step 5
Take a second sheet of colored paper and fold it in half.
Step 6
Draw one long ear shape along the folded edge with your pencil.
Step 7
Cut the ear shape while the paper is folded to make two matching ears.
Step 8
Choose a third sheet and draw a smaller circle with your pencil for the bunny's face.
Step 9
Cut out the smaller circle for the face.
Step 10
Glue the face circle onto the top center of the oval body.
Step 11
Glue the two ears behind the face so they stick up above the head.
Step 12
Use colouring materials to draw eyes a nose and a mouth on the face.
Step 13
Glue a cotton ball to the back of the oval as a fluffy tail.
Step 14
Add extra decorations like spots bows or patterns on the body using colouring materials.
Step 15
Take a photo of your finished bunny and share your creation on DIY.org.
Help!?
If I don't have cotton balls or colored paper, what can I use instead?
Use a white pom‑pom, a crumpled piece of tissue paper, or a small scrap of batting glued to the back of the oval for the tail in place of the 'Glue a cotton ball' step, and color plain printer paper or use a brown paper bag sheet for the body and face.
My ears came out uneven or tore while cutting — how can I fix that?
Refold the second sheet along the folded edge, re‑trace one long ear on the fold, and cut slowly with sharper safety scissors so both ears match and stay intact before gluing them behind the face as directed.
How can I adapt this bunny craft for different age groups?
For toddlers (2–4) pre‑cut the oval, face, and ears and let them glue and decorate, for preschool/early elementary (4–7) supervise cutting and gluing, and for older kids (8+) let them design patterns, add pipe‑cleaner whiskers or sequins, and photograph the finished bunny to share on DIY.org.
What are some ways to make the bunny more special or durable?
Make the bunny sturdier and more personal by using cardstock for the body, adding googly eyes or pipe‑cleaner whiskers, attaching the ears with a paper fastener so they move, and decorating with ribbon, sequins, or fabric scraps before taking the photo to share on DIY.org.
Watch videos on how to craft a paper bunny
Cute Paper Rabbit | How to make rabbit with paper | Easy paper rabbit craft Ideas | Paper craft
4 Videos
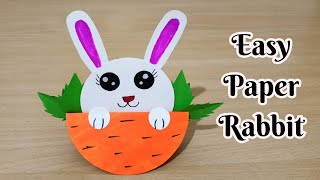
Cute Paper Rabbit | How to make rabbit with paper | Easy paper rabbit craft Ideas | Paper craft
Origami Rabbit 🐇 | Easy Paper Bunny Tutorial | DIY Paper Craft for Beginners

Origami Paper Rabbit🐰/How to make Paper Bunny/Step by Step Tutorial for Kids #diy #origami
DIY Origami Cute Paper 🐇Rabbit/ Bunny |Fun paper toy craft for kids #diy #origami #rabbit #ytshort
Facts about paper crafts
🐰 Rabbits' front teeth never stop growing, so they nibble a lot to keep them the right length!
📄 Origami traditionally uses only folding (no cuts or glue), while papercraft lets you cut and glue — great for bunnies with fluffy tails!
✂️ Cutting and gluing help build fine motor skills and hand-eye coordination in kids.
🎨 Decorating your paper bunny with markers and patterns is a fun way to practice creativity and storytelling.
♻️ Many craft papers can be recycled or upcycled — using scraps makes crafting kinder to the planet.
How do I make a cute paper bunny craft with my child?
What materials do I need to craft a paper bunny?
What ages is this paper bunny craft suitable for?
What are the benefits and safety tips for making a paper bunny?
