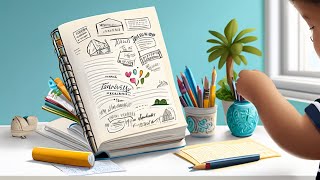
Make a Digital Travel Journal
Create a digital travel journal using a tablet or computer, adding photos, drawings, maps, and short notes to document trips and memories.


Step-by-step guide to make a digital travel journal
Step 1
Pick which app or program you want to use for your digital travel journal.
Step 2
Create a new journal file or project in that app.
Step 3
Choose a fun title for your travel journal.
Step 4
Make a cover page and add your title on it.
Step 5
Import or add photos from your trip into the journal.
Step 6
Write a short caption or note for each photo explaining the memory.
Step 7
Insert a map image or screenshot of the place you visited.
Step 8
Use the drawing tool to mark the route or place you visited on the map.
Step 9
Draw a small picture or doodle that shows your favorite moment from the trip.
Step 10
Add the date and location name to each page or entry.
Step 11
Rearrange the pages so the trip is in the order it happened.
Step 12
Add stickers colors or other decorations to make your journal lively.
Step 13
Save or export your finished journal to your device.
Step 14
Share your finished digital travel journal on DIY.org.
Help!?
What can we use if we don't have the chosen app, original photos, or a map screenshot?
If you don't have the chosen app or original photos, use Google Slides, PowerPoint, or Canva to 'Create a new journal file', import phone photos or scanned printed pictures for the 'Import or add photos' step, and either take a Google Maps screenshot or draw and import your own image for 'Insert a map image'.
My photos won't import or the drawing tool isn't available—what should we try to fix it?
If photos won't import or the drawing tool is missing, convert images to smaller JPG files before 'Import or add photos', update or switch the app, or draw in a simple paint app, save that drawing, then import it to complete the 'Use the drawing tool' step and finally 'Save or export your finished journal' to test the result.
How can we adapt this activity for a 5-year-old versus a 12-year-old?
For younger kids (around 4–6), use a simple drag-and-drop app like Google Slides to 'Create a new journal file', keep pages short with stickers and voice-recorded captions instead of long text, while older kids can write detailed captions for each photo, precisely 'Use the drawing tool' to mark routes on the 'Insert a map image', rearrange pages in order, and prepare a PDF to 'Share your finished digital travel journal on DIY.org'.
What are some ways to extend or personalize the travel journal beyond the basic steps?
Enhance the journal by embedding short video clips or voice notes when you 'Import or add photos', add interactive Google Maps links on the 'Insert a map image', scan and import original doodles for 'Draw a small picture', use custom sticker sets and color themes for 'Add stickers colors or other decorations', and export multiple formats in 'Save or export' to print or share on DIY.org.
Watch videos on how to make a digital travel journal
Creating Travel Journals for Kids: Foster Creativity, Capture Memories, and Keep it Fun!
4 Videos
Creating Travel Journals for Kids: Foster Creativity, Capture Memories, and Keep it Fun!

🌸 how to complete a travel journal // flip through + easy tips & spread ideas

How Do I Create A Travel Journal For Kids? - The Family Getaway Guide

How to Keep a Digital Travel Journal (+ Free Notion Template)
Facts about digital journaling for kids
📸 Most photos today are taken with phones and tablets — you can build an entire travel journal from your device's camera!
🗺️ Google Maps debuted in 2005, and modern digital maps make it easy to mark, screenshot, or embed routes in your journal.
🧭 Geotagging adds location data to photos so you can remember the exact spot where each memory happened.
✍️ Writing about a trip soon after it happens helps you remember more vivid details — journaling boosts memory!
🎨 Digital journals let you mix photos, drawings, stickers, and maps without glue or scissors — endless creative decorating!
How do I make a digital travel journal with my child?
What materials do I need to make a digital travel journal?
What ages is a digital travel journal suitable for?
What are the benefits and safety tips for making a digital travel journal?
