Chibi Minecraft Characters w/ DIY Star ChibiWiz2020
Create chibi-style Minecraft characters from paper or clay and make a matching DIY star accessory, learning simple drawing, cutting, and decorating techniques.

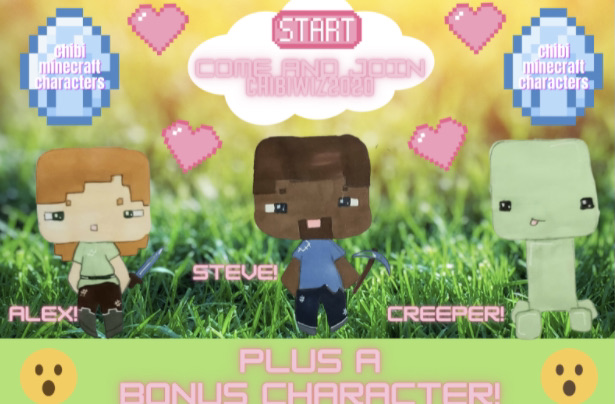
Step-by-step guide to make Chibi Minecraft characters with a DIY star (ChibiWiz2020)
Step 1
Gather all your materials and set them on a clean table so everything is ready and close by.
Step 2
Decide if you will make your chibi from paper or from clay.
Step 3
Pick a Minecraft character to turn into a chibi and choose two main colors for its outfit.
Step 4
(Paper) Draw a square head and a small rectangular body on your chosen paper.
Step 5
(Paper) Add simple rectangular arms and short legs to your paper body.
Step 6
(Paper) Draw big cute eyes and a tiny mouth on the head to make it chibi-style.
Step 7
(Paper) Carefully cut out all your paper pieces with scissors.
Step 8
(Paper) Glue the head the body and the limbs together to assemble your paper chibi.
Step 9
(Clay) Roll and shape a cube head and a smaller rectangular body from clay if you chose clay.
Step 10
(Clay) Make small clay cylinders for arms and legs and press them onto the body.
Step 11
(Clay) Use a toothpick or clay tool to add eyes a mouth and hair or helmet details then smooth the edges.
Step 12
Make a matching star accessory from the same material and colors you used for your chibi and decorate it.
Step 13
Attach the star to your chibi by gluing it on or pressing it into place and secure it gently.
Step 14
Share your finished chibi Minecraft character and matching star on DIY.org
Help!?
If I don't have modeling clay, what can I use to make the cube head and rectangular body?
Use crumpled aluminum foil to form a cube head and smaller rectangular body, wrap and shape it with masking tape, then cover with colored paper or air‑dry clay to follow the (Clay) rolling and shaping steps.
My clay arms keep falling off — how can I fix them so they stay attached?
Make small clay cylinders for arms and legs and either press them on and smooth the edges with a toothpick or a little water as in the (Clay) step, or insert a short toothpick into the body before attaching the arm for extra support.
How can I adapt this activity for different ages?
For preschoolers, pre‑draw and pre‑cut the square head and rectangular body and let them glue on sticker eyes for the (Paper) steps, for elementary kids have them draw and cut with safety scissors, and for older kids use polymer clay and add fine details with a toothpick before baking per the (Clay) instructions.
What are some ways to make my chibi and star more special or advanced?
Enhance your project by painting Minecraft pixel patterns onto the two main outfit colors, adding a tiny magnet when you attach the matching star so it becomes removable, or baking and sealing polymer clay for a glossy, durable finish as described in the (Clay) and star attachment steps.
Watch videos on how to make Chibi Minecraft characters with a DIY star (ChibiWiz2020)
How to Draw the Chibi Art Style - Fun Cute Characters - Full Tutorial
4 Videos

How to Draw the Chibi Art Style - Fun Cute Characters - Full Tutorial
How to draw chibis
Make your own Minecraft paper craft character using your own skin!
How to Chibi Yourself in Procreate ✏️ Step-by-Step Tutorial + Free Template
Facts about paper and clay crafts for kids
🟩 Minecraft has sold over 200 million copies worldwide, making it one of the best-selling video games ever!
🎀 Chibi style uses oversized heads and tiny bodies to make characters look extra cute and full of expression.
✂️ Papercraft can turn a single sheet of paper into a detailed mini figure with cutting, folding, and glue.
🧱 Polymer clay hardens when baked in a home oven, so your chibi clay characters can become sturdy keepsakes.
⭐ Crafting a matching star accessory helps practice symmetry, measuring, and fun decorating techniques.
How do you make Chibi Minecraft characters with a matching DIY star?
What materials do I need to make Chibi Minecraft characters and a DIY star?
What ages is this Chibi Minecraft craft suitable for?
What are the benefits, safety tips, or fun variations for the Chibi Minecraft Characters w/ DIY Star activity?
