What's your favorite tool in the Procreate brush studio?
Design your own Procreate brush in Brush Studio by adjusting settings, testing strokes on the canvas, and saving a custom brush for future drawings.

Step-by-step guide to design a custom Procreate brush in Brush Studio
Step 1
Open the Brush Library by tapping the brush icon at the top of the screen.
Step 2
Tap the plus + button at the top right to create a brand new custom brush.
Step 3
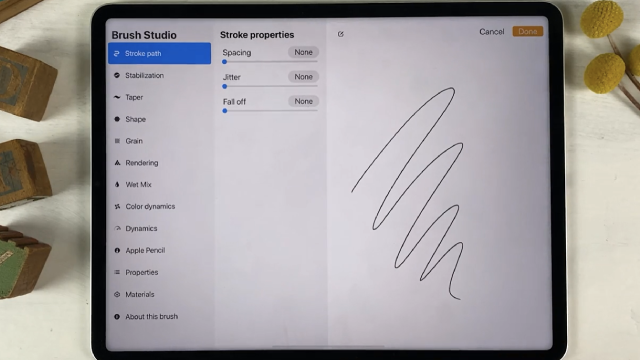
Tap Stroke Path and move the Spacing slider left or right to change how solid or dotted your strokes look.
Step 4
Tap Shape and pick a different shape from the list to change the brush tip outline.
Step 5
Tap Grain and slide the Scale slider to make the texture chunkier or smoother.
Step 6
Tap Rendering and choose a rendering mode like Normal or Glazed to change how the brush paint blends.
Step 7
Tap Apple Pencil and turn on Pressure for Size or Opacity so the brush reacts to how hard you press.
Step 8
Draw a few strokes in the test area at the bottom to see how your brush behaves.
Step 9
Go back to Stroke Path and increase the StreamLine slider if you want smoother wavy lines.
Step 10
Slide the Size slider at the top to set the base thickness of your brush.
Step 11
Tap the brush name at the top and type a fun name for your custom brush.
Step 12
Tap Done to save your new brush into your Brush Library.
Step 13
Share your finished custom brush and a sample drawing on DIY.org to show everyone your awesome creation.
Help!?
What can I use if I don't have an Apple Pencil to follow the instruction 'Tap Apple Pencil and turn on Pressure for Size or Opacity'?
If you don't have an Apple Pencil you can use your finger or a generic Bluetooth stylus to draw, but skip enabling Apple Pencil Pressure since pressure sensitivity won't be available and expect less variation in Size or Opacity.
Why do my strokes still look dotted after I 'Tap Stroke Path and move the Spacing slider' and how can I fix it?
If strokes stay dotted, move the Spacing slider further left in Stroke Path, increase the Size slider at the top so the tip overlaps more, and redraw in the test area to confirm the change.
How can I adapt this Procreate brush-studio activity for different ages?
For younger kids (5–8) simplify by only changing Shape and Size and drawing in the test area, while older kids (9+) can explore Grain Scale, Rendering modes, StreamLine, Apple Pencil Pressure, naming the brush, and sharing on DIY.org.
How can I enhance or personalize my custom brush beyond the basic steps listed?
Enhance your brush by importing a custom Shape or photo Grain in Shape/Grain, increase Grain Scale for texture, try Rendering modes like Glazed for blending, give it a fun name at the top, tap Done to save, and share the brush plus a sample drawing on DIY.org.
Watch videos on how to design a custom Procreate brush in Brush Studio
Every New Brush in Procreate 5.4 (Full Walkthrough)
4 Videos
Every New Brush in Procreate 5.4 (Full Walkthrough)
Make Your Own Procreate Brushes - A Beginners Guide
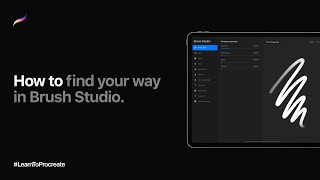
How to find your way with Brush Studio in Procreate
Procreate for Kids Tutorial // How to Use Procreate for Kids!
Facts about digital brush design
🎨 Procreate is a popular iPad app artists use for digital painting and illustration — it feels like drawing on paper but with endless tools.
🛠️ Brush Studio in Procreate lets you tweak shape, grain, rendering, dynamics and pressure response to build totally custom brushes.
✏️ Apple Pencil provides pressure and tilt input that Procreate uses to vary stroke thickness, opacity, and angle as you draw.
📥 You can import or create brush shapes and texture grains, so a single brush can stamp leaves, stars, or rough fabric patterns.
🌍 Procreate was created by Savage Interactive, a small Australian developer, and is used by hobbyists and professional artists worldwide.
How do I design my own Procreate brush in Brush Studio?
What materials do I need to design a Procreate brush?
What ages is designing a Procreate brush suitable for?
What are the benefits of designing custom brushes in Procreate?
