Build a Minecraft Mushroom House w/ DIY Star Eoinjordan
Build a Minecraft-style mushroom house model and create a DIY star ornament with Eoinjordan’s simple steps, using safe craft materials and tools.
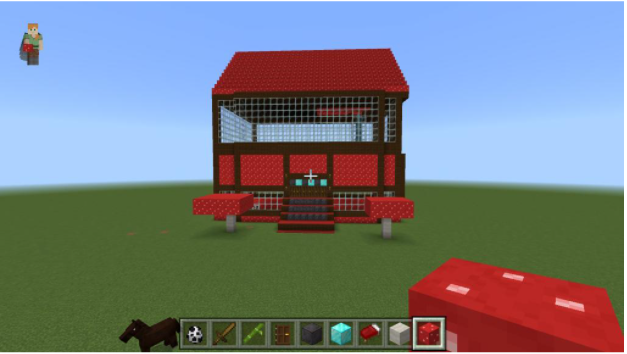
About this tutorial
Build a Minecraft-style mushroom house model and create a DIY star ornament with Eoinjordan’s simple steps, using safe craft materials and tools.
What you need
Step by step
- 1
Step 1
Gather all the materials and set them on a clean table so you can reach everything easily.
- 2
Step 2
Pick a small cardboard box to be your Minecraft mushroom house base.
- 3
Step 3
Use scissors to cut off the top flaps of the box so the roof edge is flat.
- 4
Step 4
Draw a large circle on the extra cardboard to make the mushroom cap.
- 5
Step 5
Cut out the circle carefully with scissors.
- 6
Step 6
Gently bend the cardboard circle into a shallow dome shape so it looks like a mushroom cap.
- 7
Step 7
Glue the dome onto the top of the box and press gently so it sticks.
- 8
Step 8
Use red paint or a red marker to make square pixel tiles all over the dome like Minecraft blocks.
- 9
Step 9
Add white spots to the cap using white paint or by gluing on white paper circles.
- 10
Step 10
Draw a Minecraft-style door and windows directly on the front of the box with markers.
- 11
Step 11
Cut a star shape from the extra cardboard to make your DIY star ornament.
- 12
Step 12
Decorate the star with colouring materials or paint and add fun patterns.
- 13
Step 13
Punch a small hole near the top of the star to make a place for hanging if needed.
- 14
Step 14
Attach a string or ribbon to the star to make a hanger.
- 15
Step 15
Share your finished Minecraft mushroom house and DIY star ornament on DIY.org
Fun facts
How do you build a Minecraft mushroom house and make the DIY star with Eoinjordan's steps?
Start by sketching a blocky mushroom house inspired by Minecraft: square base, cube walls, and a domed cap. Cut cardboard or foam into cubes for walls, stack and glue. Make a red roof by layering curved cardboard or foam, paint red and add white spots. Add a door, windows, and a small interior. For the DIY star, follow Eoinjordan’s simple steps: trace a star template on cardstock or foam, cut two shapes, glue together with a loop, decorate, and attach string to hang. Use child-safe glue and adul
What materials do I need for the Minecraft mushroom house and DIY star?
You'll need cardboard or craft foam sheets, scissors, craft knife (for adult use), ruler, pencil, hot glue or strong white craft glue, child-safe glue sticks, acrylic paints (red, white, brown, green), small paintbrushes, marker for details, star template or printable, glitter or sequins, string or ribbon for hanging, toothpicks or wooden dowels for support, and optional mini LED tealight for the house interior. Safety extras: cutting mat and protective gloves for adults.
What ages is this activity suitable for?
Suitable for ages 5–12 with varying supervision. Ages 5–7 enjoy simple cutting, painting, and gluing with close adult help for sharp tools and assembly. Ages 8–10 can follow Eoinjordan’s steps more independently, handling small glues and detailed painting with supervision. Ages 11–12 and up can manage hot glue or craft knife with adult guidance and add complex details or electronics. Adapt complexity and safety measures to each child's skill level.
What are the benefits and safety tips for this activity?
This activity boosts creativity, spatial reasoning, fine motor skills, and following instructions. Building a blocky mushroom house encourages planning and problem-solving; making the DIY star supports hand-eye coordination and decoration skills. Safety tips: always supervise cutting or hot glue, use child-safe scissors and non-toxic paints, work on a protected surface, and let paint and glue fully dry before handling. Offer simpler templates or pre-cut shapes for younger children.
Watch & Learn
Need help?
What can I use if I don't have red paint or extra cardboard for the mushroom cap and star?
If you don't have red paint or extra cardboard, use red markers or cut red construction paper for the dome's pixel tiles and reuse cereal or shipping boxes to cut the cap circle and star shape.
My cardboard circle won't hold a dome shape or the glue doesn't stick when I attach it to the box—what can I do?
If the dome won't hold shape or the glue fails when you bend the cardboard circle into a shallow dome and glue it onto the box, score a light crease around the rim, use stronger craft glue or hot glue with adult help, and hold the cap in place with clothespins until dry.
How can I adapt this Minecraft mushroom house project for different age groups?
For younger kids, have an adult pre-cut the top flaps, cardboard circle, and star so they can paint, add white spots, and draw the door and windows, while older kids can measure a pixel grid, cut precise squares, poke a small hole for a battery LED under the dome, and decorate the star with detailed patterns before punching the hanger hole.
How can we enhance or personalize the finished mushroom house and DIY star ornament?
To personalize and extend the activity, cut a hinged door from the box front to open, build tiny cardboard furniture inside, glue a battery tea light under the dome for a glow, and decorate the star with unique patterns before attaching the ribbon hanger and sharing on DIY.org.