Make A Paper Mask Of An Amazonian Animal!
Make a colorful paper mask of an Amazonian animal using cardstock, pencils, scissors, and string, then learn about its habitat and behaviors.
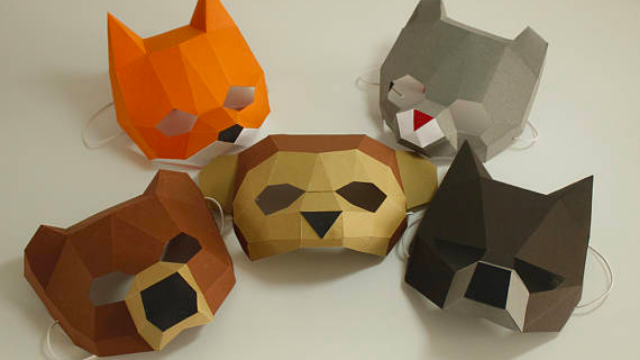
About this activity
Make a colorful paper mask of an Amazonian animal using cardstock, pencils, scissors, and string, then learn about its habitat and behaviors.
What you need
Step by step
- 1
Step 1
Pick an Amazonian animal to make a mask of like a jaguar sloth macaw toucan or poison dart frog.
- 2
Step 2
Find a clear photo of that animal in a book or online.
- 3
Step 3
Look carefully at the photo and notice the animal’s colors shapes and special face features.
- 4
Step 4
Fold a sheet of cardstock in half down the middle to make a symmetrical mask base.
- 5
Step 5
Draw half of the mask outline along the folded edge of the cardstock to match your animal’s face shape.
- 6
Step 6
Cut out the mask shape by cutting along your pencil line while keeping the fold intact.
- 7
Step 7
Hold the mask up to your face and mark the center of each eye with a pencil.
- 8
Step 8
Carefully cut out the eye holes where you marked them.
- 9
Step 9
Sketch the animal’s eyes nose mouth and main markings onto the mask with your pencil.
- 10
Step 10
Color the mask using your coloring materials to match the photo’s colors and patterns.
- 11
Step 11
Cut small extra shapes from leftover cardstock for ears beak or feathers if your animal needs them.
- 12
Step 12
Glue or tape the extra ear beak or feather shapes onto the mask.
- 13
Step 13
Write one habitat fact and one behavior fact about your chosen animal on the inside of the mask.
- 14
Step 14
Make a small hole on each side of the mask near the ears and tie string to both holes so the mask fits your head.
- 15
Step 15
Share your finished mask and the facts you learned on DIY.org.
Fun facts
How do I make a paper mask of an Amazonian animal?
Start by picking an Amazonian animal and finding a photo to copy. Draw the mask shape on cardstock, including eye holes, then sketch distinctive features like a toucan’s beak or jaguar spots. Cut carefully, color with markers or paints, and add details (feathers, paper leaves). Punch holes at the sides and tie string or attach elastic. Finally, fit it on the child and talk about the animal’s habitat and behaviors for a learning boost.
What materials do I need to make an Amazonian animal paper mask?
You’ll need sturdy cardstock, pencils for sketching, eraser, scissors (child-safe for younger kids), markers or paints, glue and optional decorations like tissue paper or craft feathers. Also bring a hole punch, string or elastic to secure the mask, reference photos of the chosen animal, and tape or reinforcements for the edges. Optional: crayons, glitter, and recycled cardboard for thicker support.
What ages is this Amazonian animal paper mask activity suitable for?
This craft fits many ages: preschoolers (3–5) can color and glue with close adult help for cutting and assembly. Early elementary (6–8) can trace, cut, and decorate more independently. Older children (9–12+) can design complex shapes, research behaviors, and add realistic details. Always supervise scissors and small decorations, and adapt complexity and tools to each child’s fine motor skills and attention level.
What are some fun variations and extensions of the Amazonian animal mask activity?
Turn it into a learning unit: make a mask parade, create a habitat backdrop, or build a mask-and-fact booklet about Amazonian ecosystems. Use recycled materials for eco-friendly masks or craft 3D masks with layered cardstock. Older kids can research conservation issues, write short animal reports, or present a mini-play. For group projects, assign different animals and compare roles in the food web.
Watch & Learn
Need help?
What can I use instead of cardstock if it's hard to find?
Use a flattened cereal box or the cardboard backing from a notebook folded in half to follow the step 'Fold a sheet of cardstock in half' or double up printer paper and tape the edges to make a sturdier mask base.
My eye holes don't line up after cutting—how can I avoid or fix that?
Follow the step 'Hold the mask up to your face and mark the center of each eye' and mark both eyes before cutting, use a hole punch or make small pilot cuts then trim slowly with scissors, and if they end up uneven glue a small cardstock patch behind the smaller hole and recut.
How should I change the activity for different ages?
For preschoolers, have an adult pre-fold and pre-cut the mask base and provide large stickers and chunky crayons for the 'color the mask' step, while older kids can add detailed painting, layered 'extra shapes' for 3D features, and write longer habitat and behavior facts on the inside.
How can we make the mask more durable or realistic?
Reinforce the 'Make a small hole on each side of the mask' step with tape or hole reinforcers and use elastic instead of string, seal the colored surface with clear craft varnish or laminate, and attach layered cardstock 'ears beak or feathers' for added 3D texture.