Design An Infinity Cube
Design and build a handheld infinity cube from cardstock or cardboard, fold and hinge panels, decorate, and explore geometry, symmetry, and motion.


Step-by-step guide to design and build an infinity cube
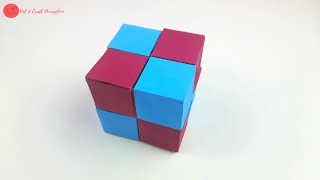
How to make a paper Infinity Cube? Origami Infinity cube fidget toy | Easy DIY Craft for Kids
Step 1
Choose a cube side length of about 4 cm and draw one cube net (a cross of six equal squares) on your cardstock with the ruler and pencil.
Step 2
Trace that same net seven more times so you have eight identical nets on your cardstock.
Step 3
Cut out all eight nets carefully with scissors.
Step 4
Score and fold along every edge line on each net so all the squares fold crisply.
Step 5
Apply glue or double-sided tape to the tabs and assemble each net into a closed cube until you have eight finished cubes.
Step 6
Arrange the eight cubes on your table into two rows of four cubes side by side.
Step 7
Put a short strip of masking tape on the outside seam between the first and second cube of the top row to make a hinge.
Step 8
Put a short strip of masking tape on the outside seam between the third and fourth cube of the top row.
Step 9
Put a short strip of masking tape on the outside seam between the first and second cube of the bottom row.
Step 10
Put a short strip of masking tape on the outside seam between the third and fourth cube of the bottom row.
Step 11
Tape the second cube of the top row to the first cube of the bottom row with a short tape strip on the outside face to join the rows.
Step 12
Tape the third cube of the top row to the fourth cube of the bottom row with a short tape strip on the outside face to finish the moves.
Step 13
Decorate each face of your infinity cube with markers stickers or crayons to create repeating patterns or color symmetry.
Step 14
Fold and unfold your infinity cube several times to explore how the cubes move notice mirrored patterns and feel the symmetry in the motion.
Step 15
Share a photo or video of your finished infinity cube and what you discovered about its symmetry and motion on DIY.org.
Help!?
Can I substitute any materials if I don't have cardstock, double-sided tape, or masking tape?
Yes—replace cardstock with cereal-box cardboard or heavy construction paper for sturdier nets, use regular school glue or clear tape on the tabs instead of double-sided tape, and swap masking tape for painter's tape or clear packing tape for the hinge strips.
What should I do if my cube seams don't line up or the cubes are floppy after assembly?
If seams misalign or cubes are floppy after steps 4–6, re-score each edge with a dull knife or bone folder for crisp folds, press tabs firmly with extra glue or stronger tape, and make sure each cube is fully closed before adding the masking-tape hinges in the row layout steps.
How can I adapt the activity for a 4-year-old, an 8-year-old, or a 12-year-old?
For a 4-year-old, pre-cut larger nets (6–8 cm squares) and let them stick stickers when you do the scoring and gluing; for an 8-year-old, have them trace and cut the 4 cm nets and assemble with supervision; and for a 12-year-old, challenge them to design alternate net layouts, experiment with hinge placement in the tape steps, or build cubes from thicker cardboard for durability.
How can we extend or personalize the finished infinity cube beyond decorating?
After decorating each face in step 13, personalize and enhance the motion by embedding small magnets or fabric pads at chosen seams before taping the hinges, numbering faces to create folding-sequence puzzles, or adding patterned symmetry to demonstrate the motion you share on DIY.org.
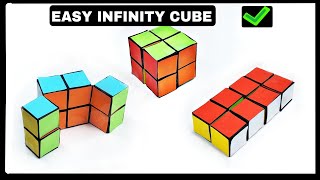
Watch videos on how to design and build an infinity cube
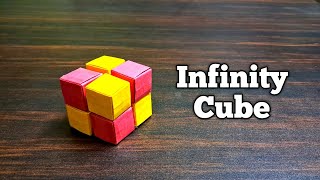
How To Make An Infinity Cube (Easy Tutorial) | Origami Infinity Cube - No Tape Or Glue
4 Videos
How To Make An Infinity Cube (Easy Tutorial) | Origami Infinity Cube - No Tape Or Glue
How To Make A Paper Infinity Cube - Aadrit's Origami
DIY - Paper Infinity CUBE // How to Make an Easy INFINITY CUBE
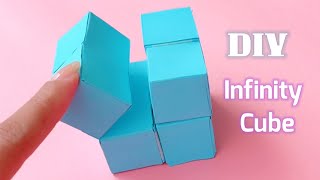
How to make Paper Infinity Cube? Easy Tutorial for Beginners - step by step | DIY Infinity Cube
Facts about papercraft and paper engineering for kids
🧊 An infinity cube is a handheld fidget toy made of small hinged cubes you can flip forever in a smooth, repeating motion.
✂️ Origami (paper folding) techniques are super helpful for planning precise panels and hinges—paper folding has been practiced for centuries.
📐 Making an infinity cube teaches geometry basics: cube nets, right angles, and rotational symmetry show up as you build and flip.
📦 Cardstock and thin cardboard work great because folds act like flexible hinges—proper creases make the toy both movable and sturdy.
🎨 Decorating each face with mirrored patterns or colors makes the cube's symmetry and motion easier (and more fun) to explore.
How do I design and build a handheld infinity cube step by step?
What materials do I need to make an infinity cube?
What ages is the infinity cube activity suitable for?
What are some safe variations and benefits of making an infinity cube?
