Take a picture of your in-house set for an acting audition
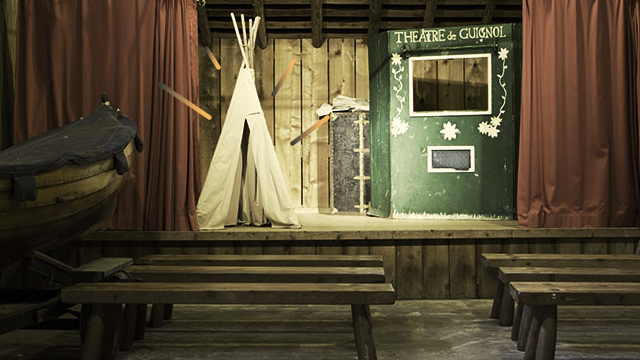
Create and photograph a simple in-house acting set using furniture, props, and lighting; arrange the scene to support your audition monologue and costume.


Step-by-step guide to create and photograph an in-house acting set
Step 1
Choose the monologue you will perform and decide the feeling or story you want the set to show.
Step 2
Pick a room or corner in your house that matches the mood of your monologue.
Step 3
Clear the chosen space so there is room for your furniture and props.
Step 4
Select one or two pieces of furniture to act as the base of your set.
Step 5
Arrange the furniture to make a stage area or a scene that supports your character.
Step 6
Choose three props that help tell your character’s story and place them on or near the furniture.
Step 7
Put up a sheet or blanket behind your furniture to make a clean backdrop and fasten it with tape or clothespins.
Step 8
Place a lamp to light the most important part of the scene and turn the lamp on.
Step 9
Move the lamp to different spots to see which light makes the mood you want.
Step 10
Put on your costume pieces and hold the props you will use in your audition.
Step 11
Stand or sit where you will perform and rehearse your monologue while facing the set.
Step 12
Ask an adult to help take several photos of your set and your audition pose.
Step 13
Make small adjustments to the furniture props or lighting if a photo doesn’t look right and take one final photo.
Step 14
Share your finished creation on DIY.org
Help!?
What can we use if we don't have a sheet, lamp, or clothespins for the backdrop and lighting?
Use a flat bedsheet, a piece of poster board or large cardboard for the backdrop fastened with binder clips or heavy books, and replace the lamp with a desk lamp, clip light, or flashlight softened with white paper.
My backdrop keeps falling and the photos are too dark—what should we try?
Secure the sheet or blanket with tape, binder clips, or heavy books as in step 7, move the lamp closer or add a second lamp from step 9, and take several test photos while adjusting furniture, props, and lamp position before the final photo.
How can we adapt this audition set activity for younger children or teens?
For younger kids, choose a very short monologue, use one chair and two simple props with an adult helping place the lamp and take photos, while older kids can build a more detailed set, try different lighting angles, and rehearse facing the set longer.
What are some ways to enhance or personalize the set for a more professional look?
Add a painted or paper backdrop behind the furniture, use fairy lights or colored bulbs for mood lighting, mark the stage area with tape, create themed costume pieces and props, and record a short video as well as photos to share on DIY.org.
Watch videos on how to create and photograph an in-house acting set
How Actors Enter and Exit Auditions (Video Acting Lesson) (Acting classes for kids, Los Angeles)
4 Videos

How Actors Enter and Exit Auditions (Video Acting Lesson) (Acting classes for kids, Los Angeles)
KidsCasting.com How To: Pro Self-Tape Auditions

KidsCasting.com: How to Prepare for Your Kid's First Audition
How to Record Voice Acting Auditions for Kids (Beginner's Guide!)
Facts about theater and set design for kids
🎭 Thespis is often called the first actor in Western theatre history — that's where the word "thespian" comes from.
💡 Three-point lighting (key, fill, back) is a classic setup you can recreate at home with lamps to make your actor pop on camera.
📸 Your phone's back camera usually records sharper, higher-quality video than the selfie camera — use it for auditions when possible.
👗 A single costume piece (like a hat or jacket) can instantly signal a character’s age, job, or mood to a casting director.
🪑 Everyday furniture becomes set dressing — a chair can be a throne and a table a café counter with the right props and arrangement.
How do I create and photograph an in-house acting set for my child's audition?
What materials do I need to build and photograph a simple in-house acting set?
What ages is this in-house acting set activity suitable for?
What are the benefits of creating and photographing a home acting set for an audition?
