Build A Hydraulic Lifter
Build a simple hydraulic lifter using syringes, tubing, water, and cardboard to raise small objects with adult help and learn how fluid pressure transfers force.


Step-by-step guide to build a hydraulic lifter
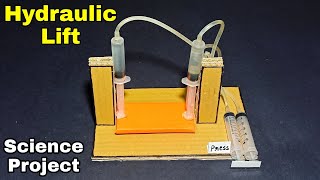
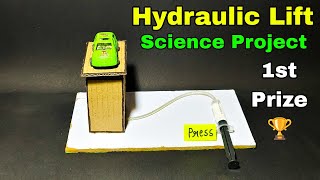
How to make hydraulic lift for science project | School science project hydraulic lift
Step 1
Gather all your materials and place them on a clear table so you can reach everything easily.
Step 2
Cut a rectangle of cardboard about the size of your hand to use as the base.
Step 3
Tape one syringe flat to the cardboard base with the tip pointing outward toward the edge.
Step 4
Tape the second syringe upright to the cardboard base so its tip points toward the tip of the flat syringe.
Step 5
Dip the tip of one syringe in the cup of water and pull the plunger up to fill the syringe about halfway.
Step 6
Push the tubing onto the tip of each syringe until both tube ends are snug on the syringe tips.
Step 7
Push and pull the plungers slowly to move water through the tubing and clear out all air bubbles until only water fills the tubing.
Step 8
Tape the bottle cap or small flat platform to the top of the upright syringe plunger so it will carry objects when the plunger rises.
Step 9
Put the small lightweight object gently on the platform.
Step 10
Press the plunger of the flat syringe slowly and watch the platform rise to lift your object.
Step 11
Share a photo or video of your hydraulic lifter and what it lifted on DIY.org
Help!?
What can we use if we can't find two syringes or the plastic tubing called for in the materials?
If you can't find two syringes, use two identical plastic pipettes or turkey basters and replace the tubing with flexible aquarium tubing or a trimmed plastic straw sealed tightly with hot glue so the step that pushes tubing onto each syringe tip still forms a snug, water-tight connection.
Why doesn't the platform rise when I press the flat syringe and how do I fix it?
If the platform doesn't rise, check for air bubbles or leaks by repeating the step of dipping one syringe in water and pulling the plunger, then push and pull the plungers slowly to flush out trapped air and make sure the tubing ends are taped or pushed tightly onto the syringe tips.
How can I change the activity for different age groups to make it safe and educational?
For preschoolers have an adult pre-cut the cardboard base and tape the syringes in place while using larger 10–20 mL syringes so they can press easily, and for older kids challenge them to redesign the taped bottle cap platform and measure how far it rises per milliliter of water moved to explore mechanical advantage.
How can we improve or personalize the hydraulic lifter after finishing the basic build?
To enhance the lifter, attach a taller DIY platform from recycled cardboard or LEGO to the taped bottle cap, add colored water for visual flow, or connect two upright syringes in parallel as an extension to lift heavier lightweight objects placed on the platform.
Watch videos on how to build a hydraulic lifter
How to make hydraulic lift science project | School science project hydraulic lift
4 Videos
How to make hydraulic lift science project | School science project hydraulic lift
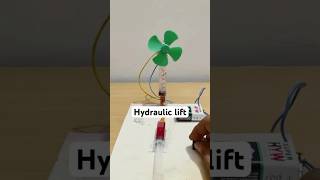
How to make hydraulic lift for science project | Hydraulic lift science project for school
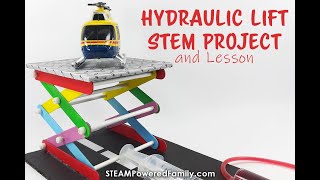
Hydraulic Lift STEM Project and Exploring Pascal's Law
DIY Hydraulic Lift | Simple Science Project for Beginners | Engineering Basics
Facts about hydraulics and fluid pressure
🚰 Pascal's law: pressure applied to a confined fluid is transmitted equally in all directions — the principle behind hydraulic lifters.
🧪 A syringe works like a tiny hydraulic piston: push the plunger and the fluid carries that force through the tubing.
🏗️ Hydraulic jacks in garages can lift whole cars by turning small hand pushes into huge lifting forces.
📏 Using a larger-diameter output piston (bigger syringe) increases force but reduces how far the lifter moves — trade-offs are fun!
⏱️ You can often build a simple, working hydraulic model in under an hour with syringes, tubing, water, and cardboard.
How do I build a simple hydraulic lifter at home?
What materials do I need to build a hydraulic lifter?
What ages is this hydraulic lifter activity suitable for?
What are the safety tips and learning benefits of building a hydraulic lifter?
