Make a paper-cutting machine
Build a simple, safe paper cutting machine using cardboard, plastic gears, a rubber band motor, and guides to explore mechanical design and safety.


Step-by-step guide to make a paper-cutting machine
Step 1
Gather all the materials and find a clean flat workspace.
Step 2
Cut a rectangle of cardboard about 20 cm by 10 cm to use as the base.
Step 3
Cut two small rectangular support blocks from cardboard and tape or glue them near each end of the base to hold axles.
Step 4
Push a wooden skewer through the first support block and then through the second so the skewer can spin and fasten the ends under the base with tape.
Step 5
Slide a plastic gear onto each skewer so the gear teeth face each other and interlock while leaving room for a sheet of paper between them.
Step 6
Cut two long thin cardboard guide strips and glue them to the base alongside the space between the gears to make a paper feed channel.
Step 7
Roll a small tight cardboard tube and attach it to one skewer near its gear so it becomes a turning spool on that axle.
Step 8
Hook one end of a rubber band around the cardboard spool and tape the other end to a small peg or anchored tape on the base to make a simple motor.
Step 9
Turn the gear with the spool clockwise several times to wind the rubber band and hold the spool steady with your finger so the motor stays wound.
Step 10
Slide a piece of scrap paper into the guide channel so its edge sits between the interlocking gear teeth.
Step 11
Release the spool so the rubber band unwinds and the gears spin, pulling the paper between the teeth so it is torn into strips.
Step 12
Share a photo and a short description of your paper-cutting machine on DIY.org
Help!?
What can we use instead of the plastic gears or wooden skewers if those are hard to find?
If you don't have plastic gears, cut matching notches into two bottle caps or cardboard discs to act as gears and use pencils or wooden dowels in place of the wooden skewers as axles, fastening their ends under the 20 cm x 10 cm cardboard base with tape as described.
Why won't the gears pull the paper and how can we fix it?
If the gears don't pull the paper, check that the two gears' teeth interlock with only enough space for one sheet by repositioning the small support blocks, tighten the skewers under the base so axles don't wobble, and wrap a bit of tape around the cardboard spool to increase friction between the rubber band and spool.
How can we adapt the activity for different ages?
For preschoolers, have an adult pre-cut the 20x10 cm base, support blocks, and guide strips and replace sharp wooden skewers with blunt straws or pencils indoors while older children can experiment independently with changing gear sizes, spool placement, and winding the rubber band motor.
How can we improve or personalize the paper-cutting machine?
To personalize and extend the machine, glue different-sized plastic gears or cardboard gear discs to change tear width, add a second cardboard spool to feed two papers, and decorate the base before sharing a photo on DIY.org.
Watch videos on how to make a paper-cutting machine
How to Make Arduino based paper cutting machine | Arduino project
4 Videos
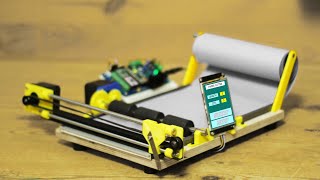
How to Make Arduino based paper cutting machine | Arduino project
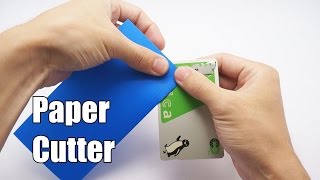
HOW TO MAKE A PAPER CUTTER - Origami Tip #7

Make your own cute paper cutting machine at home | DIY cute paper cutter

How to Make a Paper Cutter | DIY Paper Cutter Machine at Home | Easy Paper Cutting Craft Ideas
Facts about simple machines and mechanical design
⚙️ Gears let you trade speed for force — a gear with twice as many teeth turns half as fast but delivers double the torque.
🪢 Rubber bands store elastic energy when stretched; tiny rubber-band motors can power a toy for seconds to minutes depending on the twist!
📄 Paper cutters can slice multiple sheets at once — small craft cutters handle around 5–20 sheets while industrial cutters can cut hundreds.
📦 Corrugated cardboard is strong because the wavy middle layer (fluting) acts like lots of tiny beams to resist bending.
🔒 Simple safety features — blade covers, finger guides, and slow speeds — prevent most paper-cutting accidents in DIY projects.
How do I build a safe, simple paper-cutting machine with cardboard and a rubber band motor?
What materials do I need to make a child-safe paper-cutting machine?
What ages is this cardboard paper-cutting machine activity suitable for?
How can I keep kids safe and what learning benefits does this activity offer?
