Create a comic panel with your favorite point of view
Draw and design a single comic panel showing your favorite point of view, sketching characters, backgrounds, speech bubbles, and coloring to tell a simple story.


Step-by-step guide to create a comic panel with your favorite point of view
Step 1
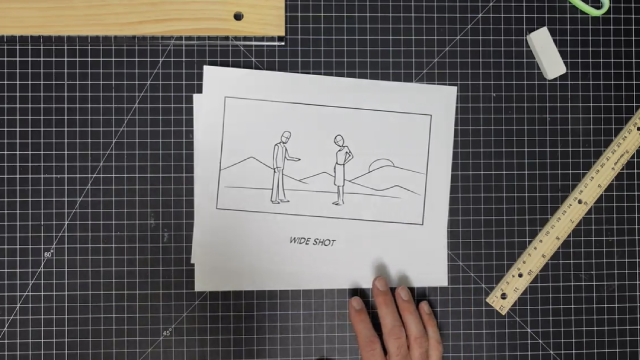
Choose your favorite point of view for the panel like bird's-eye worm's-eye eye-level or over-the-shoulder.
Step 2
Think of a simple moment or tiny story you want to show in one panel like a surprise jump or a funny reaction.
Step 3
Make a small thumbnail sketch on scrap paper to plan where characters background and speech bubbles will go.
Step 4
Use a ruler to draw the border of your single comic panel on your final paper.
Step 5
Lightly sketch the main characters as big simple shapes in pencil so they fit the chosen point of view.
Step 6
Draw background shapes that show depth like horizon lines buildings or ground to match your point of view.
Step 7
Draw empty speech bubbles where characters will talk or make sounds.
Step 8
Write short dialogue or sound words inside the speech bubbles using clear letters.
Step 9
Add facial expressions and small costume or prop details to show how your characters feel.
Step 10
Trace over the pencil lines you want to keep with a black marker or pen to ink your drawing.
Step 11
Wait for the ink to dry then carefully erase the pencil sketch lines.
Step 12
Color your characters background and speech bubbles with your coloring materials.
Step 13
Add final touches like highlights shadows or a bold sound effect word to make your panel pop.
Step 14
Take a photo or scan your finished comic panel and share it on DIY.org.
Help!?
What can I use if I don't have a ruler, black marker, or a scanner?
Use the straight edge of a hardcover book to draw the border of your single comic panel on your final paper, a fine-tip black gel pen or permanent marker (or a dark ballpoint) to trace over the pencil lines you want to keep, and your smartphone camera instead of a scanner, with crayons or colored pencils for coloring materials.
My ink smudges or pencil lines won't erase cleanly—what should I try?
When you trace over the pencil lines with a black marker or pen, test the ink on scrap paper, wait until the ink is fully dry before you carefully erase the pencil sketch lines, and use light pencil strokes and a soft eraser to reduce smudging.
How can I adapt this activity for different ages?
For younger kids, skip a detailed thumbnail and have them lightly sketch main characters as big simple shapes and use pre-drawn speech bubbles or stickers, while older kids can plan complex perspective in a thumbnail, add detailed background shapes and advanced inking, shading, and color blending before coloring.
What are some ways to extend or personalize the finished comic panel?
Add final touches like a bold sound-effect word, highlights and shadows, mixed-media textures or extra props, turn it into a short sequence of panels, then take a photo or scan and share or edit it on DIY.org.
Watch videos on how to create a comic panel with your favorite point of view
Point of View | 1st, 2nd, and 3rd Person Explained | It's Easy With Twinkl | Twinkl USA
3 Videos
Point of View | 1st, 2nd, and 3rd Person Explained | It's Easy With Twinkl | Twinkl USA

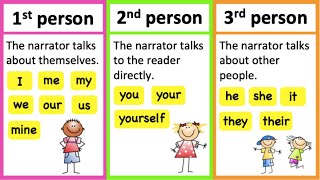
Point of View | First, Second, & Third Person
POINT OF VIEW 🤔| First person, Second person & Third person | Learn with examples | Types of stories
Facts about comic art and storytelling
🖊️ Comics use panels to control time and pacing — a single panel can show a quick joke or an entire moment in a story.
🧭 One-point, two-point, and three-point perspective tricks help artists make backgrounds and characters look like they're really in space.
💬 Speech balloons and captions have roots in ancient art, but the modern comic speech balloon became common in the 1800s.
🎯 Picking a point of view (bird's-eye, worm's-eye, eye-level) instantly changes how powerful or small characters feel.
🎨 Color choices set the mood fast — cool colors feel calm or sad, warm colors feel energetic or cozy.
How do I create a single comic panel that shows my favorite point of view?
What materials do I need to make a comic panel?
What ages is this comic panel activity suitable for?
What are the benefits of creating a comic panel, and are there safe variations?
