Embroider a planet
Embroider a planet patch using an embroidery hoop, needle and thread, stitching continents, oceans, and craters with adult supervision while learning basic stitches.


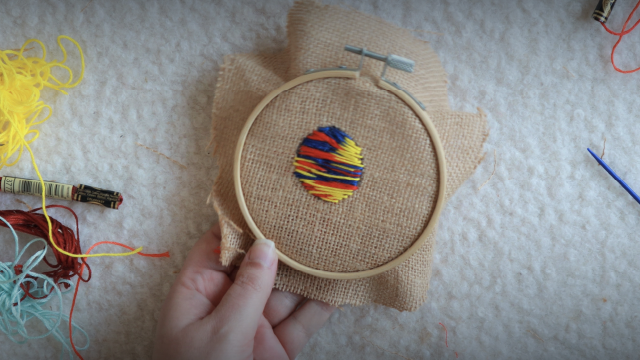
Step-by-step guide to embroider a planet
Step 1
Lay out all materials on a clean flat table so you can see everything easily.
Step 2
Loosen the hoop screw and place the fabric between the inner and outer hoop then tighten the screw so the fabric is pulled smooth and snug.
Step 3
Lightly draw a planet circle on the fabric and add simple continent shapes and small circles for craters using the pencil or fabric marker.
Step 4
Cut a 60 cm length of blue floss for the ocean outlines.
Step 5
Separate the blue floss into three thin strands by gently pulling the strands apart.
Step 6
Thread the needle with the three blue strands and tie a small knot at the end of the thread.
Step 7
Use backstitch with the blue thread to outline the planet circle and ocean lines by bringing the needle up at point A then down a short distance at point B then up ahead at point C and back down into A, repeating to make a solid line.
Step 8
Cut a 60 cm length of green or brown floss for the continents.
Step 9
Separate the green or brown floss into three thin strands by gently pulling the strands apart.
Step 10
Thread the needle with the three green or brown strands and tie a small knot at the end.
Step 11
Use satin stitch to fill each continent by bringing the needle up at one edge of a continent shape and down directly across at the opposite edge to make long straight stitches side by side until the shape is filled.
Step 12
Thread a short length of dark floss and make French knots for craters by bringing the needle up, wrapping the thread once around the needle tip, holding the wrap tight, and inserting the needle back down very close to the entry point to form a small raised dot.
Step 13
Turn the hoop over and secure each thread end by tying a small knot or making two tiny locking stitches on the back then trim the excess thread close to the knot.
Step 14
Cut the felt to fit the back of the hoop, glue or stitch it in place to hide the knots, and tighten the hoop screw so your patch looks neat.
Step 15
Take a picture of your embroidered planet patch and share your finished creation on DIY.org
Help!?
What can we use instead of an embroidery hoop or embroidery floss if those are hard to find?
If you don't have an embroidery hoop, stretch the fabric over an open picture frame or a sturdy cardboard circle and secure it tightly with strong tape to mimic the 'place the fabric between the inner and outer hoop then tighten the screw' step, and if you lack embroidery floss use two strands of cotton sewing thread held together for the backstitch and satin stitch.
My backstitch line has gaps or looks uneven — how do we fix that?
Make each backstitch snug as you go and keep the A-B-C spacing consistent by bringing the needle up at A, down at B, then up at C and back down into A so the outline forms a solid line without gaps.
How can this activity be adapted for younger children or older kids?
For younger kids, pre-draw larger planet and continent shapes and use thick yarn with a blunt plastic needle so they can easily do the backstitch and rough satin stitches, while older kids can work with finer floss, smaller satin-stitch fills, detailed French-knot craters, or add extra embroidery details.
What are some ways to personalize or improve the finished embroidered planet patch?
Personalize it by stitching a name or orbital rings in metallic thread, adding tiny seed beads as raised craters, or turn it into a wearable patch by trimming, applying fusible web or stitching on Velcro after gluing the felt backing and tightening the hoop screw.
Watch videos on how to embroider a planet
DIY Planets And Space Crafts For Kids Compilation | Make Your Own Solar System | Kids Space Facts
4 Videos
DIY Planets And Space Crafts For Kids Compilation | Make Your Own Solar System | Kids Space Facts
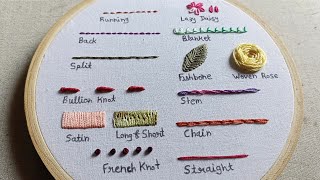
Hand Embroidery for Beginners || 14 basic embroidery stitches by Let's Explore
Embroidery for beginners - Stitches, knots, needle threading & more - Complete Basics Series
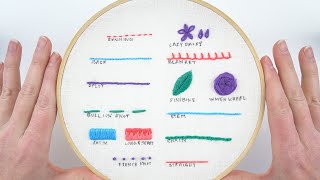
13 Hand Embroidery Stitches for Beginners
Facts about embroidery for kids
🪡 Embroidery dates back thousands of years—archaeologists have found embroidered pieces from ancient civilizations.
🧵 There are dozens of common hand stitches (running, backstitch, satin, French knot) you can mix to make continents, oceans, and craters pop.
🌍 About 71% of Earth's surface is covered by water—great inspiration to stitch big blue oceans on your planet patch.
🌑 The Moon and many planets have thousands of craters—adding stitched circles and knots can recreate that pocked look.
👧👦 Children as young as 6 can start learning simple stitches with adult supervision—embroidery helps develop fine motor skills and patience.
How do I embroider a planet patch step-by-step?
What materials do I need for an embroidered planet patch?
What ages is planet embroidery suitable for?
What are the benefits and safety tips for kids embroidering a planet patch?
