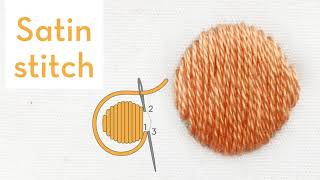
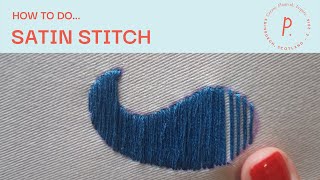
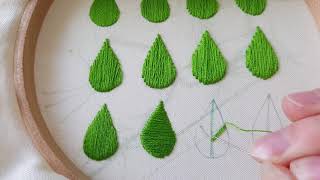
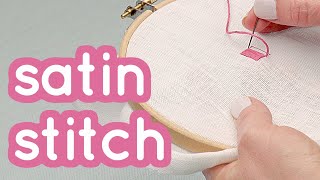
Make a satin stitch
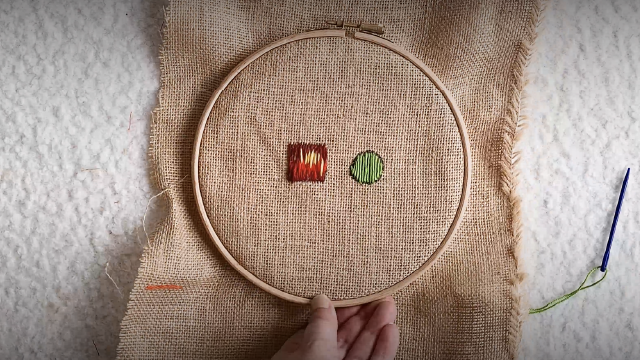
Make satin stitch fills on fabric by tracing a small shape, using an embroidery hoop, needle, and thread with adult help to create smooth stitches.


Step-by-step guide to make satin stitch fills on fabric
Step 1
Pick a small simple shape like a heart star or circle and place the template on your fabric.
Step 2
Put the fabric into the embroidery hoop and tighten the outer ring until the fabric is smooth and drum tight.
Step 3
Trace the shape onto the fabric with the washable fabric marker or pencil.
Step 4
Separate the embroidery floss into three strands by pulling them gently apart.
Step 5
Ask an adult to help thread the needle with the separated floss.
Step 6
Tie a small knot at the end of the threaded floss to stop it pulling through the fabric.
Step 7
Bring the needle up through the fabric at one edge of the traced shape and pull until the knot rests on the back.
Step 8
Insert the needle down through the fabric at the opposite edge of the shape to make the first long satin stitch across the shape.
Step 9
Bring the needle up again at the starting edge very close to the first stitch to prepare the next parallel stitch.
Step 10
Insert the needle down at the opposite edge again parallel to the previous stitch and keep the stitches flat and close together.
Step 11
Continue making parallel satin stitches across the shape until the entire shape is filled and smooth.
Step 12
Turn the hoop to the back and weave the needle under a few nearby stitches to secure the thread.
Step 13
Trim the extra thread close to the fabric and share your finished satin stitch fill on DIY.org
Help!?
Can I substitute any materials if I don't have everything listed?
If you don't have a washable fabric marker, trace the shape with a soft regular pencil or tailor's chalk as in the 'Trace the shape onto the fabric with the washable fabric marker or pencil' step, and you can use a plastic embroidery hoop or an old picture frame in place of a commercial embroidery hoop.
What should I do if my satin stitches look bumpy or the fabric puckers?
If your stitches gap or the fabric puckers, re-seat and tighten the fabric in the embroidery hoop until it's drum tight as in 'Put the fabric into the embroidery hoop and tighten the outer ring until the fabric is smooth and drum tight' and then keep the stitches flat and close together while continuing the satin stitches.
How can I adapt this activity for different age groups?
For younger children use a larger simple shape, a thicker plastic needle, and leave the floss un-separated or 'ask an adult to help thread the needle with the separated floss', while older kids can separate the embroidery floss into three strands and tackle smaller, more detailed shapes.
How can we make the satin-stitch piece more special or advanced?
To enhance the project, switch floss colors partway through filling the shape for stripes, add a backstitch outline before you 'weave the needle under a few nearby stitches to secure the thread', or sew on tiny beads for texture and then share your finished satin stitch fill on DIY.org.
Watch videos on how to make satin stitch fills on fabric
Satin stitch - How to quick video tutorial - hand embroidery stitches for beginners
4 Videos
Satin stitch - How to quick video tutorial - hand embroidery stitches for beginners
How to Satin Stitch - Embroidery Tutorial for Beginners
How to do Satin Stitch. The basics and some variations.
How to do Satin Stitch - Basics series #11 - Embroidery for beginners - Tutorial
Facts about hand embroidery for kids
🧵 Satin stitch fills an area with closely packed parallel stitches to make a smooth, shiny surface.
🪡 Embroidery is ancient — decorated textiles have been found from civilizations like Egypt and China thousands of years ago.
🪢 Using an embroidery hoop keeps fabric taut so satin stitches stay even and the cloth doesn't pucker.
🧶 Embroidery floss usually has six strands; beginners often use 2–3 strands for neat satin-stitch fills.
⭐ Small shapes and short satin stitches (like tiny hearts or leaves) are the friendliest projects for kids starting out.
How do you make a satin stitch fill on fabric?
What materials do I need to make a satin stitch?
What ages are satin stitch fills suitable for?
What are the benefits and safety tips for doing satin stitch with kids?
