Show us your embroidery skills!
Use simple stitches to embroider a colorful fabric patch, practicing patterns, patience, and fine motor skills while creating a unique mini artwork.
About this activity
Use simple stitches to embroider a colorful fabric patch, practicing patterns, patience, and fine motor skills while creating a unique mini artwork.
What you need
Step by step
- 1
Step 1
Lay out all materials on a clean flat surface so you can reach everything easily.
- 2
Step 2
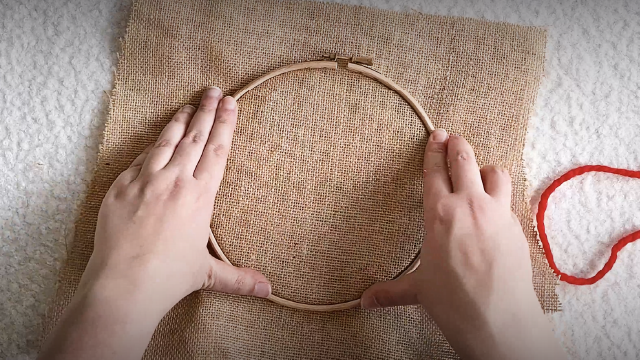
Place the fabric patch in the embroidery hoop and tighten the screw so the fabric is held snug.
- 3
Step 3
Use the fabric marker to draw a simple design like a heart star flower or swirl on the fabric.
- 4
Step 4
Cut a length of embroidery floss about 18 inches long.
- 5
Step 5
Separate the floss into two or three strands for easier stitching.
- 6
Step 6
Thread the needle with the separated strands.
- 7
Step 7
Tie a small knot at the end of the thread to stop it from pulling through the fabric.
- 8
Step 8
Use a running stitch to stitch along your drawn outline by pushing the needle in and out along the line.
- 9
Step 9
Use a satin stitch to fill a small shape by making many close parallel stitches across the shape.
- 10
Step 10
Make French knots or tiny seed stitches for dots or texture by wrapping the thread around the needle and pulling it through.
- 11
Step 11
Secure each thread on the back with a small knot so your stitches stay safe.
- 12
Step 12
Trim extra thread close to the knots using scissors.
- 13
Step 13
Share your finished embroidered patch on DIY.org so everyone can see your mini artwork.
Fun facts
How do I embroider a small fabric patch with simple stitches?
Start by choosing a small fabric patch and draw a simple cartoon or shape with a washable marker. Secure the patch in a small embroidery hoop if available. Thread a blunt embroidery needle with embroidery floss and knot the end. Use basic stitches—running stitch for outlines, satin or straight stitch for filling, and French knots for dots. Work slowly, keeping stitches even. Finish by tying a small knot on the back and trimming excess thread.
What materials do I need to make a colorful embroidered patch?
You’ll need a small piece of fabric or premade patch (felt or cotton), embroidery floss in several colors, a blunt or child-friendly embroidery needle, small embroidery hoop (optional), fabric pencil or washable marker for drawing, sharp scissors, and a thimble or finger guard for older kids if needed. Optional: an iron-on backing or small safety pin to attach the finished patch. Supervise needle use for younger children.
What ages is this embroidery activity suitable for?
Embroidery patches are suitable for children about 6 years and older with supervision. Younger kids (4–5) can join if an adult handles the needle while they choose colors and place stitches. Ages 6–9 work well with larger needles and simple designs; 9–12 can handle finer stitches and more detail. Teens can experiment with complex patterns and mixed materials. Adjust tools and supervision to match each child’s patience and fine-motor skill level.
What are the benefits of children practicing embroidery on a fabric patch?
Embroidering builds fine motor skills, hand-eye coordination, and patience while encouraging creativity and focus. It reinforces pattern recognition and planning when choosing colors and stitches. Completing a small patch boosts confidence and offers a tangible keepsake or gift. The slow, repetitive motion can be calming, supporting emotional regulation. It’s also a screen-free activity that promotes concentration and pride in craftsmanship for children and shared learning time with caregivers.
Watch & Learn
Need help?
What can I use if I don't have an embroidery hoop or fabric patch?
Use scrap fabric or an old shirt as the fabric patch and improvise a hoop by stretching the fabric over a small plastic lid, cardboard ring, or upside-down picture frame so you can still place the fabric patch in a 'hoop' and tighten the screw.
My thread keeps tangling or the fabric puckers—how can I fix that?
Cut the embroidery floss to about 18 inches, separate it into two or three strands (as the instructions say), tighten the hoop screw so the fabric is held snug, and tie small knots and pull gently to avoid tangles and puckering.
How can I adapt this embroidery project for younger or older kids?
For younger children use thicker yarn or doubled floss, plastic blunt needles, and pre-drawn fabric marker designs while older kids can use single strands, practice satin stitch fills and French knots, and try more detailed patterns.
How can we personalize or extend the embroidered patch after finishing the basic stitches?
Enhance the patch by adding beads or sequins with embroidery floss, mixing running and satin stitches for texture, using metallic or variegated floss for color effects, or sewing the finished patch onto a backpack and sharing it on DIY.org.