Practice horizontal joins in calligraphy
Practice horizontal joins in calligraphy by tracing and writing joined letter pairs on guide lines, using a calligraphy pen or marker to improve smoothness.


Step-by-step guide to practice horizontal joins in calligraphy
Step 1
Gather all your materials and find a flat table to work on.
Step 2
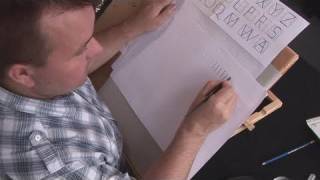
Use the ruler and pencil to draw three parallel horizontal guideline lines about 1 cm apart across the paper.
Step 3
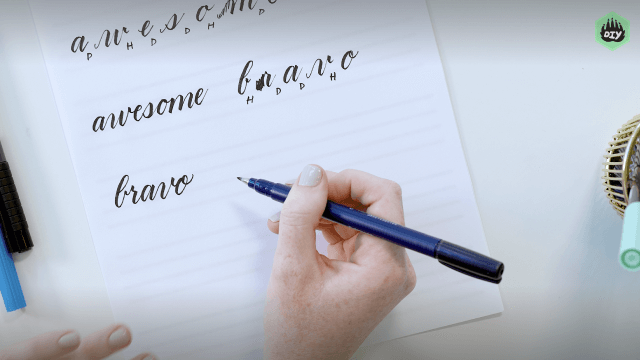
Lightly write several joined letter pairs in pencil on the top guideline to use as tracing examples.
Step 4
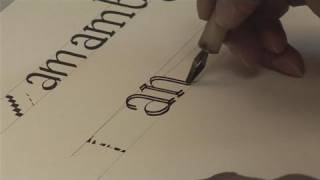
Hold your calligraphy pen at a 45-degree angle to the paper.
Step 5
On a scrap area of paper practice making smooth thin horizontal strokes left to right along the middle line.
Step 6
Trace over each pencil letter pair with your calligraphy pen, following the guideline and keeping your pen angle steady.
Step 7
Wait until the ink has fully dried before touching the paper.
Step 8
Gently erase the pencil marks so only your inked letters remain.
Step 9
Lightly write the same joined letter pairs freehand in pencil on the guidelines.
Step 10
Write the freehand joined letter pairs with your calligraphy pen, keeping each join smooth and connected.
Step 11
Choose one joined letter pair and write it five times in a row with your calligraphy pen to improve smoothness.
Step 12
Cap your marker or clean your pen nib as needed.
Step 13
Put away materials and tidy your workspace.
Step 14
Share a photo of your finished calligraphy practice on DIY.org.
Help!?
What can we use if we don't have a calligraphy pen or chisel nib?
Use a chisel-tip or italic felt-tip marker as a substitute for the calligraphy pen and practice holding it at the instructed 45-degree angle while making smooth thin horizontal strokes along the middle guideline.
My ink keeps smudging when I erase the pencil—how do I stop that?
Follow the step to 'Wait until the ink has fully dried before touching the paper,' and if needed lay the sheet flat to dry longer or use a cool hairdryer at a distance before gently erasing the pencil marks.
How can I adapt this activity for younger children or older kids?
For younger children increase the three parallel guideline spacing to about 1.5–2 cm, pre-write thicker pencil letter pairs for tracing, and use a broad marker, while older kids can reduce the 1 cm spacing, use a dip nib or fine pen, and focus on freehand joins and timed sets of five repeats.
What are simple ways to extend or personalize the practice after I finish the steps?
After you 'Choose one joined letter pair and write it five times in a row,' try using colored inks or markers, combine several practiced pairs into a short word or name, date the sheet to track progress, and share a photo of the finished calligraphy on DIY.org.
Watch videos on how to practice horizontal joins in calligraphy
How to Do Brush Calligraphy | Easy Calligraphy | Fun Activities For Kids
4 Videos

How to Do Brush Calligraphy | Easy Calligraphy | Fun Activities For Kids

How To Do Modern Calligraphy
How To Master The Art Of Calligraphy
How To Write A Calligraphy Alphabet
Facts about calligraphy for kids
🖋️ The word "calligraphy" comes from Greek words meaning "beautiful writing" (kallos + graphē).
✍️ Practicing horizontal joins (joined letter pairs) helps you write faster because you lift the pen less.
🎯 Calligraphers often draw guide lines first so letters stay the same height and sit neatly on the baseline.
🧠 Short daily practice sessions (even 5–15 minutes) build muscle memory and make strokes smoother over time.
🖊️ Broad-edged pens and chisel-tip markers create thick-and-thin strokes by changing the pen angle, perfect for teaching joins.
How do you practice horizontal joins in calligraphy?
What materials do I need to practice horizontal joins in calligraphy?
What ages is practicing horizontal joins in calligraphy suitable for?
What are the benefits of practicing horizontal joins in calligraphy?
