Practice light and heavy pressure with your brush pen
Use a brush pen to practice light and heavy pressure, making thin and thick strokes, basic letters, and a small stroke exercise sheet.

Step-by-step guide to practice light and heavy pressure with your brush pen
Step 1
Gather your brush pen paper pencil and eraser and place them on a flat clean workspace.
Step 2
Sit up straight and hold your brush pen like a pencil at about a 45-degree angle to the paper.
Step 3
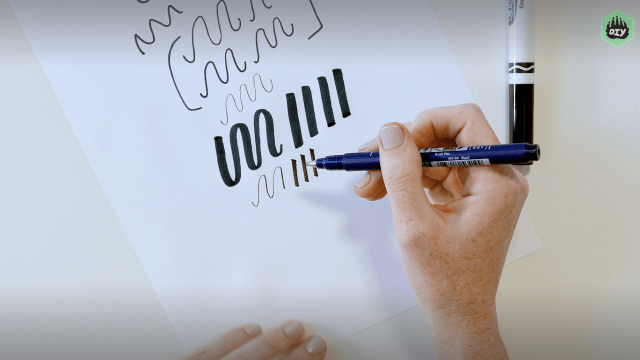
Make ten light straight strokes across the paper using very little pressure so the lines are thin.
Step 4
Make ten heavy straight strokes across the paper using firm pressure so the lines are thick.
Step 5
Draw five lines where you alternate a light stroke then a heavy stroke to make a thin thick pattern.
Step 6
Practice upstrokes by drawing ten short upward lines using light pressure so they stay thin.
Step 7
Practice downstrokes by drawing ten short downward lines using heavier pressure so they become thick.
Step 8
Draw five curved strokes that start thin on the up part and get thick on the down part to practice smooth transitions.
Step 9
Use your pencil to draw three columns or boxes on the paper to make an exercise sheet.
Step 10
Write a label at the top of each column or box with your pencil for the stroke type such as Light Strokes Heavy Strokes and Thin-Thick Combos.
Step 11
In each labeled box use your brush pen to repeat the matching stroke six times to fill the sheet.
Step 12
Wait one minute to let the ink dry so it does not smudge.
Step 13
Gently erase the pencil lines and labels so only your brush pen practice remains.
Step 14
Take a photo of your finished practice sheet and share your creation on DIY.org
Help!?
What can we use if we don't have a brush pen?
Use a small round paintbrush or a water brush loaded with ink or watered-down paint and hold it at about a 45-degree angle to the paper while practicing the light and heavy strokes from the instructions.
My strokes are smudging or bleeding—what should I change?
Work on a flat clean workspace, wait the one minute drying step before gently erasing pencil lines, and switch to heavier paper or less-watery ink if your thin light strokes are bleeding.
How can I adapt this exercise for different ages?
For younger kids draw larger pencil boxes and reduce repetitions to about three strokes using a chunky washable marker, while older kids can keep the three labeled columns and increase precision by shrinking boxes or adding timed rounds for the ten-stroke exercises.
How can we extend or personalize the practice sheet?
Write your name and date on the pencil labels, use different colored brush pens to create patterns in the Thin-Thick Combos box, and then take the photo to share your personalized sheet on DIY.org as the instructions suggest.
Watch videos on how to practice light and heavy pressure with your brush pen
How can you help a child with pencil pressure?
4 Videos
How can you help a child with pencil pressure?
KRITA Setup for Beginner - BRUSH PEN PRESSURE Settings Tutorial (on Acer Spin 3 Laptop)
Light and Heavy Pen (Gimmicks and Online Instructions) by Wayne Fox
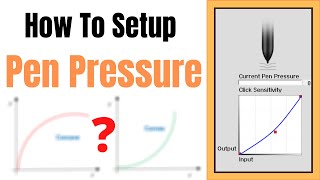
How to Setup Pen Pressure Sensitivity for Any Drawing Tablet
Facts about brush lettering for kids
🖌️ Brush pens have flexible tips that let you make thin upstrokes and thick downstrokes just by changing pressure.
✍️ Hand lettering and modern brush lettering blended traditional calligraphy with drawn letter art and boomed on social media in the 2010s.
🎯 Practicing light and heavy pressure trains fine motor control — great for kids building steady, confident handwriting.
⏱️ Short daily practice (5–10 minutes) usually helps control and muscle memory improve faster than occasional long sessions.
💧 Many brush pens use water-based, water-soluble ink that can be blended like watercolor and is easy to clean up.
How do you practice light and heavy pressure with a brush pen?
What materials do I need for a brush pen pressure practice session?
What ages is brush pen pressure practice suitable for?
What are the benefits and safety tips for practicing brush pen pressure?
