Show us the cone of your brush pen
Use a brush pen to draw a series of cone shaped strokes on paper, exploring tip angle and pressure to compare wide and thin lines.


Step-by-step guide to show the cone of your brush pen
Step 1
Gather all materials and put them on a flat table so you can reach everything easily.
Step 2
Place a fresh sheet of paper flat and draw a light vertical guideline near the center with your pencil to guide your cone strokes.
Step 3
Take a piece of scrap paper and hold your brush pen straight up at a 90 degree angle to the paper.
Step 4
Make a thin line on the scrap paper by dragging the pen down very lightly.
Step 5
Angle the pen to about 45 degrees on the scrap paper and press harder to make a wide thick line.
Step 6
Put the brush pen at the top of the guideline on your main paper ready to draw.
Step 7
Draw one cone-shaped stroke by starting thin then pressing in the middle to make it wide and lifting to finish thin.
Step 8
Tilt the pen more and draw a second cone-shaped stroke next to the first to compare the shape change.
Step 9
Continue across the guideline drawing a row of cone strokes while changing the pen angle or pressure each time.
Step 10
Look at your row of strokes and use your pencil to label which ones are thin and which ones are wide.
Step 11
Share a photo of your finished cone brush strokes on DIY.org.
Help!?
What can we use instead of a brush pen if we don't have one?
If you don't have a brush pen, substitute a soft-tipped marker or a small round paintbrush with ink or watered-down watercolor and practice thin-to-thick pressure on the scrap paper before moving to the main paper's pencil guideline.
My cone strokes aren't getting thin tips or consistent widths — what should I try?
Practice the 90-degree light drag and the 45-degree heavier press on the scrap paper as in the instructions, focus on starting very light, pressing only in the middle, and lifting at the end while keeping your brush pen steady over the guideline on the main paper.
How can I adapt this activity for younger or older children?
For younger kids use a thicker brush marker, a wider pencil guideline, and fewer larger cone strokes, while older kids can experiment with subtle angle changes on the scrap paper and precisely label thin versus wide strokes on the main paper.
How can we extend or personalize the cone stroke exercise after finishing the row?
Turn your labeled row of strokes into a design by adding color with different brush pens or watercolor washes, arranging cones into patterns or letters on the main paper, and then photograph the finished work to share on DIY.org.
Watch videos on how to show the cone of your brush pen
How to Draw and Shade a Cone Shape
4 Videos
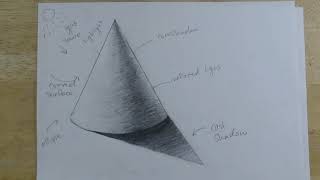
How to Draw and Shade a Cone Shape
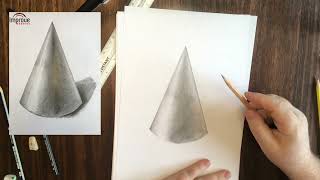
How to Draw a Cone
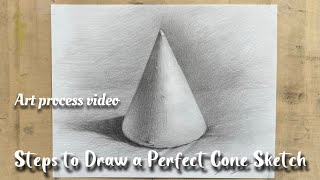
How to Draw a Simple Cone Sketch / Beginner-Friendly Tutorial / Basic sketch modeling
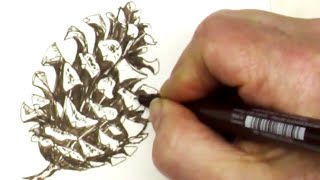
Fun and Easy How to Draw a Pinecone with a Pen
Facts about brush pen techniques and pen control
🖌️ Brush pen tips are shaped like tiny cones so one tool can make hair-thin lines and bold strokes just by changing pressure.
✍️ Tilting the pen or changing the angle of the tip against paper instantly alters the shape of your stroke—experimenting with angles is part of the fun.
🎨 Many brush pens use water-based ink, which lets you blend colors or soften lines with a little water like a mini watercolor.
🧰 Tip materials vary—felt, nylon, and synthetic fibers all feel different and bend differently, giving each pen its own personality.
🔁 Practicing thin-to-thick cone-shaped strokes is a common warm-up that builds control and muscle memory for brush lettering and art.
How do you show the cone of a brush pen and practice cone-shaped strokes?
What materials do I need to show the cone of a brush pen?
What ages is the brush pen cone practice suitable for?
What are the benefits of practicing cone-shaped brush pen strokes?
