Share a cookie dunker tutorial
Make a simple cookie dunker using a craft stick, clothespin, and paper to safely dunk cookies into milk without getting fingers messy.


Step-by-step guide to make a simple cookie dunker
How to dunk cookies in milk.
Step 1
Wash your hands with soap and water and dry them.
Step 2
Lay your craft stick clothespin paper tape cookie and cup of milk on a clean table.
Step 3
Open the clothespin and position it at one end of the craft stick with the jaws facing outward.
Step 4
Wrap a short piece of clear tape around the clothespin and craft stick once to hold them together.
Step 5
Fold the paper into a small sleeve sized for the opposite end of the craft stick where you will hold it.
Step 6
Tape the paper sleeve onto the craft stick so it stays in place as a clean handle.
Step 7
Place the cookie between the clothespin jaws and gently pinch the clothespin to hold the cookie securely.
Step 8
Hold the craft stick handle and dip the cookie straight down into the milk for one to three seconds.
Step 9
Lift the cookie straight up and hold it over the cup so extra milk drips back into the cup.
Step 10
Move the dunked cookie to a plate or to your mouth and enjoy your treat.
Step 11
Ask an adult to wash the clothespin and craft stick before using the dunker again.
Step 12
Share a photo and a short note about your cookie dunker on DIY.org
Help!?
What can I use if I don't have a clothespin, craft stick, or clear tape?
If you don't have a clothespin use a small binder clip or chip clip to hold the cookie, replace the craft stick with a clean wooden spoon handle or sturdy pencil, and use a rubber band or masking tape instead of clear tape when wrapping the clothespin to the stick in step 4.
My cookie keeps slipping or breaking—what should I do?
If the cookie slips or breaks when pinched in the clothespin at step 7, add an extra wrap of tape around the clothespin and craft stick (step 4), place a small folded piece of paper between the jaws for extra grip, or choose a sturdier cookie and squeeze very gently while dipping straight down and up (steps 8–9).
How can I adapt this activity for younger or older children?
For toddlers, have an adult pre-assemble the clothespin to the craft stick and paper sleeve (steps 3–6), use a larger sturdy cookie and supervise the 1–3 second dip (step 8), while older kids can decorate the paper sleeve (step 5), experiment with dip time, and safely wash and reuse their dunker (last washing step).
How can we personalize or extend the cookie dunker activity?
Personalize the dunker by decorating the paper sleeve and craft stick with washable markers before taping (step 5), try different cookies and milks to compare dunking results, or make a multi-dunker by attaching two clothespins to one handle and share a photo and short note on DIY.org as suggested.
Watch videos on how to make a simple cookie dunker
Why We Dunk Cookies in Milk
3 Videos

Why We Dunk Cookies in Milk
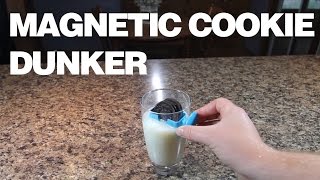
Dunking Buddy - Magnetic Cookie Dunker

Cookie Recipe in 10 minutes with your kids! Simple easy to follow/ No Egg
Facts about kitchen-safe crafts for kids
🍪 Oreos were introduced in 1912 and are one of the world’s most famously dunked cookies.
🥛 Milk is about 87% water — that's why it soaks into cookies and makes them soft quickly.
⏱️ A quick 2–3 second dunk usually gives the best balance between soft and soggy.
🖐️ A clothespin or craft stick keeps fingers clean and gives extra grip for slippery cookies.
♻️ Old clothespins and craft sticks are easy to upcycle into handy kitchen tools instead of tossing them.
How do I make a simple cookie dunker to keep my child's fingers from getting messy?
What materials do I need to make a cookie dunker with a craft stick and clothespin?
What ages is this cookie dunker activity suitable for?
What safety tips should I follow when kids use a cookie dunker?
