Draw Your Own Maze!
Design and draw your own paper maze with start and finish, add obstacles and paths, then test and improve it by solving or sharing.

Drawing Apps
Step-by-step guide to draw your own maze
Step 1
Gather your materials and find a clear flat space to work.
Step 2
Draw a rectangle border on the paper to make the maze area.
Step 3
Mark a clear Start and a Finish inside the border and write the words Start and Finish.
Step 4
Lightly sketch one winding main path from Start to Finish with your pencil.
Step 5
Add at least three branching dead ends that split off from the main path.
Step 6
Draw obstacles like walls tunnels or gates that block some routes.
Step 7
Use your pen or marker to darken the final walls and paths so the maze is easy to see.
Step 8
Decorate your maze with a fun theme using your coloring materials.
Step 9
Test your maze by tracing a route from Start to Finish with your pencil or by moving a small toy from Start to Finish.
Step 10
Time how long it takes you to solve the maze to see how tricky it is.
Step 11
Improve the maze by erasing or drawing new paths and obstacles to make it easier or harder.
Step 12
Share your finished maze on DIY.org
Help!?
What can I use if I don't have markers, small toys, or a stopwatch?
Use colored pencils or crayons instead of the pen/marker to darken paths, a bead, eraser, or coin as your small toy for testing, and your phone's timer for the 'Time how long it takes' step while using any ruler or book edge to draw the rectangle border.
My maze lines smudge or the toy keeps getting stuck—how do I fix that?
When you 'Use your pen or marker to darken the final walls and paths,' put a scrap paper under your hand and use a fine-tip pen so ink dries quickly, and if a toy gets stuck widen the tunnels or test routes first by 'tracing a route from Start to Finish' with your pencil.
How can I change the activity for younger or older kids?
For younger children make the rectangle bigger with wider paths, a clearly labeled Start and Finish, and only one or two branching dead ends, while for older kids add more branching dead ends, tighter tunnels or gates, and use the 'Time how long it takes' step for timed challenges.
What are fun ways to make my maze more creative or challenging?
Follow the 'Decorate your maze' step to add stickers or a story theme, use the 'Improve the maze' step to create a series of increasingly hard mazes, add riddles at gates to unlock routes, or build a 3D version with folded paper or cardboard tunnels before sharing on DIY.org.
Watch videos on how to draw your own maze
DIY: How to Make a Fun Maze Game for Kids in Canva - Quick & Easy!
4 Videos
DIY: How to Make a Fun Maze Game for Kids in Canva - Quick & Easy!
How to Draw a Maze (Easy!)
The EASIEST way in the world to draw a MAZE | The BAM Method
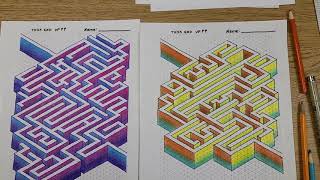
How to Draw a 3D Maze with Isometric Grid
Facts about maze design
🏰 Hampton Court Maze is one of the oldest surviving hedge mazes, planted in the late 17th century.
🧭 A labyrinth has one continuous path with no dead ends, while a maze contains choices, forks, and traps.
🤖 Micromouse competitions challenge tiny robots to map and solve a maze as quickly as possible.
⚙️ A "perfect maze" has exactly one path between any two points—meaning no loops or isolated sections.
🌺 The Dole Plantation's Pineapple Garden Maze in Hawaii was once listed among the world's largest mazes at about 2.5 acres.
How do I design and draw my own paper maze?
What materials do I need to draw a paper maze?
What ages is drawing your own maze suitable for?
What are the benefits of designing and solving paper mazes?
