Create Symmetry With Mandala!
Draw and color a symmetrical mandala using paper, compass or rulers, and markers, exploring radial symmetry and pattern repetition through guided step by step drawing.


Step-by-step guide to create symmetry with a mandala
Draw Stunning Symmetrical Mandala Art with Me! ✨Mandala Art for Beginners | Session 5 | Step-by-Step
Step 1
Place your paper flat on a table so it can’t move while you draw.
Step 2
Lightly mark the exact center of the paper with your pencil.
Step 3
Use a compass or a round object to draw one large circle centered on the mark.
Step 4
Use the compass or a smaller round object to draw a smaller concentric circle inside the big circle.
Step 5
Use the compass or another small object to draw a second concentric circle closer to the center.
Step 6
Place the ruler through the center and draw one straight line across the circle (a diameter).
Step 7
Draw a second straight line through the center at a right angle to the first to make four wedges.
Step 8
Draw a third straight line through the center that bisects one wedge to start making eight wedges.
Step 9
Draw the fourth straight line through the center to finish dividing the circle into eight equal wedges.
Step 10
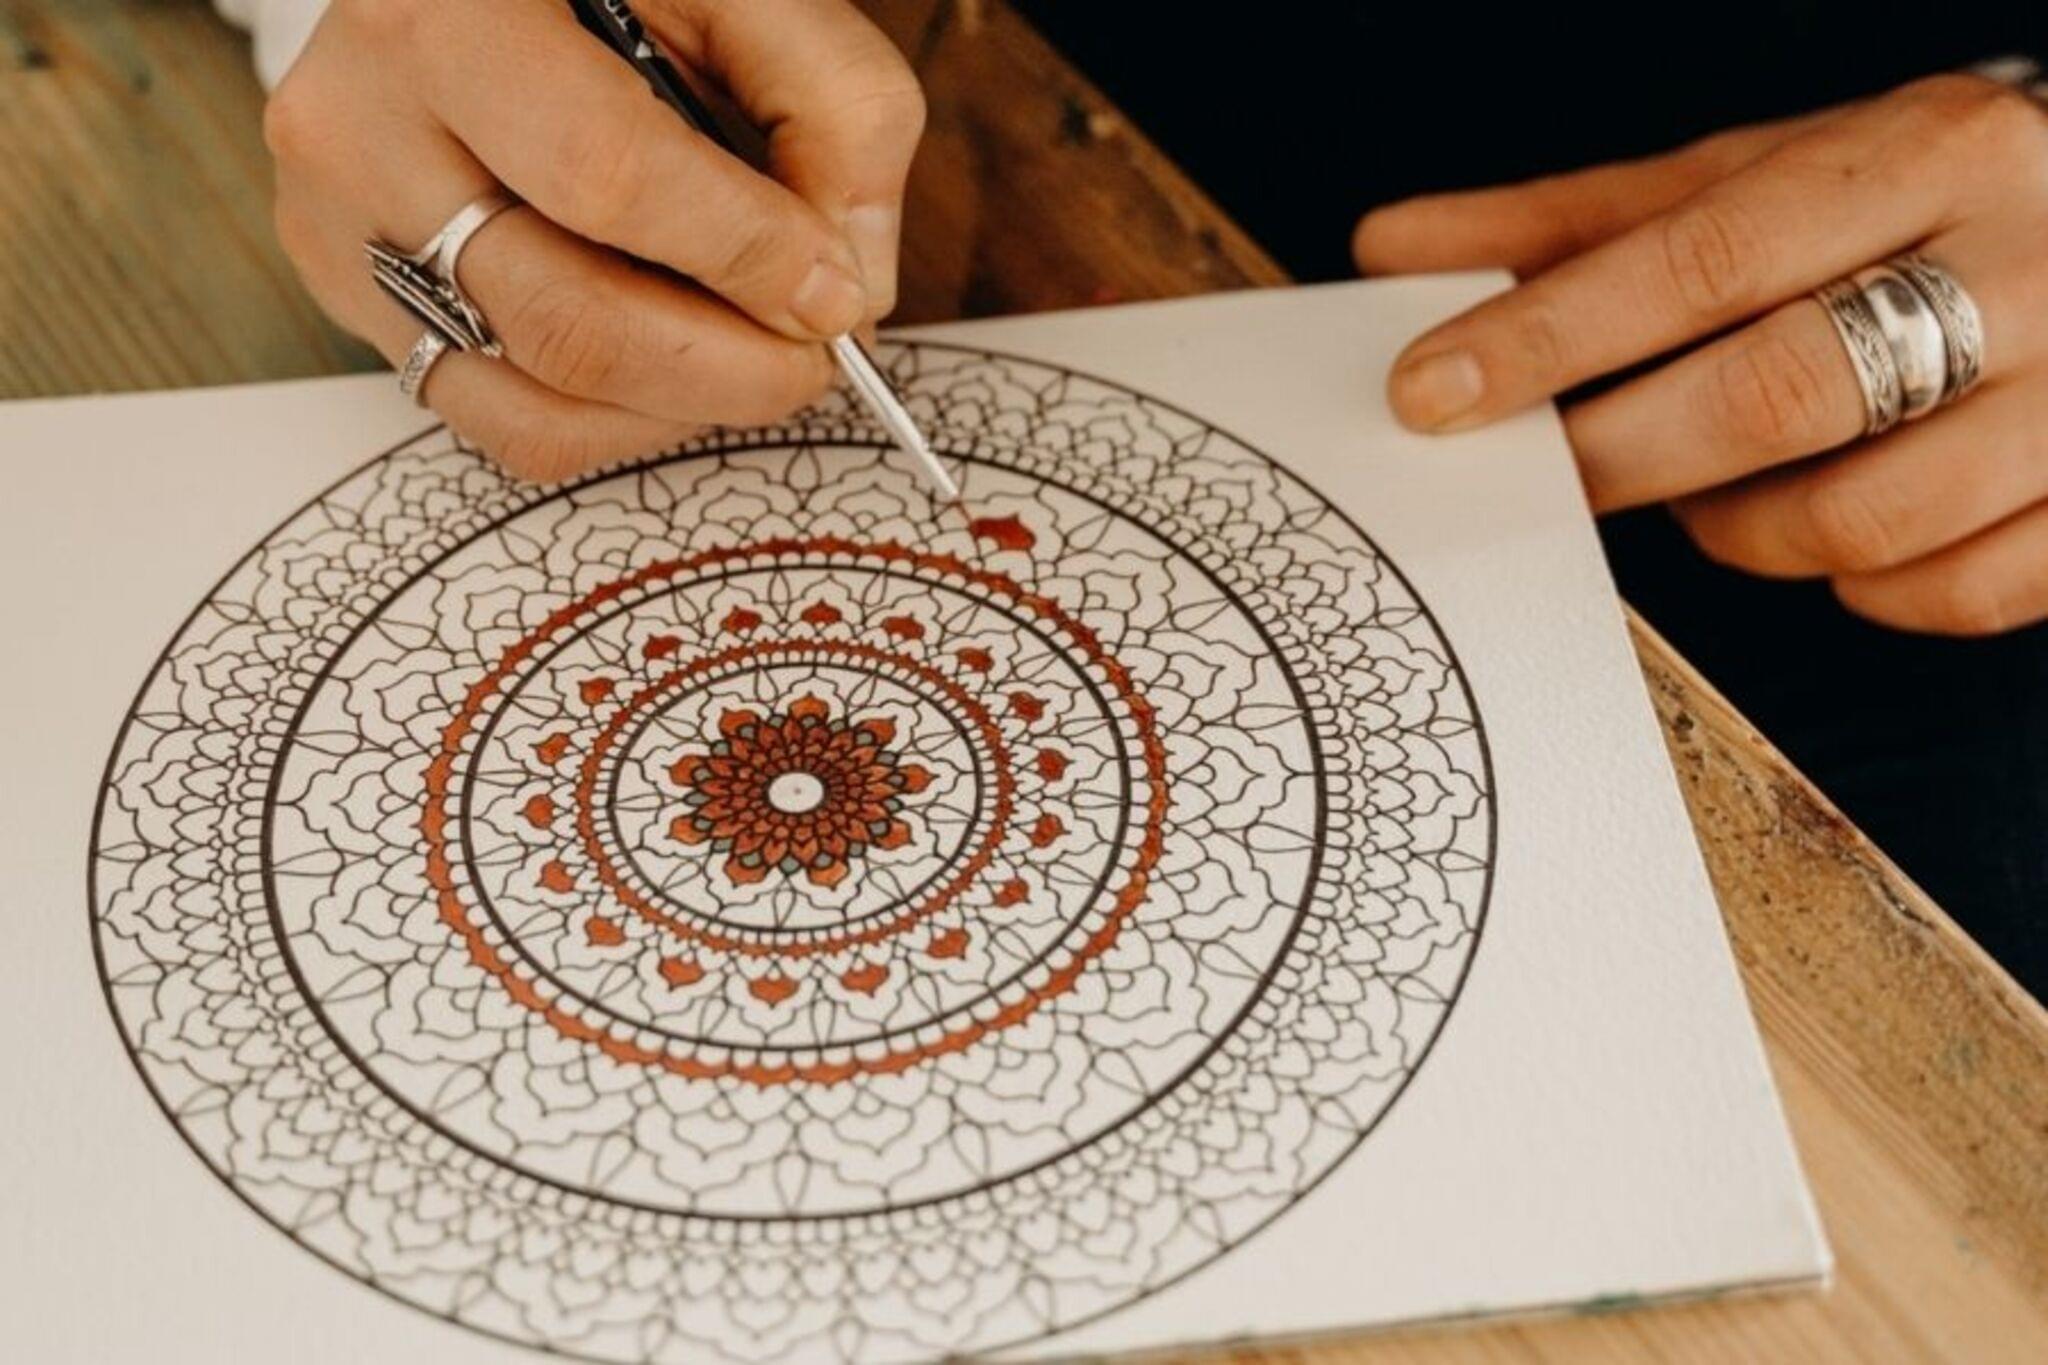
Choose a simple shape like a petal or triangle and draw it lightly in the first wedge between two concentric circles.
Step 11
Repeat the exact same shape in the same position inside each of the other seven wedges.
Step 12
Add other small repeating shapes in the other rings so each ring shows the same repeated pattern.
Step 13
Trace over your pencil lines with markers to make the mandala bold and neat.
Step 14
Colour the repeated shapes using the same color pattern in each wedge to keep radial symmetry.
Step 15
Share your finished mandala on DIY.org.
Help!?
What can I use if I don't have a compass, ruler, or markers?
Use round household objects like a mug, jar lid, or coin to trace the concentric circles, a straight-edged book or credit card as a ruler for the diameter lines, colored pencils or crayons instead of markers, and taping the paper down so it won't move while you draw.
My wedges aren't equal or lines don't meet at the center—how can I fix that?
Lightly fold the paper through the marked center to create guide creases for exact diameters, or use a protractor or an 8-wedge printed template to trace evenly spaced lines, and keep the paper taped down while drawing so lines stay accurate.
How can I adapt the mandala activity for different ages?
For younger kids simplify by making 4 wedges and using large simple shapes or stamps, while older kids can make 12–16 wedges, use a compass for finer concentric circles, and add detailed repeating motifs and color gradients.
What are some ways to extend or personalize the mandala once it's finished?
Make cardboard stencils to repeat complex shapes precisely, add metallic gel pens or watercolors over the traced marker lines, mount the paper on cardstock to make a greeting card, and photograph your finished mandala to share on DIY.org.
Watch videos on how to create symmetry with a mandala
Complete Beginner's Guide to Mandalas & Sacred Geometry Art
4 Videos
Complete Beginner's Guide to Mandalas & Sacred Geometry Art
How to draw a Mandala Art for Beginners Step-by-Step Tutorial | Easy Mandala Drawing | #vanithaarts

Easy Mandala Tutorial: Learn Mandala Elements & Patterns Step by Step

Let's create Mini Mandalas with some basic & easy Patterns ✨🥰 How to draw Mandala Art for beginners
Facts about symmetry and geometric drawing
🧘♀️ Mandalas have been used for centuries in Hindu and Buddhist practices as tools for meditation and focus.
🌀 Radial symmetry means a pattern repeats around a central point — many flowers and starfish show this in nature.
📏 Compasses and rulers let you draw perfect circles and divide them into equal slices for precise mandala segments.
🔢 Common mandala designs use 6-, 8-, or 12-fold repetition — pick a number of slices and repeat your motif in each one.
🎨 Most artists build mandalas from the center outward, layering rings of patterns and color to keep the symmetry balanced.
How do I draw and color a symmetrical mandala step by step?
What materials do I need to create a symmetrical mandala with my child?
What ages is creating a symmetrical mandala suitable for?
What are the benefits of drawing symmetrical mandalas for kids?
