Create a 3D House Using Tinkercad
Design and build a simple 3D house using Tinkercad’s shapes and tools, customize windows and roof, then export for digital or 3D-printed models.


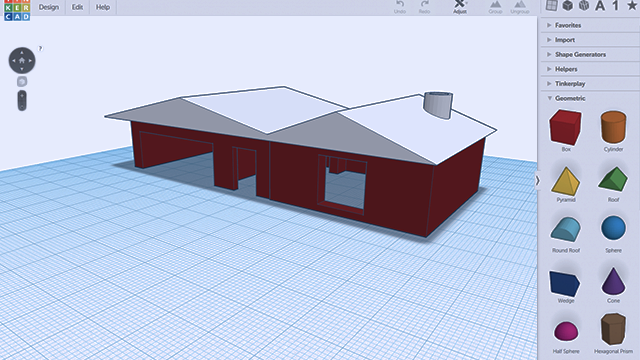

Step-by-step guide to create a 3D house using Tinkercad
Step 1
Sign in to your Tinkercad account.
Step 2
Click "Create new design" to start a fresh project.
Step 3
Drag a Box shape from the shapes panel onto the workplane to make the house base.
Step 4
Resize the base to about 60 mm long 40 mm wide and 30 mm tall using the corner handles or the shape panel.
Step 5
Drag a Roof shape onto the workplane and place it above the base.
Step 6
Use the Align tool to center the roof on top of the base.
Step 7
Drag a Box shape to the front wall to make a door.
Step 8
Resize the door box to about 12 mm wide and 20 mm tall using the corner handles.
Step 9
Turn the door box into a Hole using the shape inspector.
Step 10
Move the door hole so it intersects the front wall and touches the bottom of the base.
Step 11
Select the base and the door hole and click Group to cut the door opening.
Step 12
Drag a Box or Cylinder shape for a window and place it on the wall where you want a window.
Step 13
Turn the window into a Hole and group it with the base to cut the window opening.
Step 14
Export your model by clicking Export and choosing .STL or .OBJ to save it for digital use or 3D printing.
Step 15
Share your finished 3D house creation on DIY.org.
Help!?
I don't have a Tinkercad account or reliable internet—what can I use instead to complete the same steps?
If you can't sign in to Tinkercad, use a free alternative like SketchUp Free (web), FreeCAD (download) or 3D Slash to drag and resize shapes and create a 60×40×30 mm base and export .STL or .OBJ.
My door didn't cut out when I grouped the shapes—what should I check to fix it?
Make sure you turned the door Box into a Hole in the shape inspector, that the door hole intersects the front wall and touches the bottom of the 60×40×30 mm base, and that you selected both objects before clicking Group.
How can I adapt this house project for younger or older kids?
For younger children use bigger pre-sized shapes and skip exact resizing (use a large Box for the base and a simple door Box), while older kids can add interior walls, furniture, and export the .STL for 3D printing and painting.
What are some ways to extend or personalize the 3D house after following the instructions?
Personalize it by dragging a Cylinder to add a chimney on the Roof and aligning it, using Text shapes to engrave a name on a wall, changing colors in Tinkercad, or exporting the .STL to 3D print and paint your finished house.
Watch videos on how to create a 3D house using Tinkercad
Make a Tinkercad House Step by Step for Absolute Beginners
4 Videos
Make a Tinkercad House Step by Step for Absolute Beginners
How to use TinkerCAD 3D Design to Build a House!
How To Make A Tinkercad House Absolute Beginners & Classroom Ready
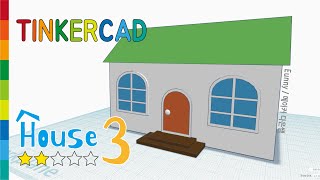
38) Tinkercad House 3 - Easy (Level2) | 3D modeling How to
Facts about 3D design and 3D printing for kids
🖥️ Tinkercad runs right in your web browser and is free for students, teachers, and hobbyists.
🏗️ Autodesk acquired Tinkercad in 2013 to bring simple 3D design tools to makers and classrooms.
📤 Tinkercad can export STL, OBJ, and SVG files so your digital house can be 3D printed or laser-cut.
🌽 Many common 3D printing filaments like PLA are made from plant-based materials (e.g., cornstarch).
🏠 Whole houses have been 3D-printed around the world—some projects printed structural walls in a day or two.
How do I create a 3D house in Tinkercad step-by-step?
What materials and tools do I need to make a 3D house in Tinkercad?
What ages is designing a 3D house in Tinkercad suitable for?
What safety tips and creative variations should I consider for a Tinkercad 3D house?
