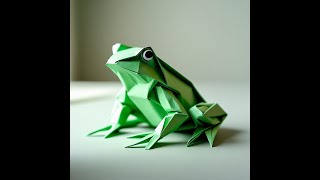
Make an Origami Frog!
Fold a jumping origami frog from paper, follow step by step creases and folds, decorate it, and test how far your frog can jump.

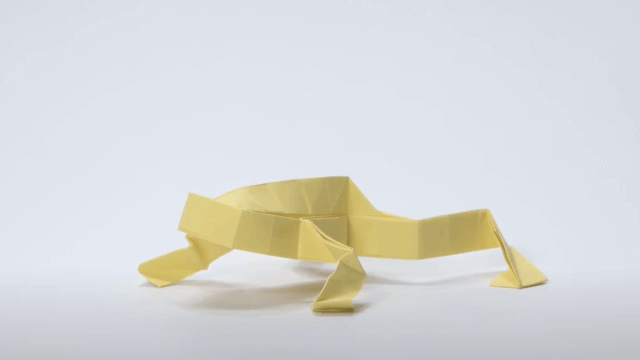

Step-by-step guide to make an origami frog
Step 1
Place the rectangular paper landscape (long side left to right) on your flat surface.
Step 2
Fold the paper in half by bringing the top edge down to meet the bottom edge and make a sharp crease.
Step 3
Unfold the paper so it lies flat again with the horizontal crease across the middle.
Step 4
Fold the bottom edge up to meet the middle crease and make a sharp crease.
Step 5
Fold the top edge down to meet the middle crease and make a sharp crease.
Step 6
Fold the paper in half by bringing the left side over to the right side and make a sharp crease so the folded edges are on the outside.
Step 7
Fold the top left corner down so its point meets the center of the short edge and crease to form one side of the frog’s head.
Step 8
Fold the top right corner down the same way so both corners make a triangle at that short edge.
Step 9
Flip the paper over so the triangle points are now on the underside.
Step 10
Fold the small triangle end (the head) back toward the center about 1 cm and crease to lock the head shape.
Step 11
Decorate your frog with colouring materials to add eyes a mouth and fun spots.
Step 12
Press down on the back folded section with your finger and release to make your frog jump and measure how far it goes.
Step 13
Take a photo or write about your jumping frog and share your finished creation on DIY.org
Help!?
What can we use if we don't have the rectangular paper or special colouring materials mentioned in step 1 and step 11?
Cut a sheet of A4 or letter printer paper to a rectangle and place it landscape for step 1, and use crayons, markers, stickers, or magazine cutouts as substitutes for the colouring materials in step 11.
My folds look uneven and the triangle head won't form—what should I check during steps 6–10?
Reopen and realign the edges before re-creasing, use a fingernail or ruler to make sharp creases for folds in steps 2–6, and ensure the top left and right points exactly meet the center of the short edge in steps 7–8 before flipping in step 9 and making the 1 cm back-fold in step 10 to lock the head.
How can I adapt this origami frog activity for a 3-year-old versus a 10-year-old?
For a 3-year-old, pre-fold the long horizontal and middle creases (steps 2–5) and let them do the corner folds and decorating (steps 7–11), while a 10-year-old can try different paper sizes, precise 1 cm back-folds (step 10) and more detailed decoration or patterning in step 11.
What are simple ways to make the frog jump farther or personalize it before sharing in step 13?
After reinforcing the creases and practicing the press-and-release on the back folded section (step 12), try adding a small paperclip under the back flap or adjusting the 1 cm head lock (step 10) and personalize with markers or googly eyes in step 11, then measure the distance to record for step 13.
Watch videos on how to make an origami frog
How to Make an Easy Origami Frog - Fun Paper Craft for Kids
4 Videos
How to Make an Easy Origami Frog - Fun Paper Craft for Kids

How To Fold An Origami Jumping Frog
Origami Jumping Frog Tutorial 🐸 Step-by-Step Instructions
Origami Frog. How to Make an Easy Origami Frog | DIY Paper Frog Folding Step by Step
Facts about origami and paper folding
🐸 Many jumping origami frogs use a rear 'spring' flap — a well-folded frog can leap several of its own body-lengths!
📄 Traditional origami is made from a single uncut sheet of paper — no glue, no scissors, just folds.
🇯🇵 Paper folding has roots in China, but modern origami flourished and became a cultural art in Japan.
⚖️ The weight and stiffness of your paper change the jump — heavier paper can store more energy but may be harder to launch.
🎨 Decorative washi or marker-made eyes and patterns make each frog unique and help you personalize your jumper.
How do you make a jumping origami frog?
What materials do I need to make an origami frog?
What ages is making an origami frog suitable for?
What are the benefits and fun variations of making an origami frog?
