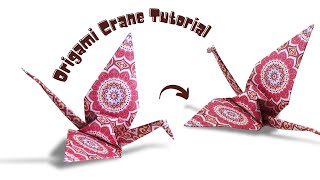
Craft a Crane
Fold and decorate a paper origami crane using simple steps, learning patience, symmetry, and basic paper-folding techniques through hands-on practice.


Step-by-step guide to craft a crane
Step 1
Place the square paper color side up on a flat table.
Step 2
Use colouring materials to draw patterns or stickers on the paper to decorate one side.
Step 3
Fold the paper diagonally from one corner to the opposite corner and crease firmly.
Step 4
Fold the paper diagonally the other way and crease firmly.
Step 5
Fold the paper in half by bringing the top edge down to meet the bottom edge and crease firmly.
Step 6
Bring two opposite diagonal corners together and flatten the paper into a small square base with the open end facing you.
Step 7
Fold the top layer's left edge to the center line and crease.
Step 8
Fold the top layer's right edge to the center line and crease.
Step 9
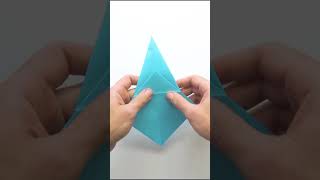
Lift the top point up and squash it flat to form a long diamond shape (petal fold).
Step 10
Turn the paper over to the other side.
Step 11
Repeat the edge-to-center folds and squash the top point into a diamond on this side.
Step 12
Fold the two long thin points upward to form the crane's neck and tail and crease them.
Step 13
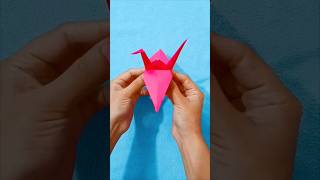
Fold down the tip of one thin point to make the crane's head.
Step 14
Gently pull the two wide flaps apart to open the body and flatten the wings.
Step 15
Share your finished paper crane on DIY.org.
Help!?
What can we use if we don't have square origami paper or stickers?
Cut a sheet of printer or magazine paper into a square and use crayons, markers, or glued-on craft paper instead of stickers to decorate the paper before folding.
My paper won't flatten into the small square base or the petal fold keeps shifting; how can we fix that?
Unfold to the previous creases, realign the diagonal folds, run a fingernail or ruler along each crease to make them firm, then bring the two opposite diagonal corners together again to form the small square base and complete the petal fold.
How can I adapt the craft for a 3-year-old, a 7-year-old, or a 12-year-old?
For a 3-year-old use a large pre-folded square or have an adult pre-create the small square base and petal folds and let them do colouring and stickers, for a 7-year-old supervise the diagonal and edge-to-center folds, and for a 12-year-old challenge them to use smaller origami paper and precise creases to make multiple cranes for a mobile.
How can we personalize or extend the finished crane?
Add a folded paper beak or draw a face after making the crane's head, attach a loop of thread to hang it, or make a flock by repeating the steps with different decorated square papers and sharing photos on DIY.org.
Watch videos on how to craft a crane
Origami Crane - Easy Step-by-Step Paper Crane Instructions
4 Videos

Origami Crane - Easy Step-by-Step Paper Crane Instructions
How to make a paper crane - Origami crane
Simple Easy origami crane tutorial for kids and beginners Easy Crane folding
Easy Paper Crane in 60 Seconds | Origami for Beginner
Facts about origami and paper folding for kids
🦢 The origami crane (orizuru) is one of the most famous origami models and is a beloved symbol in Japanese culture.
🇯🇵 Folding 1,000 paper cranes (senbazuru) became a symbol of hope and peace after Sadako Sasaki folded cranes while ill following the Hiroshima bombing.
📄 Traditional origami uses a single uncut square of paper — no scissors or glue — just folds!
⏳ Folding cranes helps build patience, concentration, and fine motor skills — perfect for little hands learning to craft.
🔁 Making a crane uses mirrored folds and symmetry, so each step teaches kids to match left and right sides carefully.
How do I fold and decorate a paper origami crane step by step?
What materials do I need to make an origami crane?
What ages is folding an origami crane suitable for?
What are the benefits of making paper cranes and safe variations to try?
