Animate Your Sprite!
Design and animate a sprite using simple drawing and block coding to create movements, reactions, and looping animations while learning sequencing and timing.


Step-by-step guide to animate your sprite
Step 1
Think of a fun character and decide one simple action it will do like walk blink or wave.
Step 2
Draw a clear front-facing outline of your character on paper.
Step 3
Draw at least two more versions of the character showing small changes for movement so you have at least three frames.
Step 4
Colour each frame so the important parts like eyes arms or legs are easy to see.
Step 5
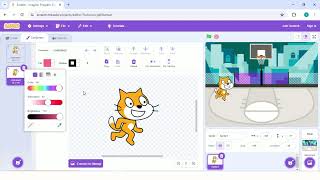
Open your block-coding platform and start a new project.
Step 6
Create a new blank sprite in the platform’s sprite editor.
Step 7
Recreate your first paper drawing as the sprite’s first costume using the editor’s drawing tools or import your drawing.
Step 8
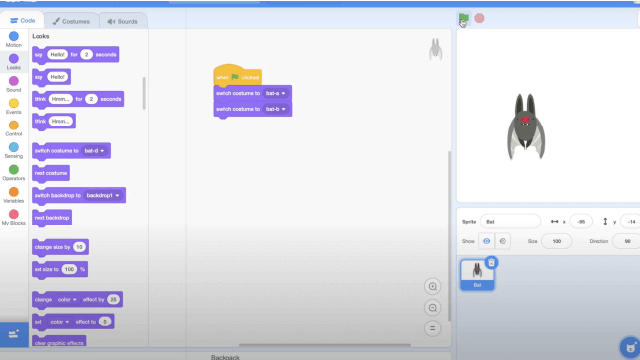
Add each extra paper frame as its own costume in the sprite editor so the sprite has multiple costumes.
Step 9
Create a loop block that repeatedly switches to the next costume and waits a short time to set the animation speed.
Step 10
Add an event block so the sprite reacts when clicked or when a key is pressed and then runs the animation or moves.
Step 11
Run your project to test the animation and watch how the costumes change.
Step 12
Adjust the wait time or edit costumes to make the motion smoother until you like it.
Step 13
Save your project and share your finished animated sprite on DIY.org
Help!?
I don't have colored markers or a tablet—what can I use instead to make and bring my frames into the sprite editor?
Use plain paper and pencil or crayons to draw your frames, photograph or scan each paper frame, and import those images as costumes into the sprite editor instead of recreating them with the platform’s drawing tools.
My sprite doesn't animate or the motion looks jumpy—what should I check?
Check that your loop block contains 'next costume' followed by a short 'wait', ensure the event block actually runs that loop, and make the drawings’ positions more consistent between frames to reduce jerky motion.
How can I adapt this activity for different age groups?
For younger kids, simplify to two clear frames with big shapes and have an adult import photos and set up the event block, while older kids can draw 6–12 subtle frames, fine-tune the wait time in the loop, and add keyboard controls or movement blocks for more advanced animation.
How can we extend or personalize the finished animated sprite?
Add a backdrop and sound blocks, script the sprite to move across the stage or react to different keys, create extra costumes for new actions, and then save and share the enhanced project on DIY.org.
Watch videos on how to animate your sprite
Sprite Animation Tutorial | By LucasRPDJ
4 Videos
Sprite Animation Tutorial | By LucasRPDJ
Animation For Beginners | Kids Learn How To Animate | Animation Basics
Blender 2.93 Tutorial - Making 2D Sprite Animation for Beginners
P2 💃 Make a Dancing Sprite - Fun Scratch Animation Project! 🎵
Facts about sprite animation and block-based coding
🕹️ Early video games used sprites to let characters move independently of the background—making lively game action possible!
🎨 Pixel art sprites can be tiny—some classic game characters were just 8×8 pixels but still super recognizable.
⏱️ Animations often use frame rates like 12 or 24 frames per second; fewer frames plus smart timing can still look smooth.
🧩 Block coding (like Scratch) uses snap-together pieces so kids learn sequencing and logic without typing code.
🚀 Small loops and quick reactions—like a blink or bounce—are the secret moves that make sprites feel alive.
How do I design and animate a sprite using block coding?
What materials do I need to animate a sprite at home?
What ages is the 'Animate Your Sprite!' activity suitable for?
What are the benefits of designing and animating sprites for kids?
