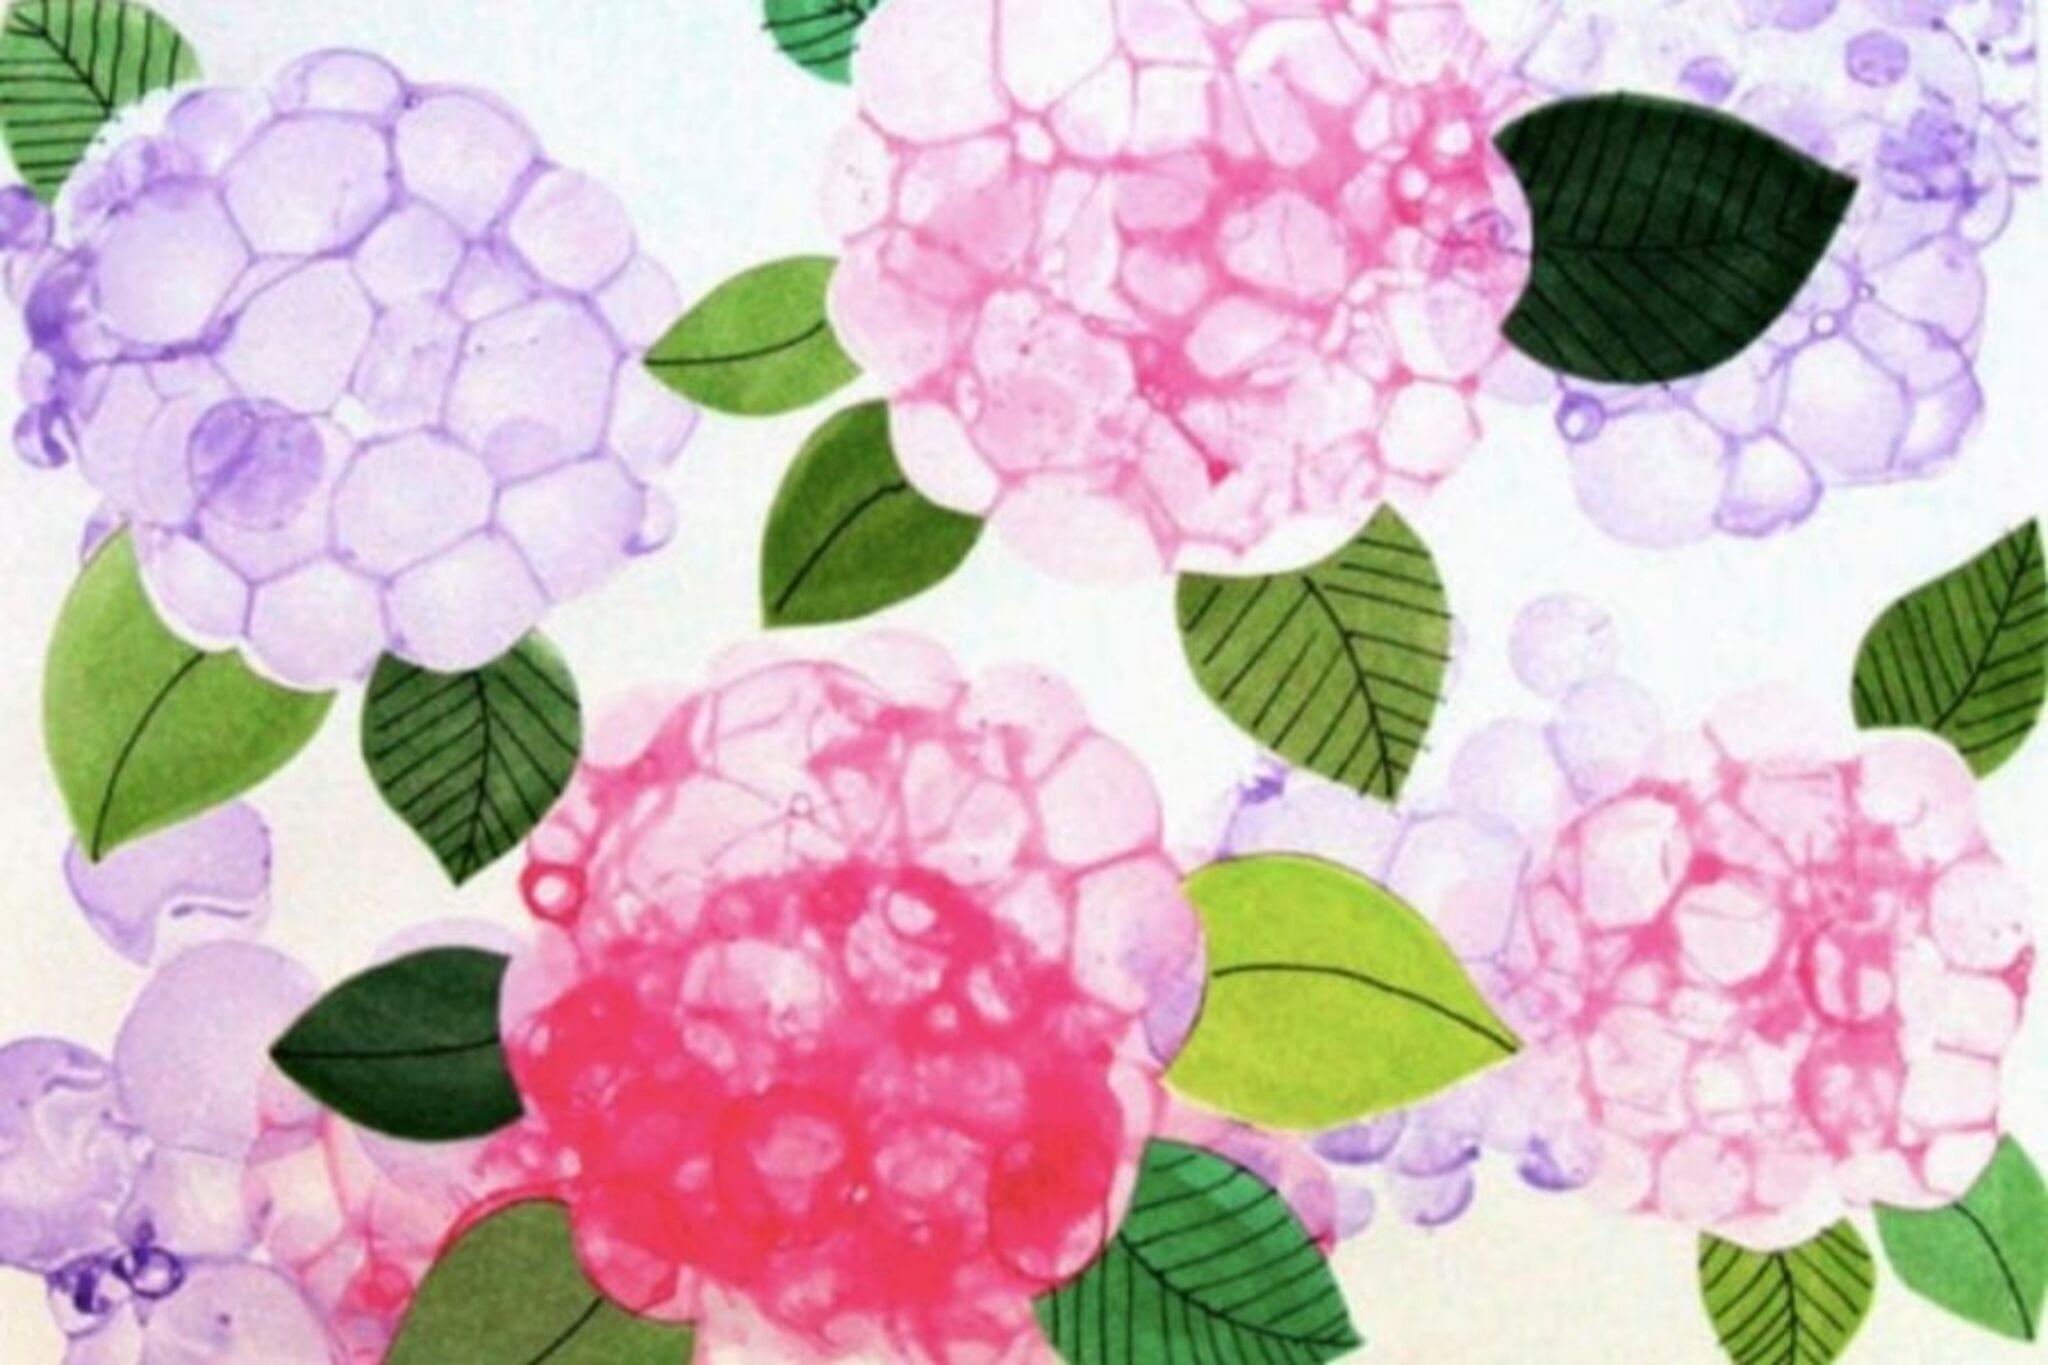
Create A Bubble Painting
Make colorful bubble paintings by mixing paint with soapy water, blowing bubbles onto paper, and observing patterns to learn about color and surface tension.

Step-by-step guide to create a bubble painting
Bubble Painting: Ultimate Guide & Best Tips
Step 1
Lay the tray or newspaper on a table and place a sheet of paper on top to catch the bubble prints.
Step 2
Pour a little water into each bowl to make several mixes.
Step 3
Add a small squirt of dish soap to each bowl.
Step 4
Use the spoon to put a spoonful of paint into each soapy water bowl.
Step 5
Stir each bowl until the paint and soap are smooth and bubbly.
Step 6
Put a straw into one bowl and blow gently to make a mound of bubbles above the rim.
Step 7
Gently press the edge of your paper onto the bubbles so they pop and leave a colorful print.
Step 8
Repeat blowing bubbles and pressing the paper with different colors to build layered patterns.
Step 9
Observe your prints and notice how the colors mix and the bubble shapes make different designs.
Step 10
Let your paintings dry flat on the tray or newspaper until the paint is no longer wet.
Step 11
Share your finished bubble painting on DIY.org
Help!?
What can we substitute if we don't have dish soap, paint, or a straw?
Use a few drops of liquid hand soap or shampoo in step 3 instead of dish soap, thin acrylic or food coloring with the water in step 2 if you lack craft paint, and swap the drinking straw in step 5 for a short paper straw or a clean plastic tube.
My bubbles keep collapsing or don't leave clear prints — what should we try?
If bubbles collapse before pressing in step 6, blow more gently in step 5 to build a steady mound, stir the paint-soap mixes more in step 4 to increase foam, and press the paper edge straight down and lightly as directed to capture the print.
How can we adapt the activity for toddlers, school-age kids, and older kids?
For toddlers, have an adult do the blowing and pressing from steps 5–6 and use washable paint on sturdy paper, school-age children can mix colors in step 4 and layer prints in step 7, and older kids can design repeat patterns, experiment with straw angles, or prepare photos to edit before sharing on DIY.org in step 10.
How can we enhance or personalize our bubble paintings?
Add glitter or a sprinkle of salt to the wet prints before drying in step 9 to change texture, use different paper shapes to create a collage, or write the child's name with a paint marker after the painting dries and then photograph it for DIY.org as in step 10.
Watch videos on how to create a bubble painting
Let's Make A BUBBLE PAINTING! | Process Art for KIDS! | Fibo Art
4 Videos
Let's Make A BUBBLE PAINTING! | Process Art for KIDS! | Fibo Art

How to create a bubble painting 🫧🎨
How to Paint with Bubbles: Soap Pump Bubble Painting Activity for Kids
![How to do bubble painting [easy tutorial]](https://img.youtube.com/vi/LRAAeLNhdlg/mqdefault.jpg)
How to do bubble painting [easy tutorial]
Facts about bubble art and surface tension
🫧 Soap bubbles are made of a thin film of soapy water trapping air — the film’s thickness makes them colorful.
🎨 Bubble printing mixes paint with bubbles to create one-of-a-kind marbled patterns — no two prints are identical.
🌈 Surface tension is what lets bubbles hold their rounded shape; soap lowers water’s surface tension so bubbles form easily.
🔬 The shimmering colors on bubbles come from thin-film interference, where light waves overlap and cancel or reinforce each other.
💡 Artists and teachers use bubble painting to teach color mixing, pattern-making, and basic physics in a fun, hands-on way.
How do you make bubble paintings with kids?
What materials do I need for bubble painting?
What ages is bubble painting suitable for?
What are the benefits and safe variations of bubble painting?
