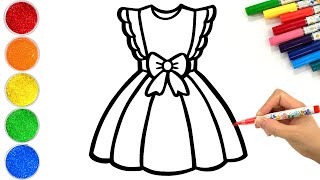
Draw Clothes and Dresses
Draw different clothes and dresses on paper using pencils and color. Practice shapes, patterns, and proportions while creating original outfit designs.

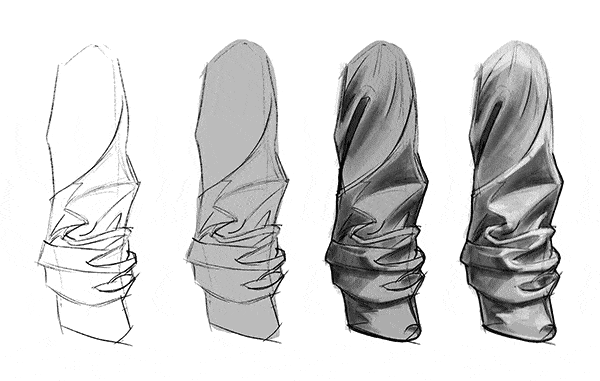

Step-by-step guide to draw clothes and dresses
How to Draw a Dress Step by Step | Easy Clothes Drawing for Kids and Beginners | Draw with Mila
Step 1
Gather your materials and find a flat table or desk to work on.
Step 2
Lightly draw a simple mannequin or dress form with an oval for the head a vertical center line and simple lines for the shoulders waist and hips.
Step 3
Use the ruler to mark basic body proportions by measuring the head length and using it to space the torso and legs.
Step 4
Sketch the overall clothing silhouette over the mannequin choosing a dress top skirt pants or coat shape.
Step 5
Smooth and refine the clothing outline so the edges look even and natural.
Step 6
Draw lines to divide the outfit into design panels like sleeves skirt panels pockets or collars.
Step 7
Choose a pattern for each panel and lightly draw the pattern shapes such as stripes checks florals or polka dots.
Step 8
Add small garment details like buttons zippers seams ruffles or bows.
Step 9
Pick colors for each panel and test a small color swatch on scrap paper.
Step 10
Carefully color each area staying inside the lines and using lighter or darker strokes for simple shading.
Step 11
Go over important lines with a slightly darker pencil or a colored outline and erase any stray marks.
Step 12
Add accessories and background elements like shoes a hat or a hanger if you want to complete the scene.
Step 13
Share your finished outfit design on DIY.org
Help!?
What can we use if we don't have a ruler or colored pencils from the materials list?
Use a straight-edged book or the edge of a credit card to mark head-length measurements (step 3) and substitute crayons, markers, or small fabric/color swatches for colored pencils when testing color on scrap paper (step 9).
My mannequin proportions look wrong after sketching — how do I fix them?
Re-measure the head length with your ruler or straight edge, lightly erase the torso and leg marks, and redraw spacing following the 'mark basic body proportions' step so corrections stay accurate and easy to erase.
How can I adapt this activity for different age groups?
For younger kids, start with a pre-drawn mannequin and large simple silhouettes to color, while older children can add panel patterns, small garment details, and practice shading and color swatches as described in steps 4–10.
What's a simple way to extend or personalize the finished outfit design?
Add texture by gluing on fabric scraps, buttons, or ribbon to panels, make alternate versions on tracing paper, and include accessories or a background (shoes, hat, hanger) before sharing on DIY.org as in the final steps.
Watch videos on how to draw clothes and dresses
How to Draw Cute Dresses | Easy Step by Step Tutorial | Made for Kids
4 Videos
How to Draw Cute Dresses | Easy Step by Step Tutorial | Made for Kids
Easy dress drawing for kids and toddlers/learn to draw step by step | Art and learn

How to Draw a Beautiful Dress Step by Step for Kids
How to Draw a Simple Dress Step by Step for Kids
Facts about fashion drawing for kids
👗 Fashion designers often begin with quick body sketches called "croquis" to try lots of outfit ideas fast.
✏️ Fashion figures are usually drawn at 9–10 head proportions so clothing looks long and stylized.
🎨 Designers often build a "color story" using 3–4 colors to make an outfit feel balanced and memorable.
📐 Sewing patterns are flat paper shapes that fit together like a puzzle to become 3D garments.
🧵 Archaeologists have found woven textiles older than 5,000 years — people have been designing clothes for millennia.
How do I teach my child to draw clothes and dresses?
What materials do I need to draw clothes and dresses with my child?
What ages is drawing clothes and dresses suitable for?
What are the benefits of drawing clothes and dresses for kids?
